こんにちは、源です。今日は構造補強の仕方を説明します。
![](https://kantan-diy.com/wp-content/uploads/2023/07/de8b0abd7ba7114bec4d02279771fcd1-150x150.jpg)
補強していくよ
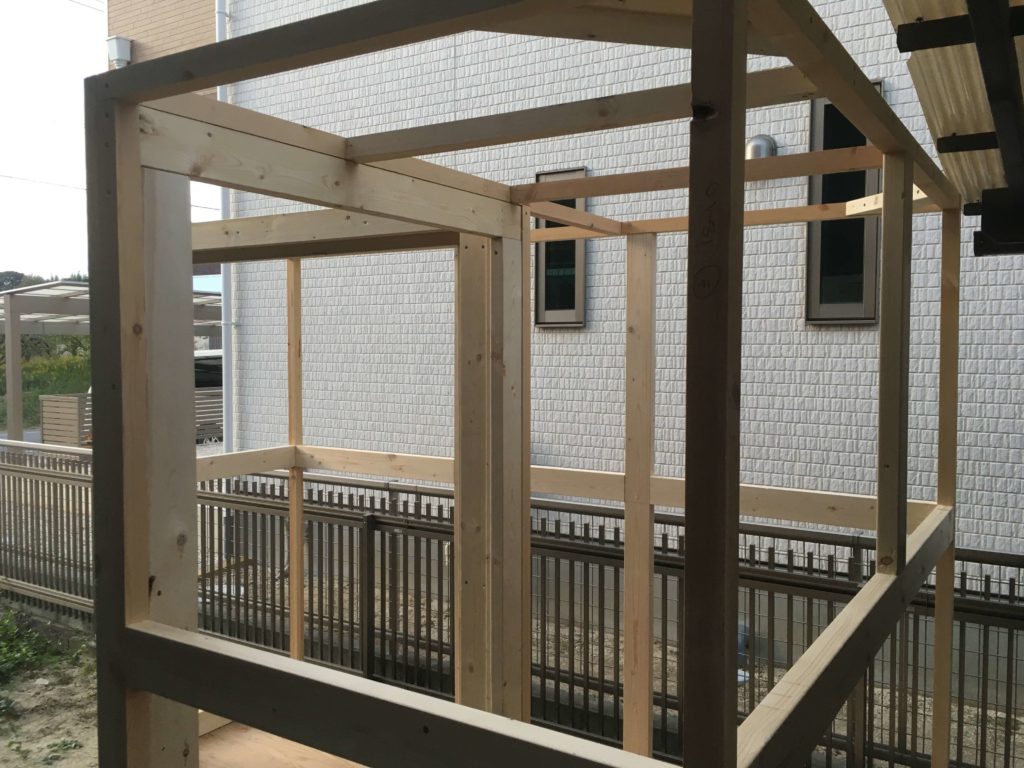
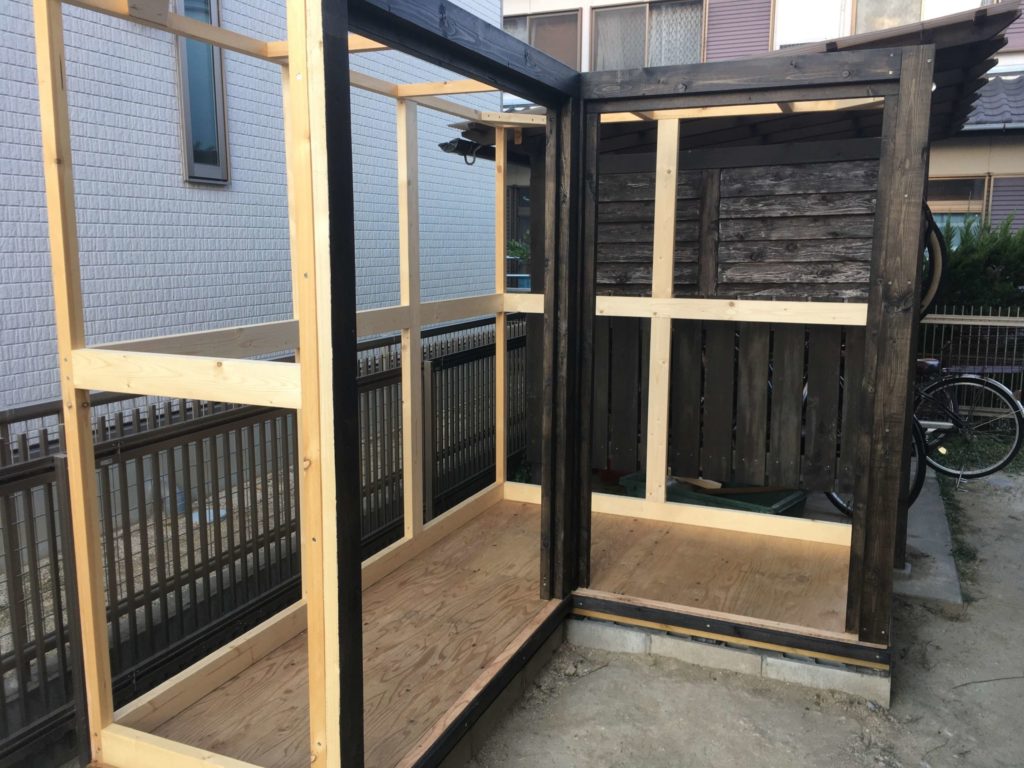
前回までに赤松垂木で枠組みを作り、ツーバイ材で補強しました。今回は、補強方法を具体的に説明します。施工した順番に補強材の取り付け方を説明します。
今回の説明は、物置の背面側の補強について具体的に説明していきます。
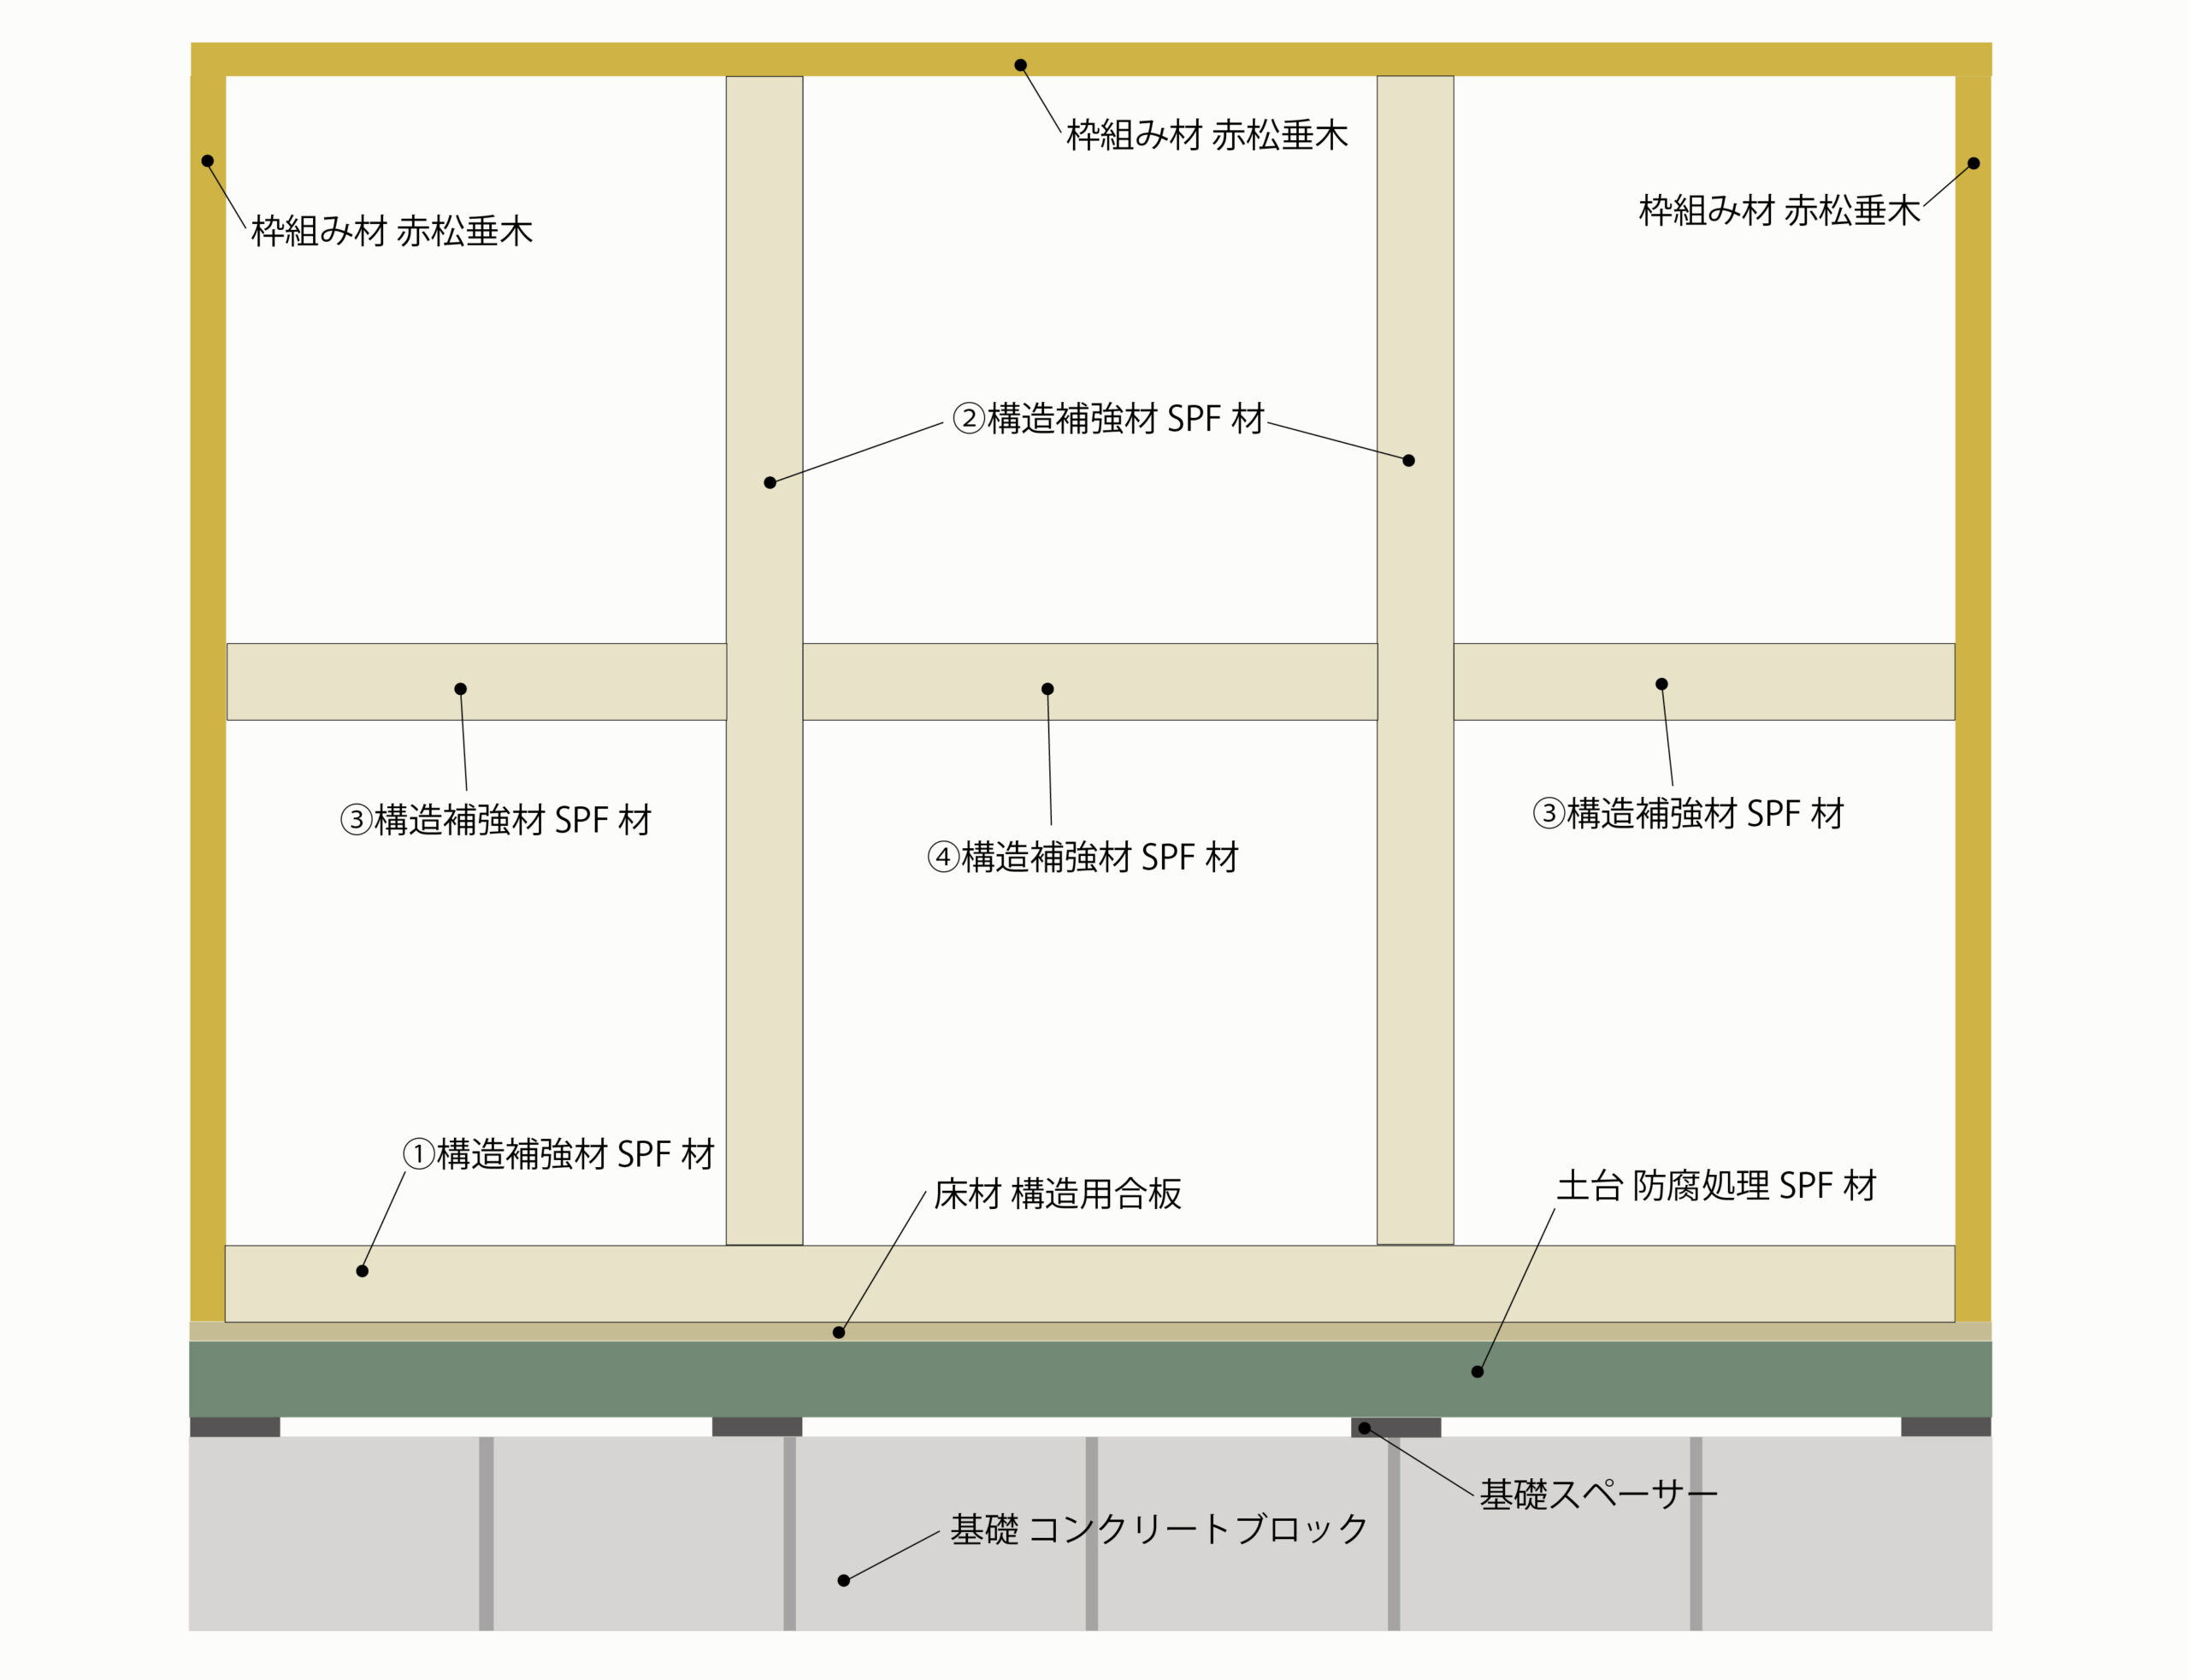
![](https://kantan-diy.com/wp-content/uploads/2019/11/24c9b14808142f604699ee6d32f4c614-1024x654.jpg)
![](https://kantan-diy.com/wp-content/uploads/2019/11/3173b0cf42c8269c04eb10eaf59d5480-1024x786.jpg)
補強材取り付け順序
- 床側の補強材
- 垂直補強材
- 両側の水平補強材
- 中央の水平補強材
- 火打ち梁
![](https://kantan-diy.com/wp-content/uploads/2023/08/IMG_1111-768x1024.jpg)
1.床側の補強材
壁の下側を補強します。
![](https://kantan-diy.com/wp-content/uploads/2023/12/9d95dbdd5dbd1ccfa8aa02b3f85f78f5-1024x976.jpg)
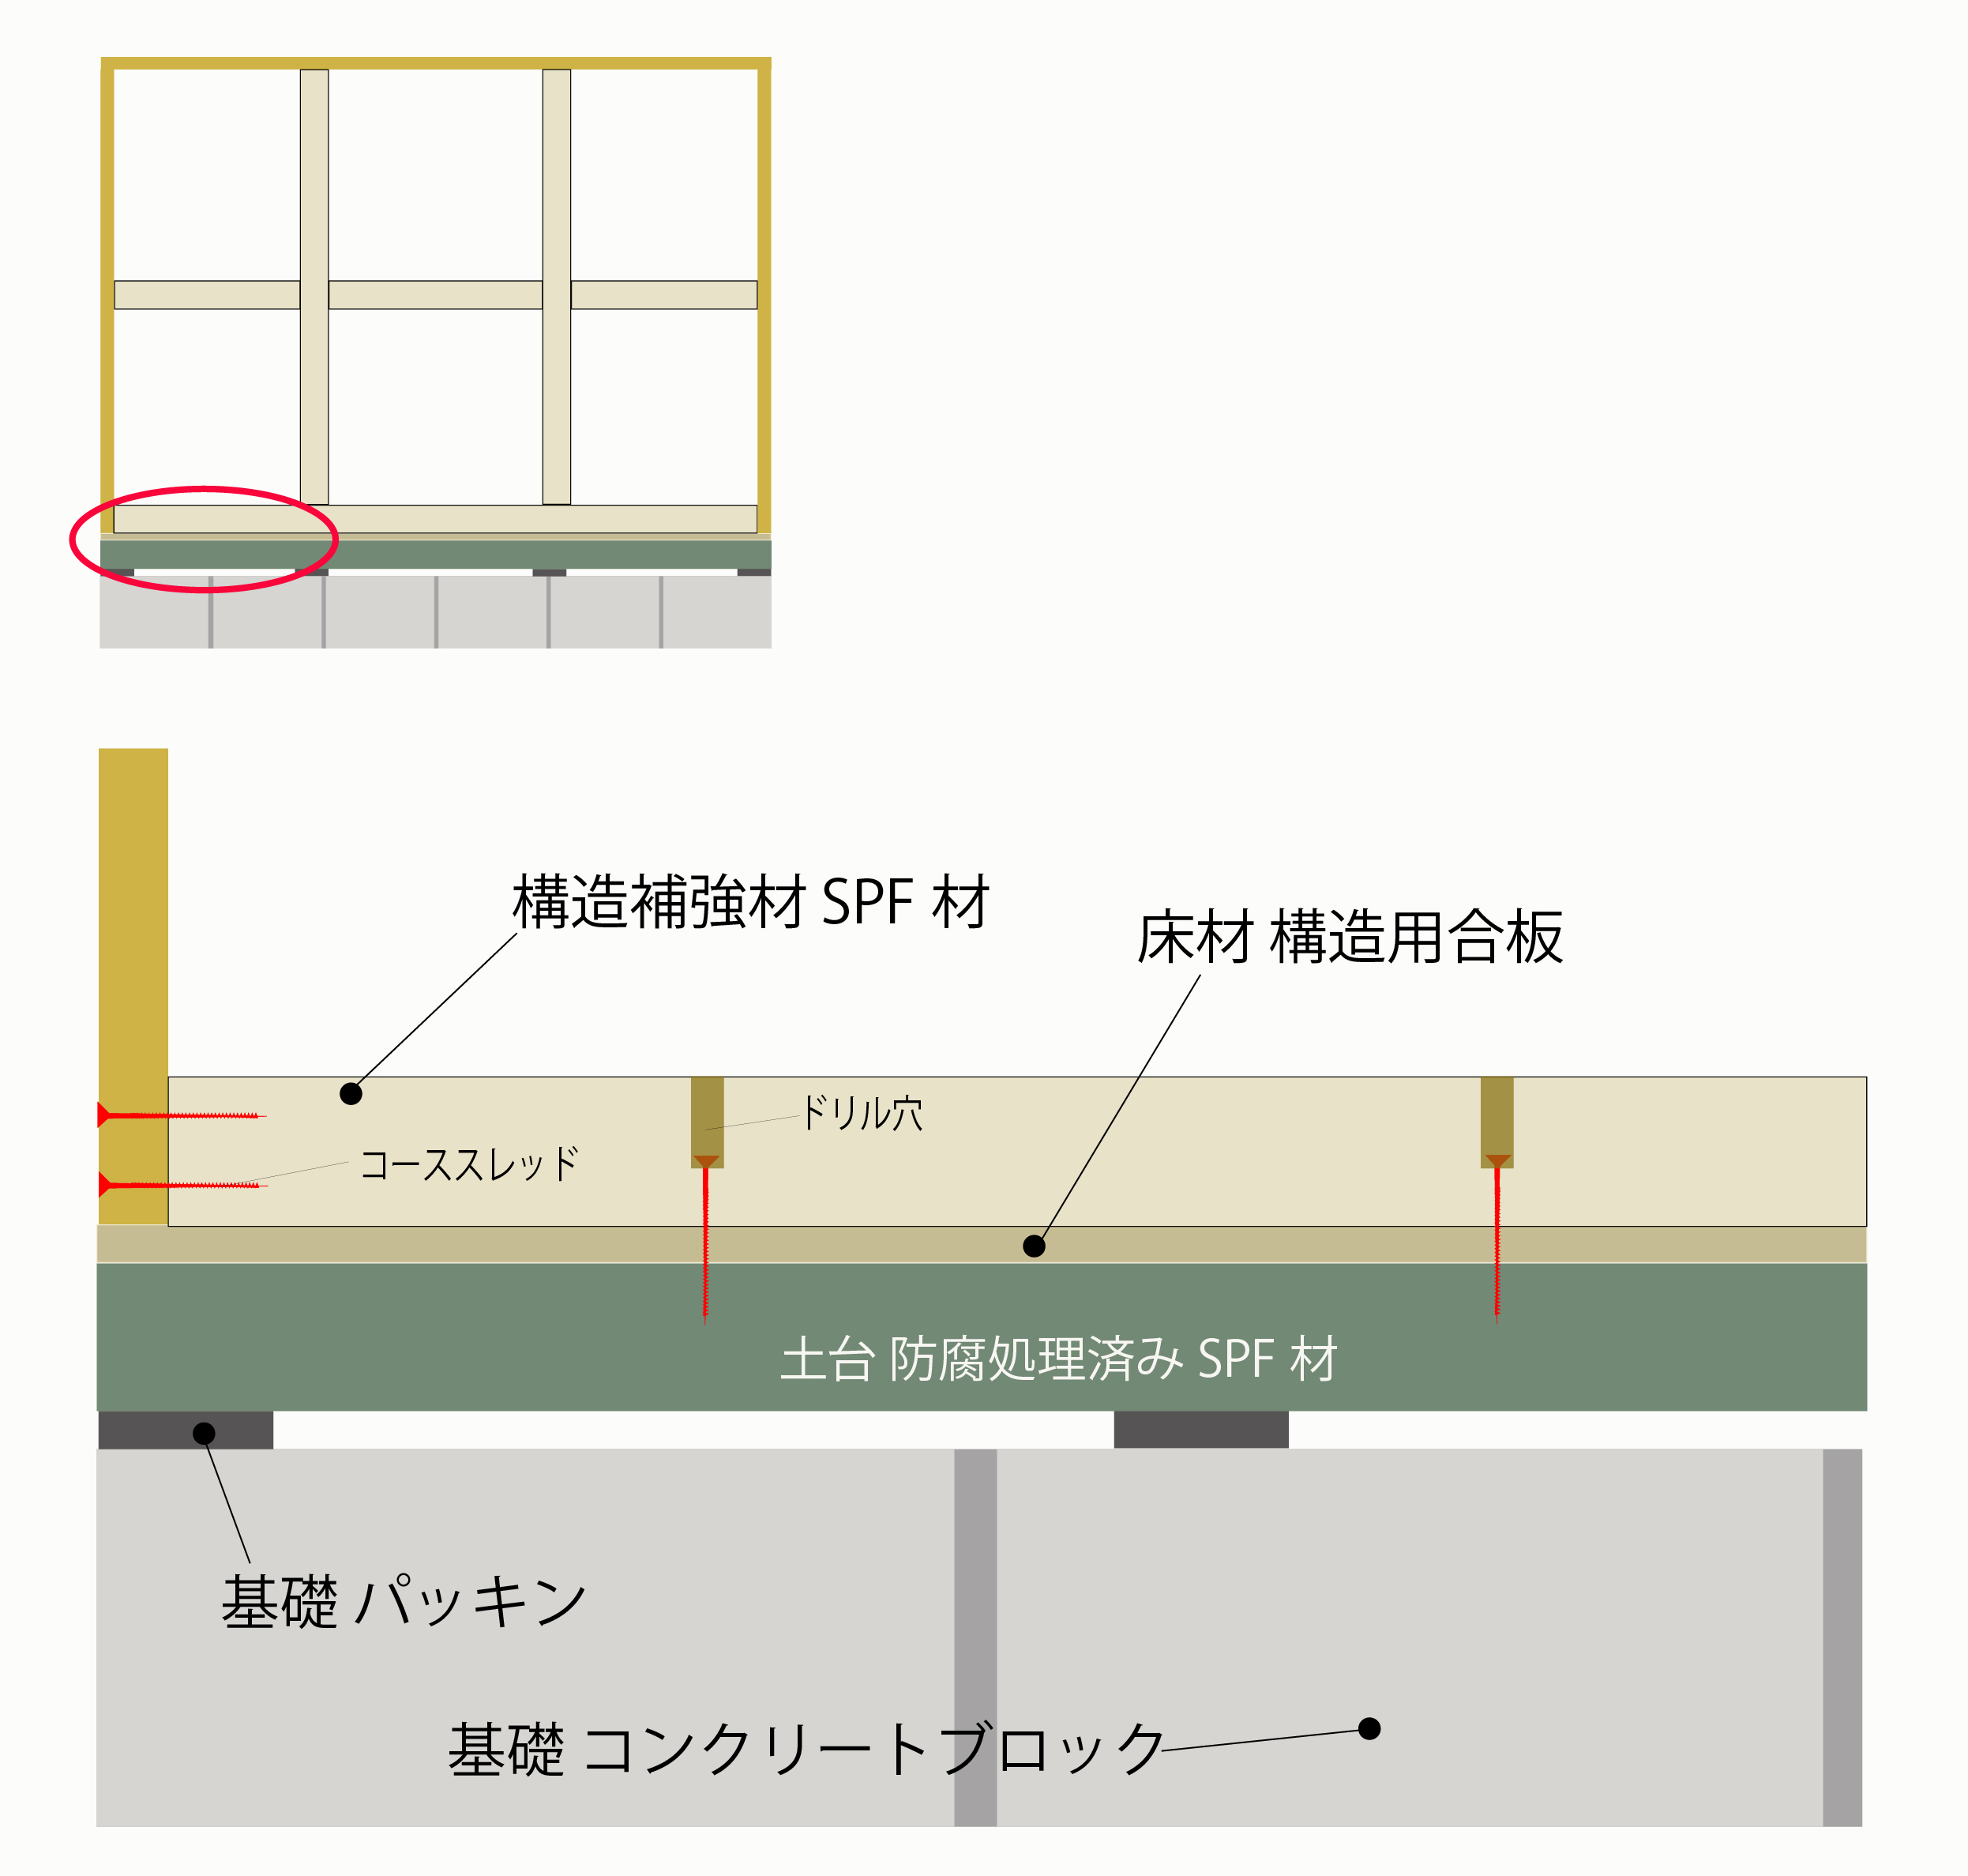
両端を赤松垂木で作った枠組みの根元に固定します。コーススレッドを水平に打ち込み固定します。
また、床上方向からは垂直にコーススレッドを打ち込み、構造用合板を貫通し土台の防腐処理済みSPF材まで達するようにします。コーススレッドの頭の大きさ以上のドリルで穴を開けておきます。長さが十分な場合は不要です。
こうすることで上部の構造が土台にしっかり緊結されることとなります。土台はアンカーボルトにて基礎コンクリートブロックに固定されており、物置が強風にあおられても飛ばなくなります。
![](https://kantan-diy.com/wp-content/uploads/2019/11/20191103_063032701_iOS-768x1024.jpg)
2.垂直補強材
まず、垂直に設置した補強材の上部については、赤松垂木の上部から垂直に下向きにコーススレッドを打ち込み固定します。次に補強材の下端部です。
![補強材下部固定方法](https://kantan-diy.com/wp-content/uploads/2019/11/img20191113_21371425.jpg)
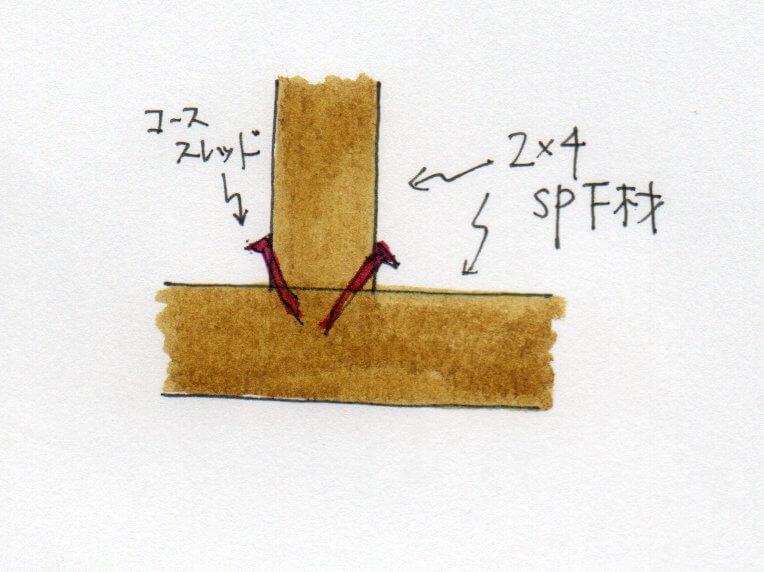
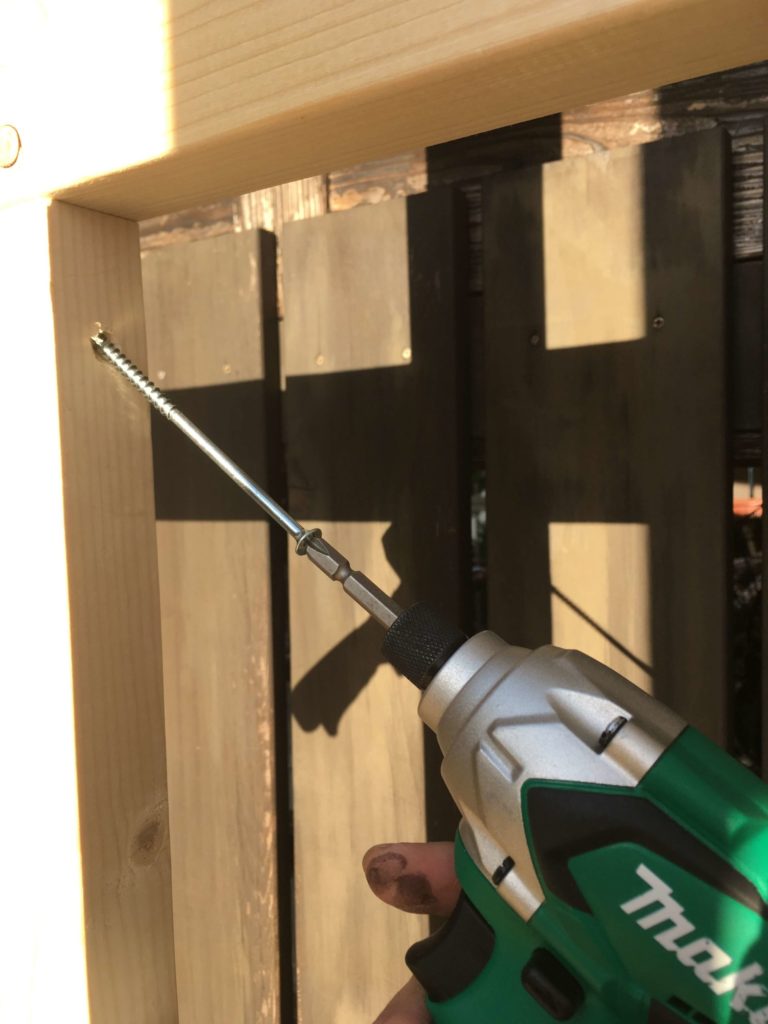
下部については、床板があるため下から打てません。このため、図のようにコーススレッドを斜めに打ち込みます。
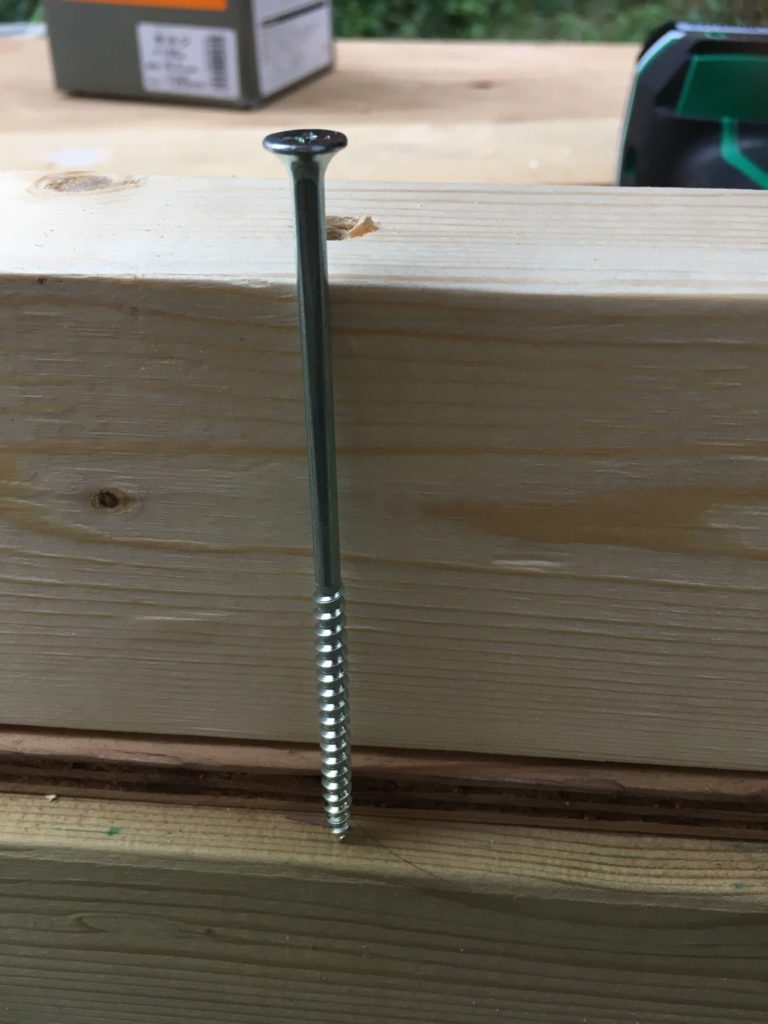
![](https://kantan-diy.com/wp-content/uploads/2019/11/20191116_000317511_iOS-scaled-e1573898360645-1024x768.jpg)
![](https://kantan-diy.com/wp-content/uploads/2019/11/20191116_000234038_iOS-scaled-e1573898411803-1024x768.jpg)
コーススレッドの斜め打ち
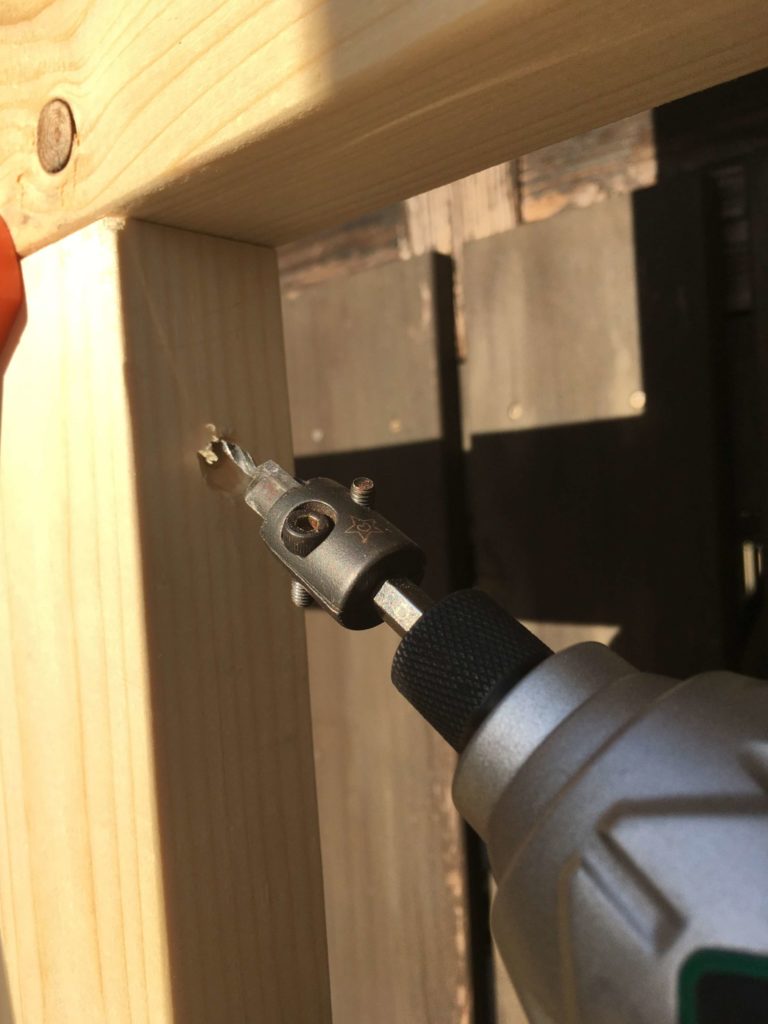
コーススレッドを斜めに打ち込む際、そのまま打ち込もうとしてもビスが安定しないので上手に打ち込むことができません。 インパクトドライバーでコーススレッドを打ち込む前に、あらかじめコーススレッドの直径よりも少し細いドリルで穴を開けておきます。
先導の穴が開いていると、ビスも安定して斜めでも安定して打ち込むことができます。
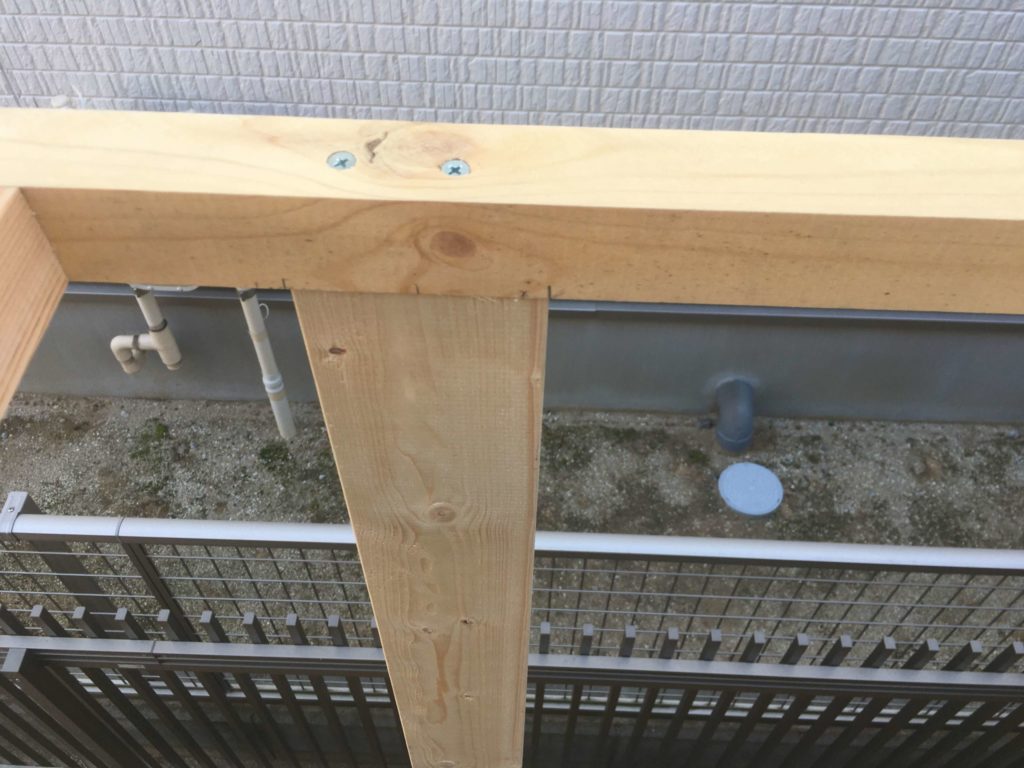
![](https://kantan-diy.com/wp-content/uploads/2019/11/20191116_054034867_iOS-768x1024.jpg)
![](https://kantan-diy.com/wp-content/uploads/2019/11/20191116_054109645_iOS-768x1024.jpg)
3.両側の水平補強材
![水平補強材(外側)固定方法](https://kantan-diy.com/wp-content/uploads/2019/11/img20191113_21374212.jpg)
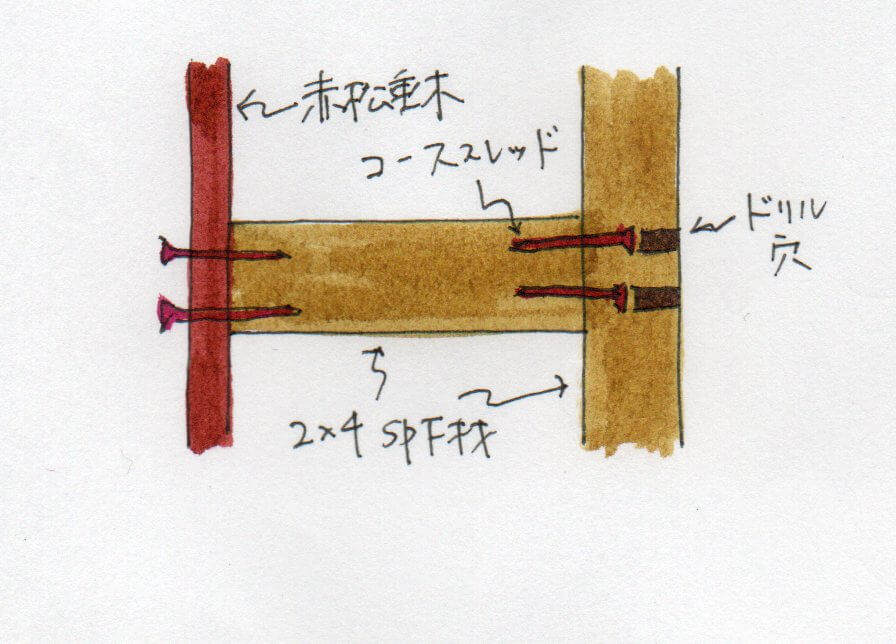
枠組み側は水平にコーススレッドを打ち込みます。
ツーバイ材側は、そのまま打ち込みますとコーススレッドの長さが足りないので、先にドリルで頭部よりも大きな穴を開けて置き、コーススレッドを材の中央部分まで打ち込みます。
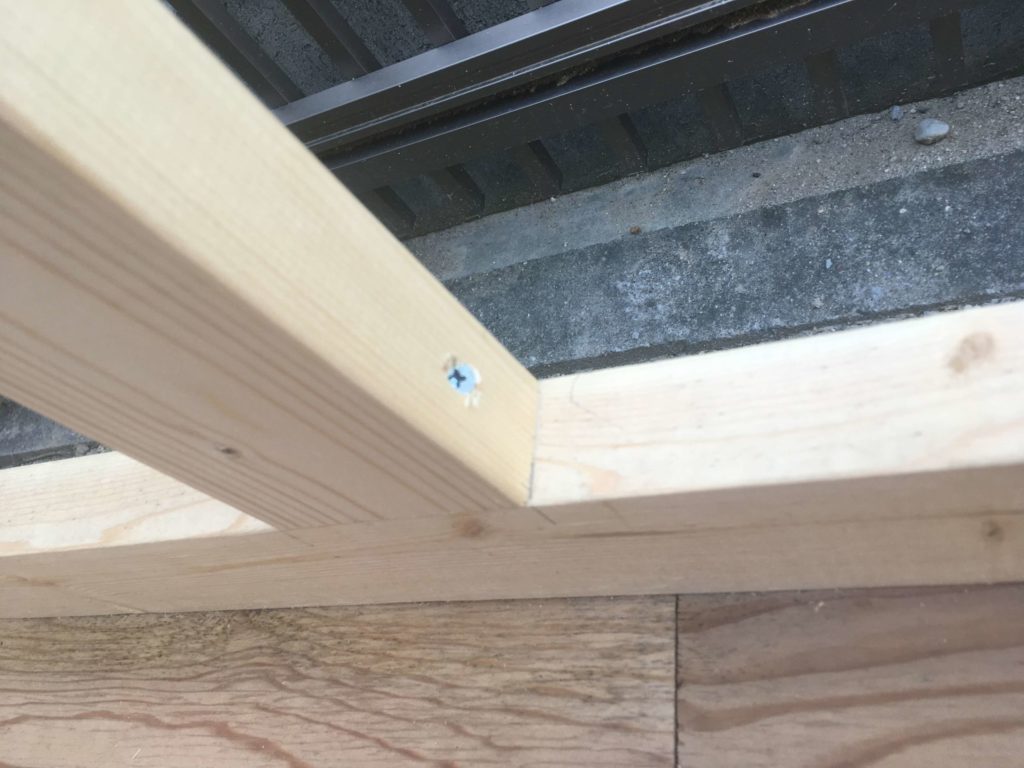
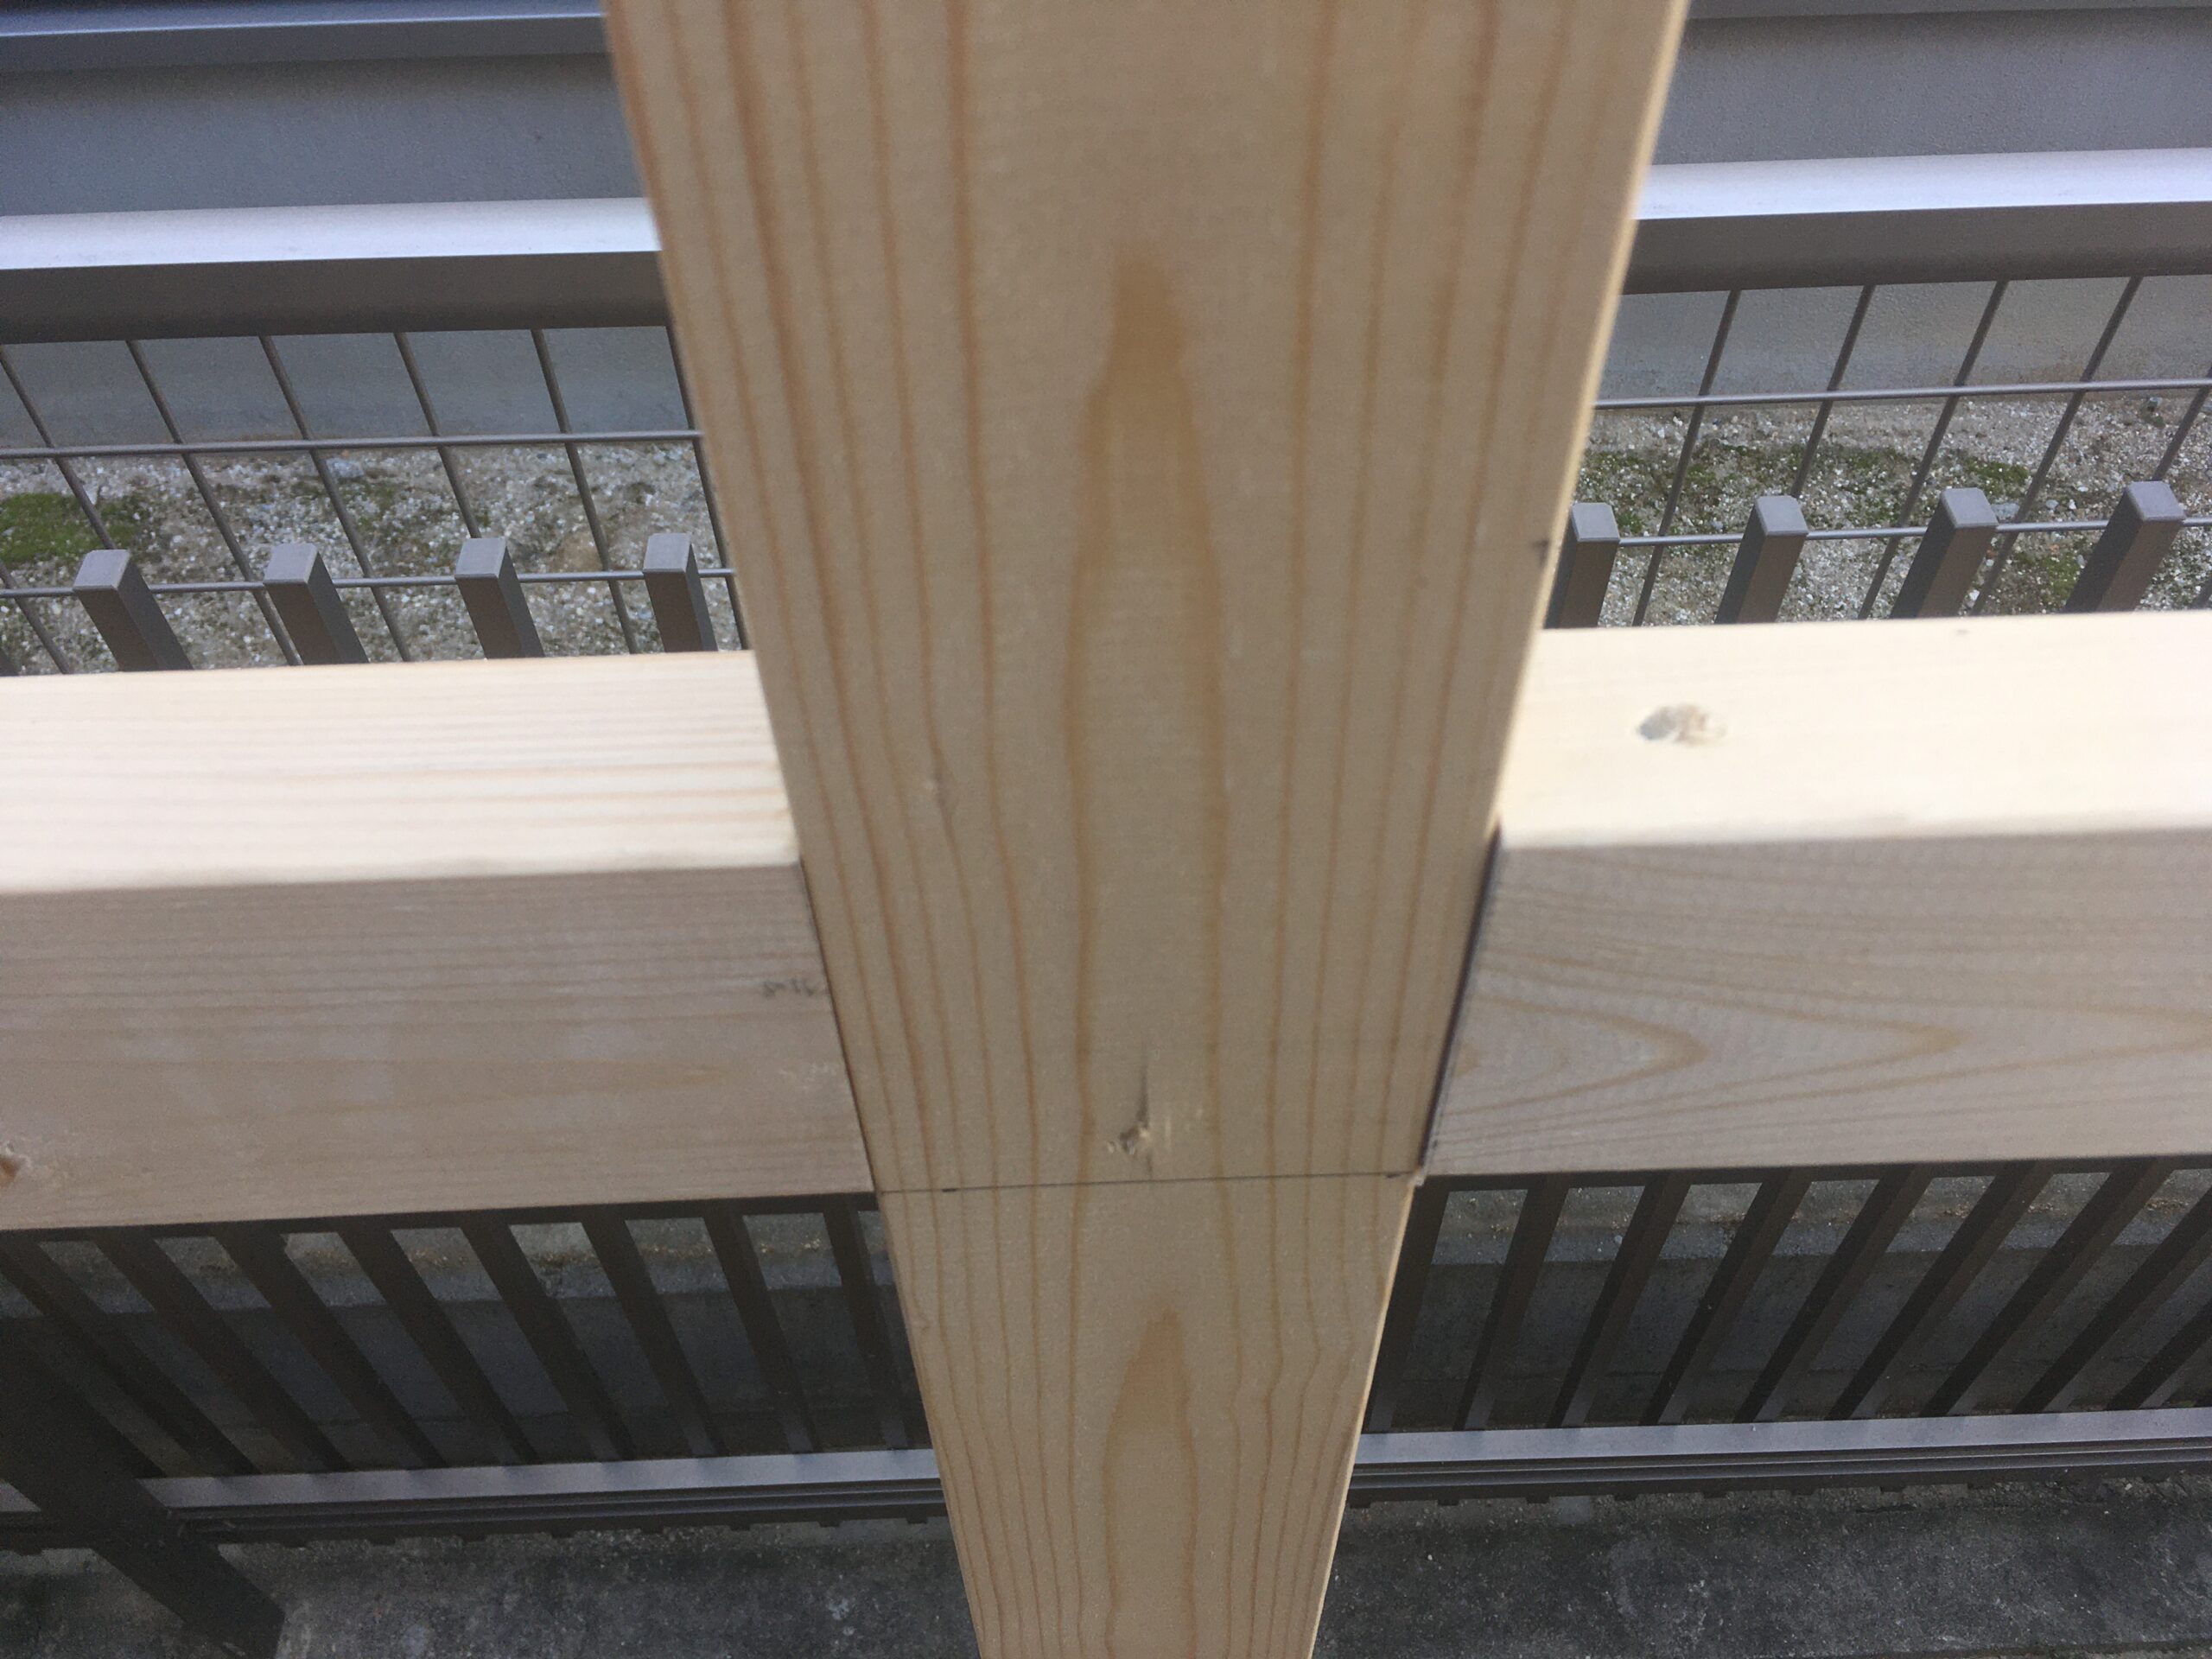
4.中央の水平補強材
中央部分の水平補強材は、すでに両側に補強材が取り付けてあるため、外側から水平方向にコーススレッドを打ち込むことができません。
このため、補強材の両側にコーススレッドを斜めに打ち込むことで固定します。先に述べたように、斜めに打ち込む場合には、ドリルで穴を開けておいてから打ち込みます。
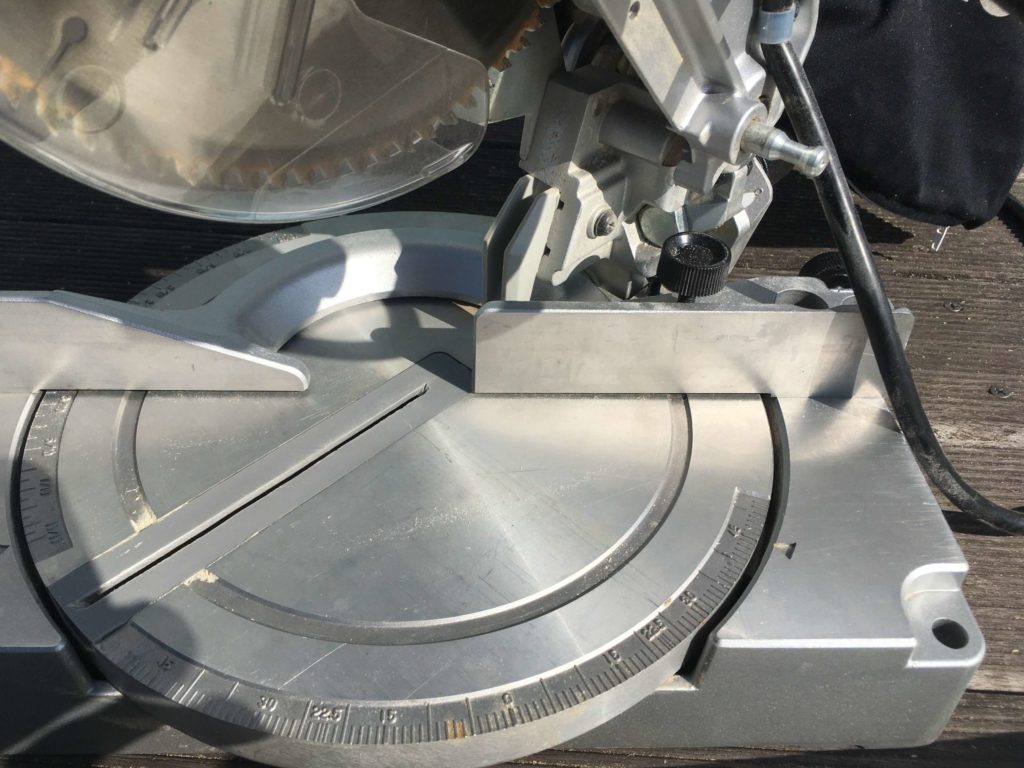
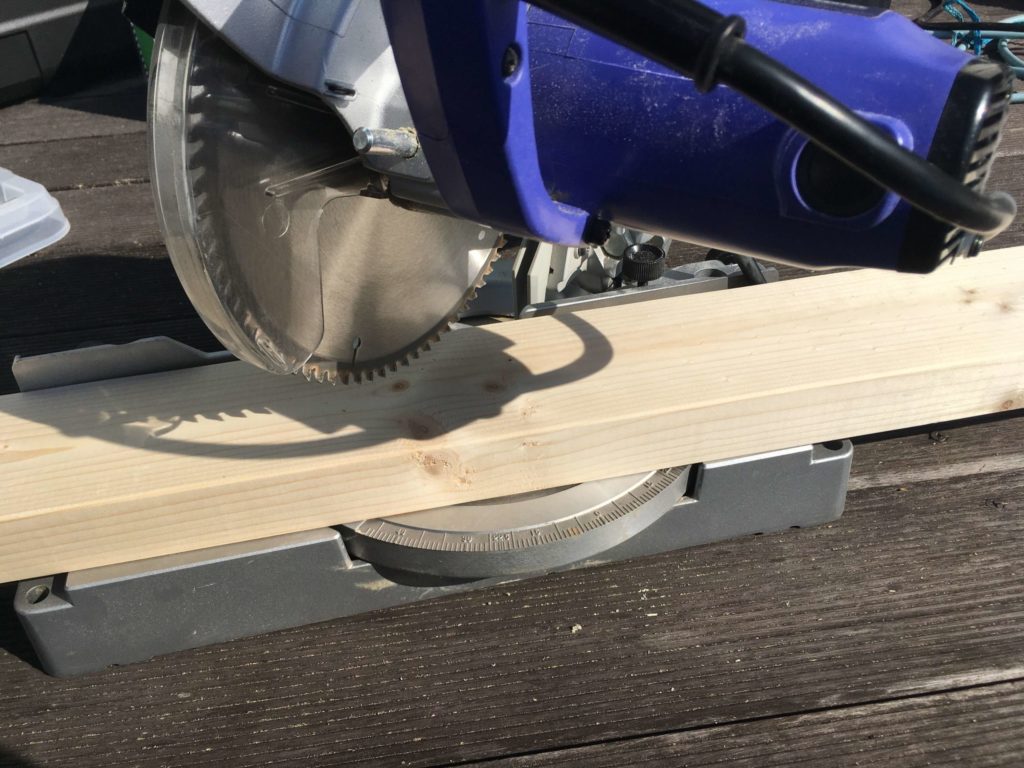
![中央部分水平材固定方法](https://kantan-diy.com/wp-content/uploads/2019/11/img20191113_21380182.jpg)
![](https://kantan-diy.com/wp-content/uploads/2023/08/IMG_1113-1024x768.jpg)
![](https://kantan-diy.com/wp-content/uploads/2023/08/IMG_1111-768x1024.jpg)
5.火打ち梁
天井面の補強は火打ち梁(ひうちはり)を実施します。今回の火打ち梁は、天井面の角に三角形を構築することで、水平方向の変形を少なくすることで構造を補強しています。
![](https://kantan-diy.com/wp-content/uploads/2023/08/IMG_1117-1024x768.jpg)
![](https://kantan-diy.com/wp-content/uploads/2023/08/IMG_1083-1024x768.jpg)
火打ち梁は45度の曲線切りが必要となりますが、丸ノコ定規を使うか卓上丸ノコを使用すると正確に切断できます。
![](https://kantan-diy.com/wp-content/uploads/2019/11/20191116_014936008_iOS-1024x768.jpg)
![](https://kantan-diy.com/wp-content/uploads/2019/11/20191116_015001190_iOS-1024x768.jpg)
以上で、背面側の補強材設置方法を説明しましたが、他の面についても今回の方法を参考にすることで設置できます。
![](https://kantan-diy.com/wp-content/uploads/2023/07/de8b0abd7ba7114bec4d02279771fcd1-150x150.jpg)
だいぶ、がっちりしたよ
次回は扉取り付け面の塗装作業について紹介します。
![](https://kantan-diy.com/wp-content/uploads/2019/11/20191116_070226466_iOS-scaled-e1573898581920.jpg)
コメント