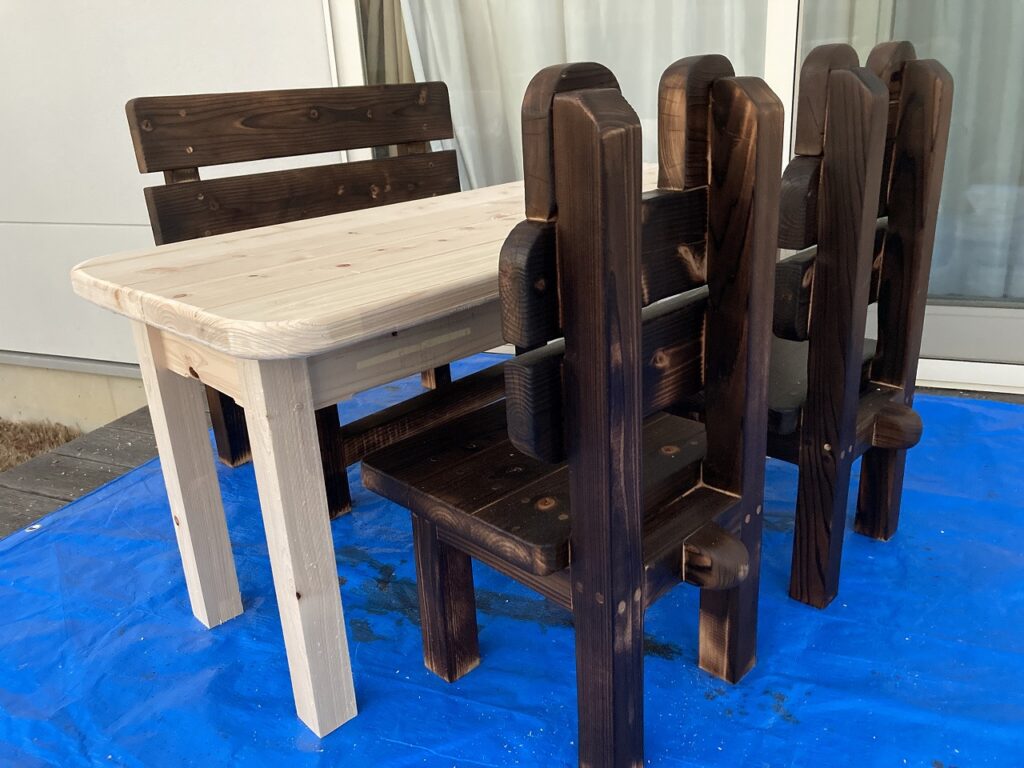
こんにちは、源です。以前、子供用の椅子とベンチを作りました。これらに合わせたテーブルを作ってダイニングセットにしようと思います。
![](https://kantan-diy.com/wp-content/uploads/2023/07/de8b0abd7ba7114bec4d02279771fcd1-150x150.jpg)
シンプルな作りなので、難易度(★★☆☆☆)比較的かんたんよ
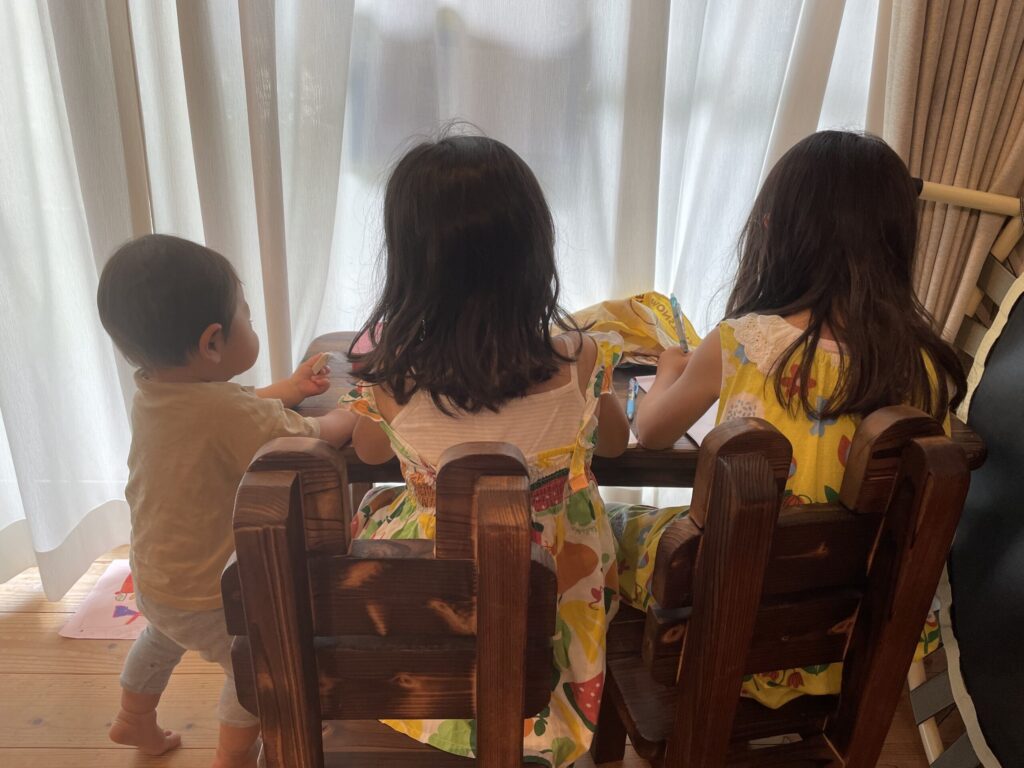
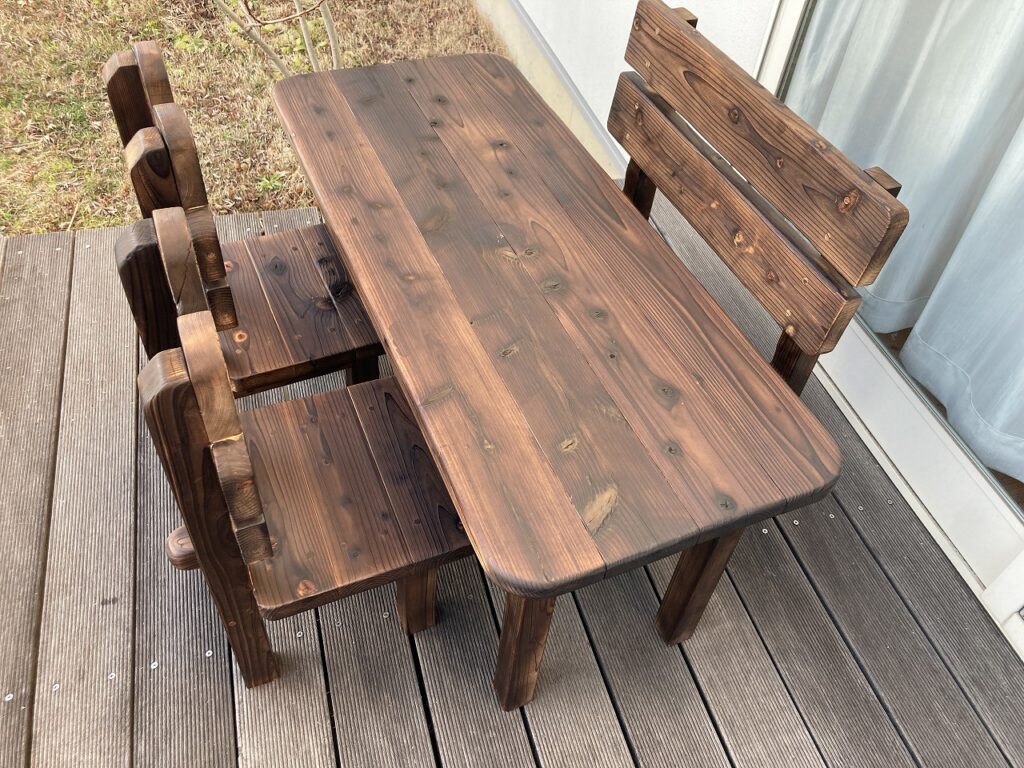
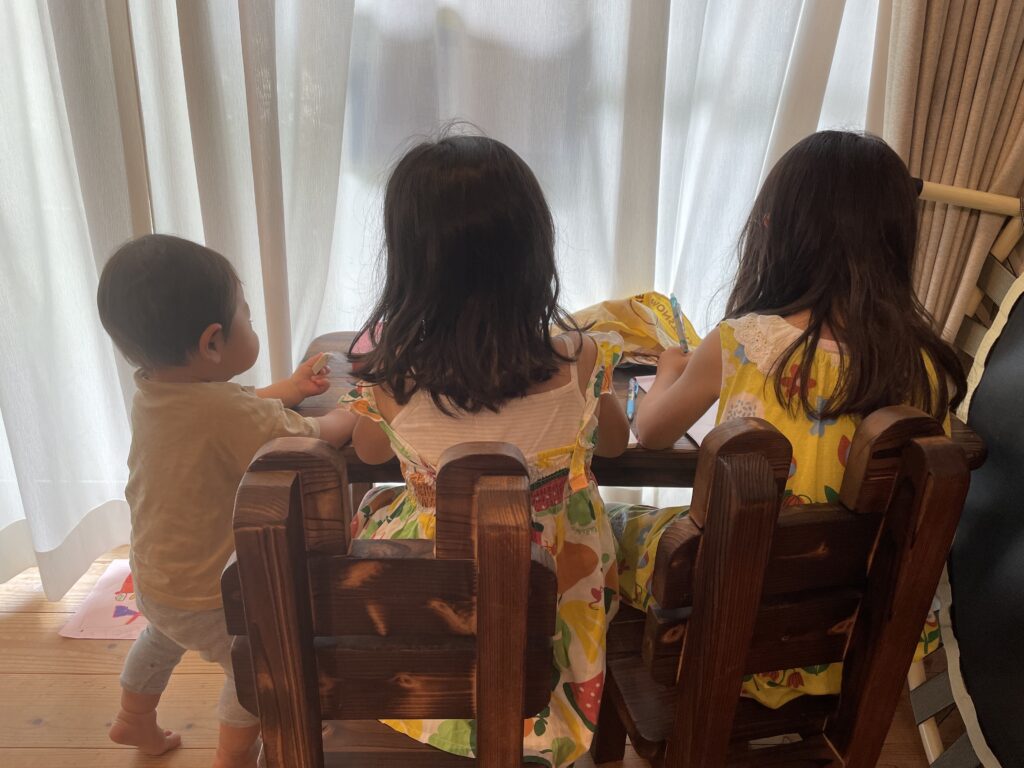
出産祝いに、テーブルと椅子2脚、ベンチをセットにしてあげました。お姉ちゃん二人はご飯食べたり、お絵描きしたりでいつも使ってくれているようです。その横で、弟がうろちょろしているらしいです。近いうちに、3人揃って大人しく座れる日が来そうです。
![](https://kantan-diy.com/wp-content/uploads/2023/07/ee248f2ccd245a29d161072d3ffc7654-150x150.jpg)
いつも使ってるよ
![](https://kantan-diy.com/wp-content/uploads/2023/07/c3dc87ffffa4022a89e751f3752c52be-150x150.jpg)
お絵描きしているよ
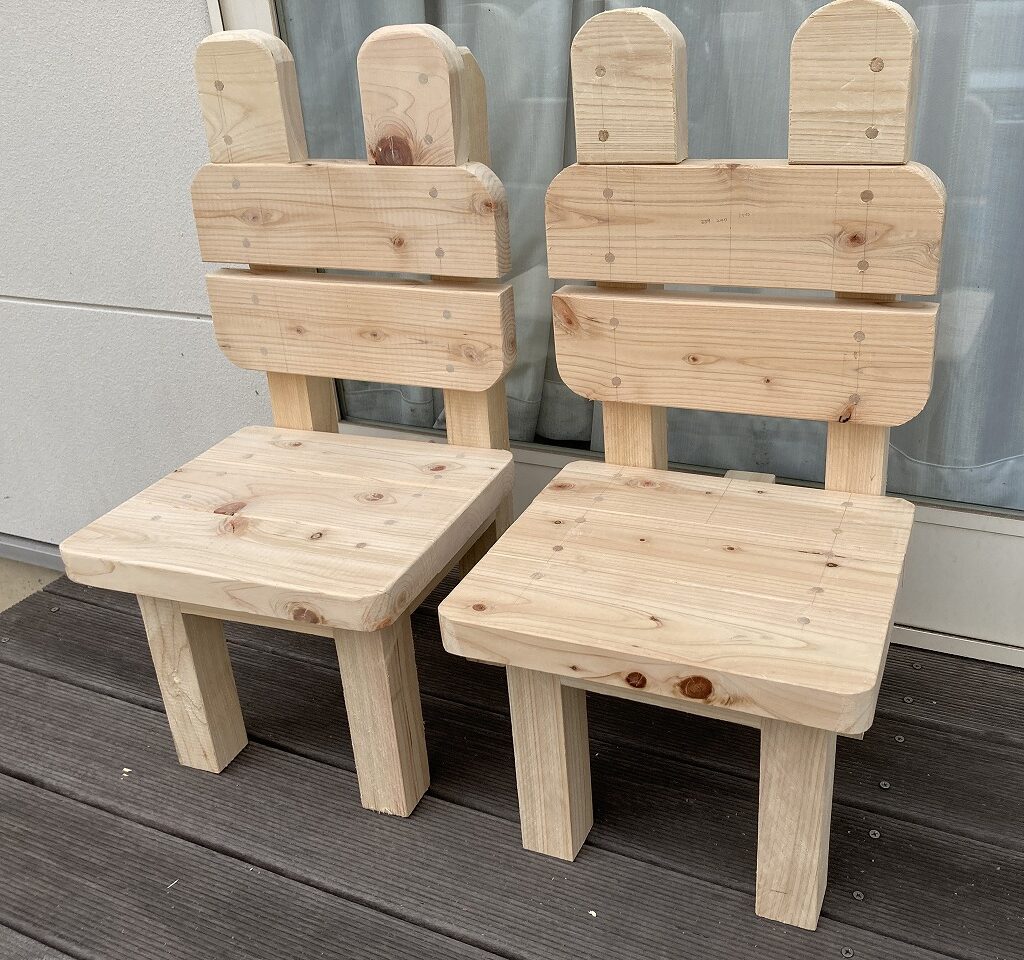
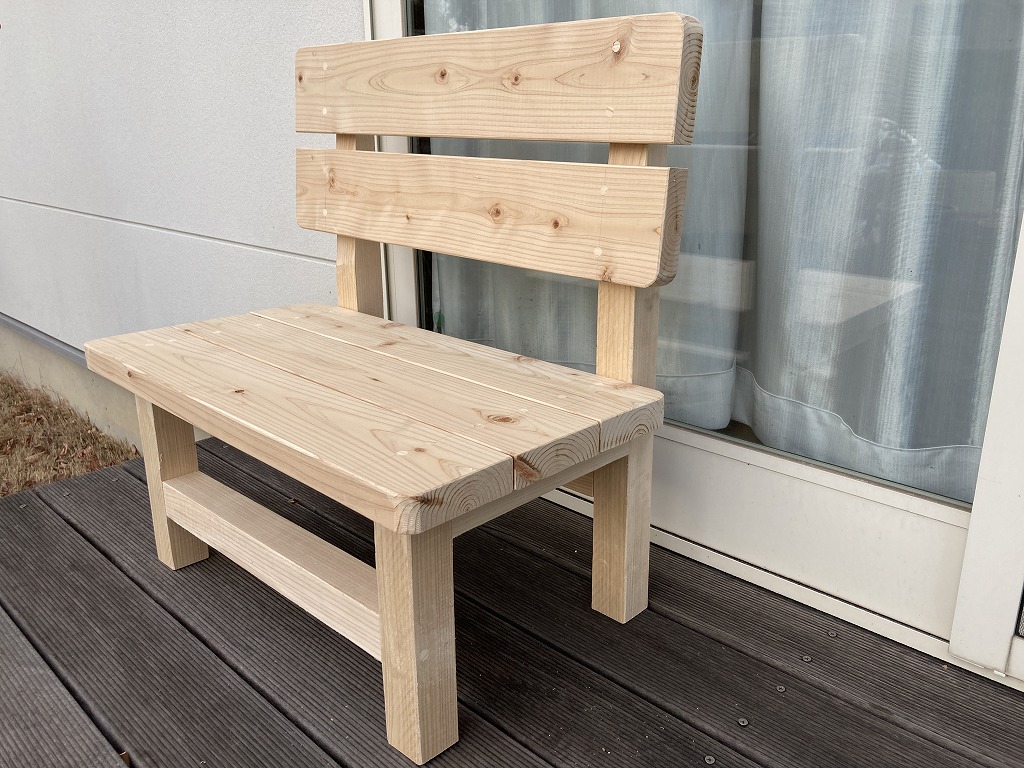
セットの椅子とベンチはこちらの記事で作り方を書いています。
![](https://kantan-diy.com/wp-content/uploads/2021/01/IMG_4428-e1610973628456.jpg)
![](https://kantan-diy.com/wp-content/uploads/2021/01/IMG_4376.jpg)
設計
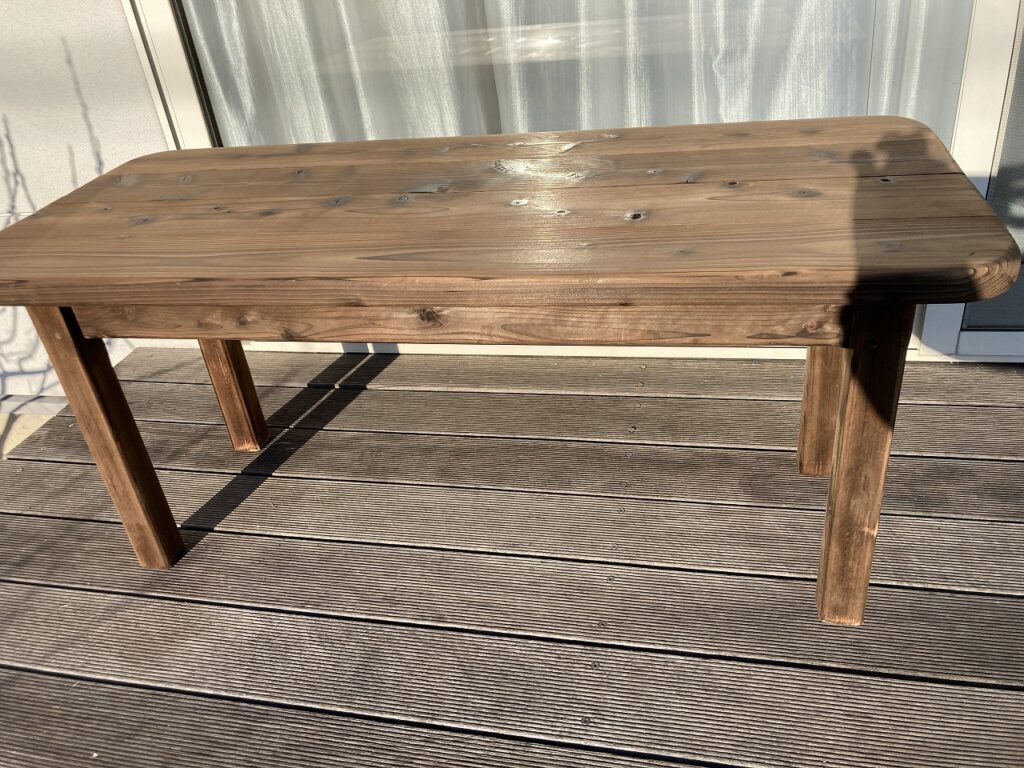
まずは図面です。手元にある材料の大きさや、組み合わせるイスの大きさから机の形状を決めます。
![](https://kantan-diy.com/wp-content/uploads/2023/10/06a9af6a8408f72ddb5ffee16e1d276b-1024x766.jpg)
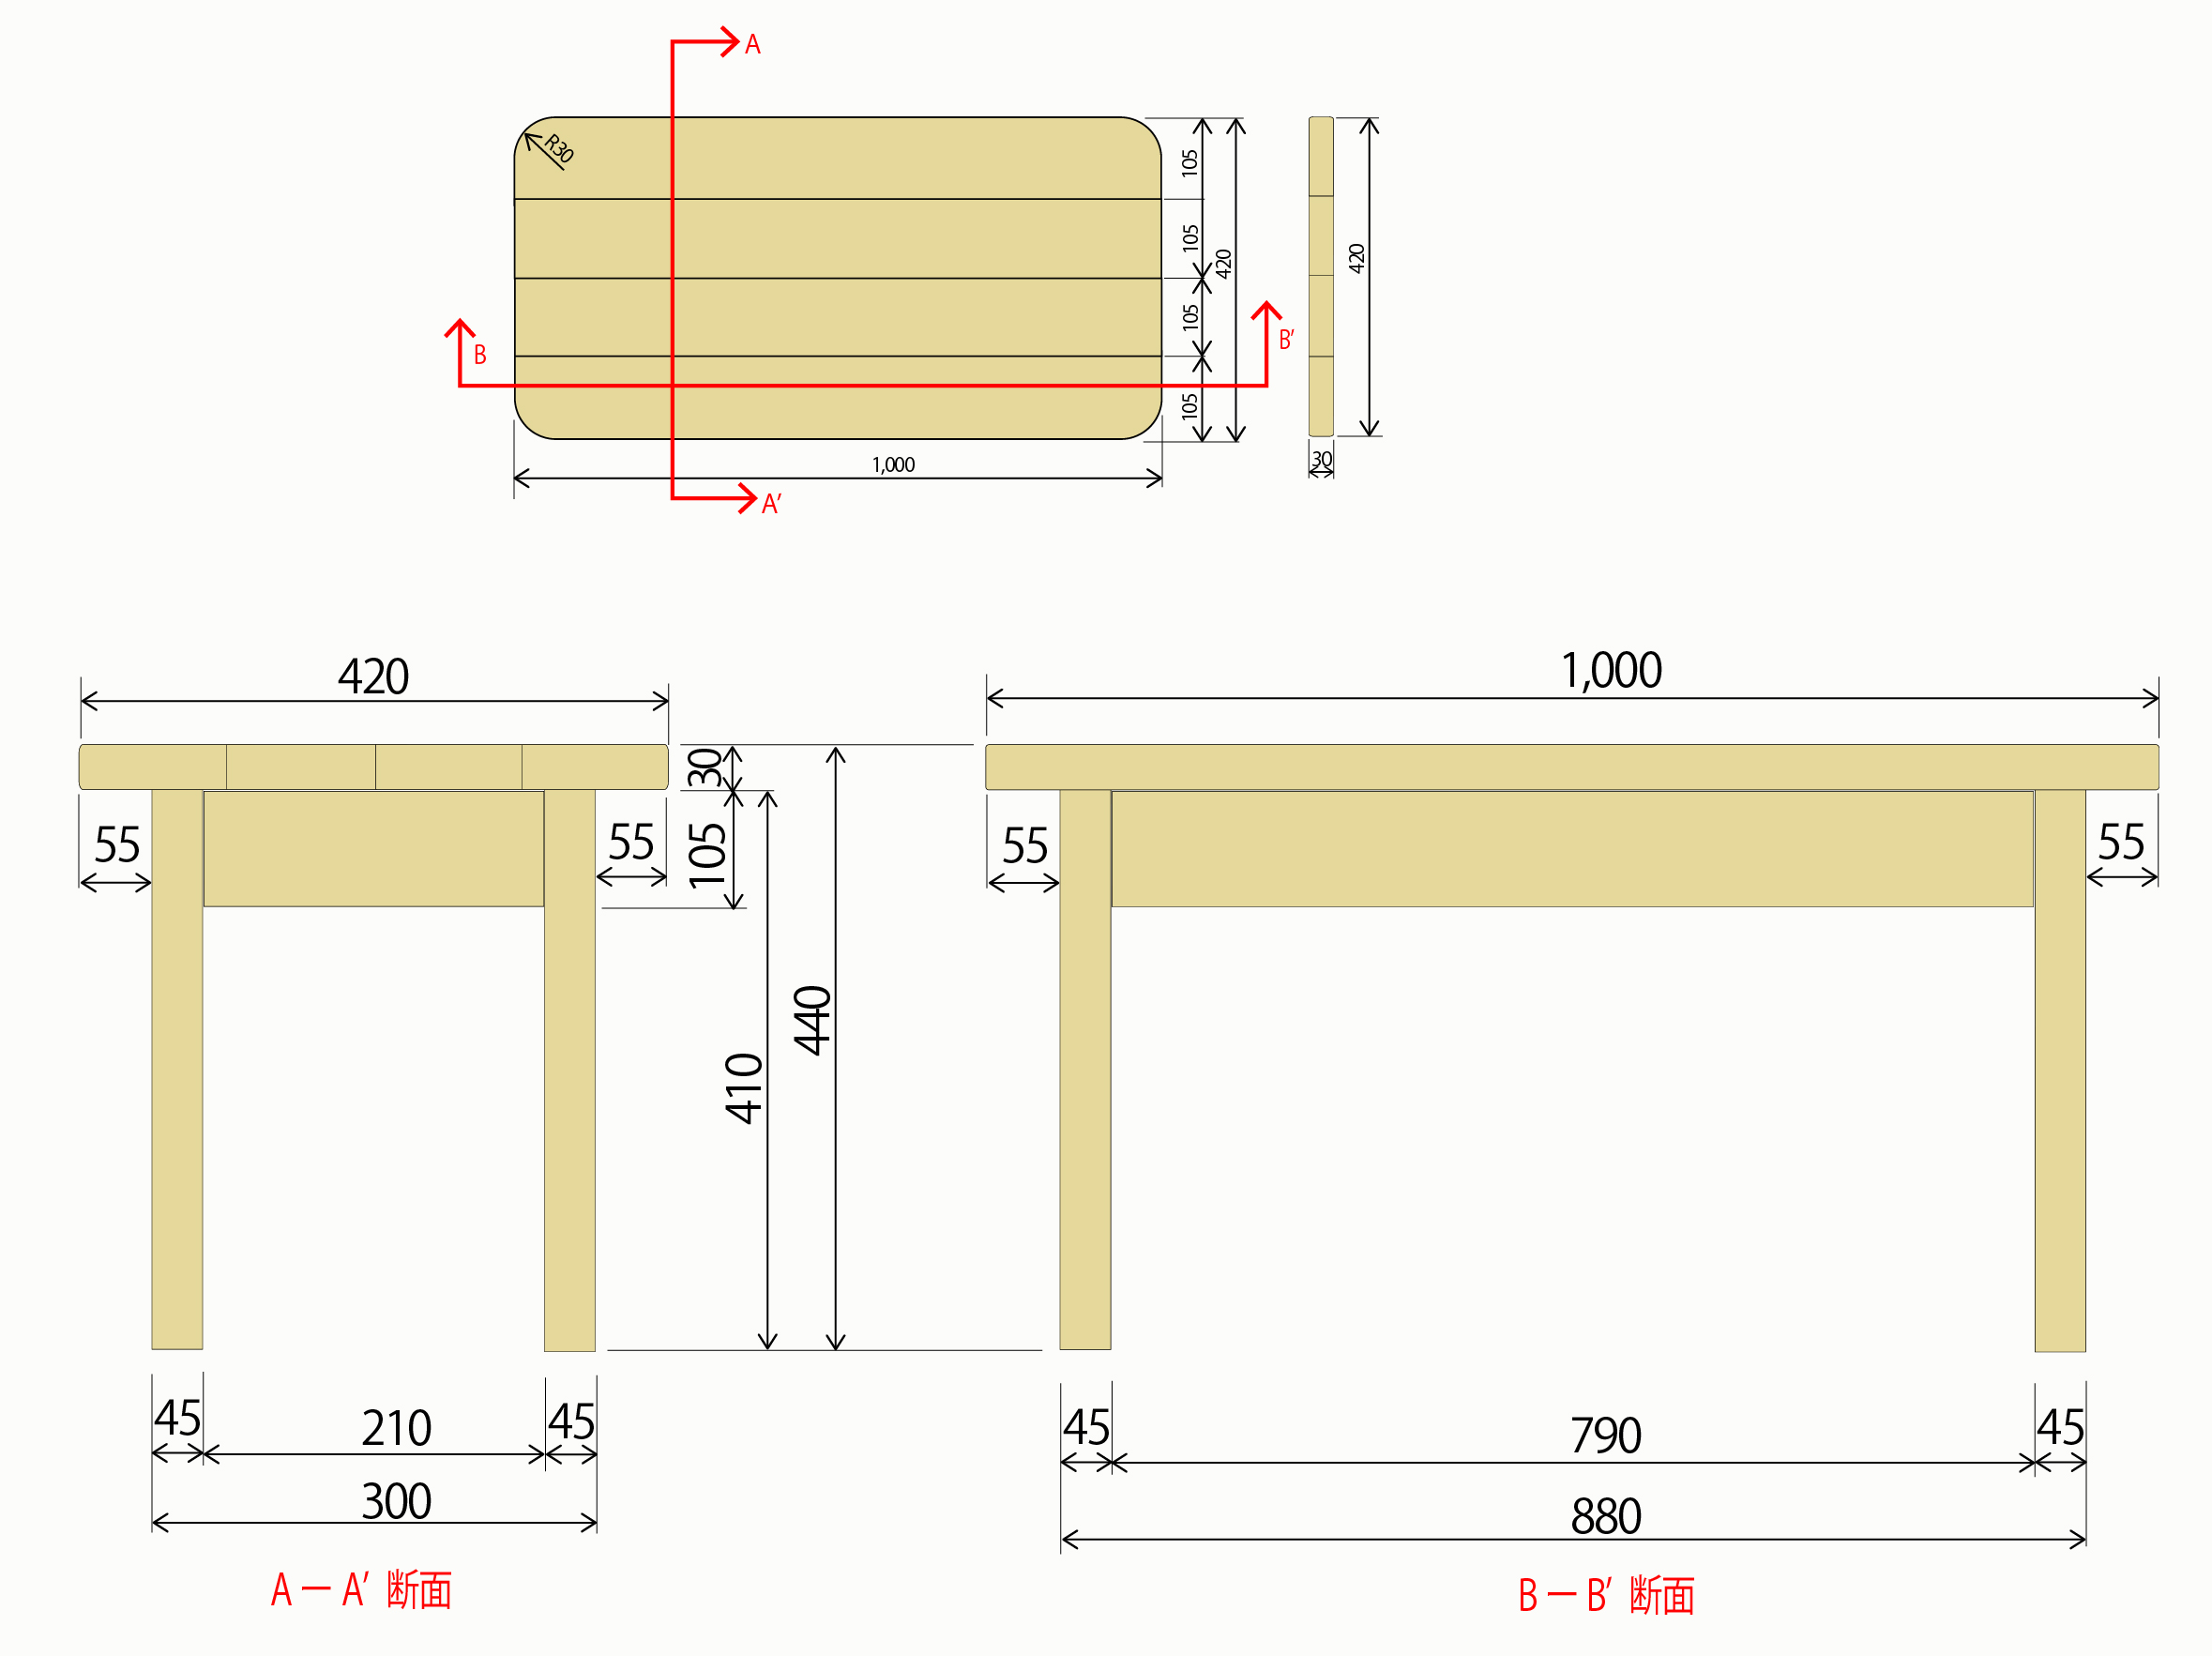
まずはテーブルの幅を決めます。ベンチの幅595㎜、うさぎ椅子幅300㎜×2脚がテーブルの脚の間に納まるようにします。
うさぎいす2脚を並べた600㎜が余裕を持って出し入れできる寸法として、790㎜にします。テーブルの長辺方向は、脚の控えからテーブル幅は1,000㎜にします。
次に重要な項目はテーブルの高さです。テーブルの高さは使い勝手に影響しますので、慎重に考える必要があります。高さを決定する時に関係する項目は、椅子の高さです。差尺(=テーブル天端高さー椅子座面高さ)を考慮して決めます。
![](https://kantan-diy.com/wp-content/uploads/2023/10/f5f5fca9b22f73fb1ea6f5d7f981d5c2-1024x658.jpg)
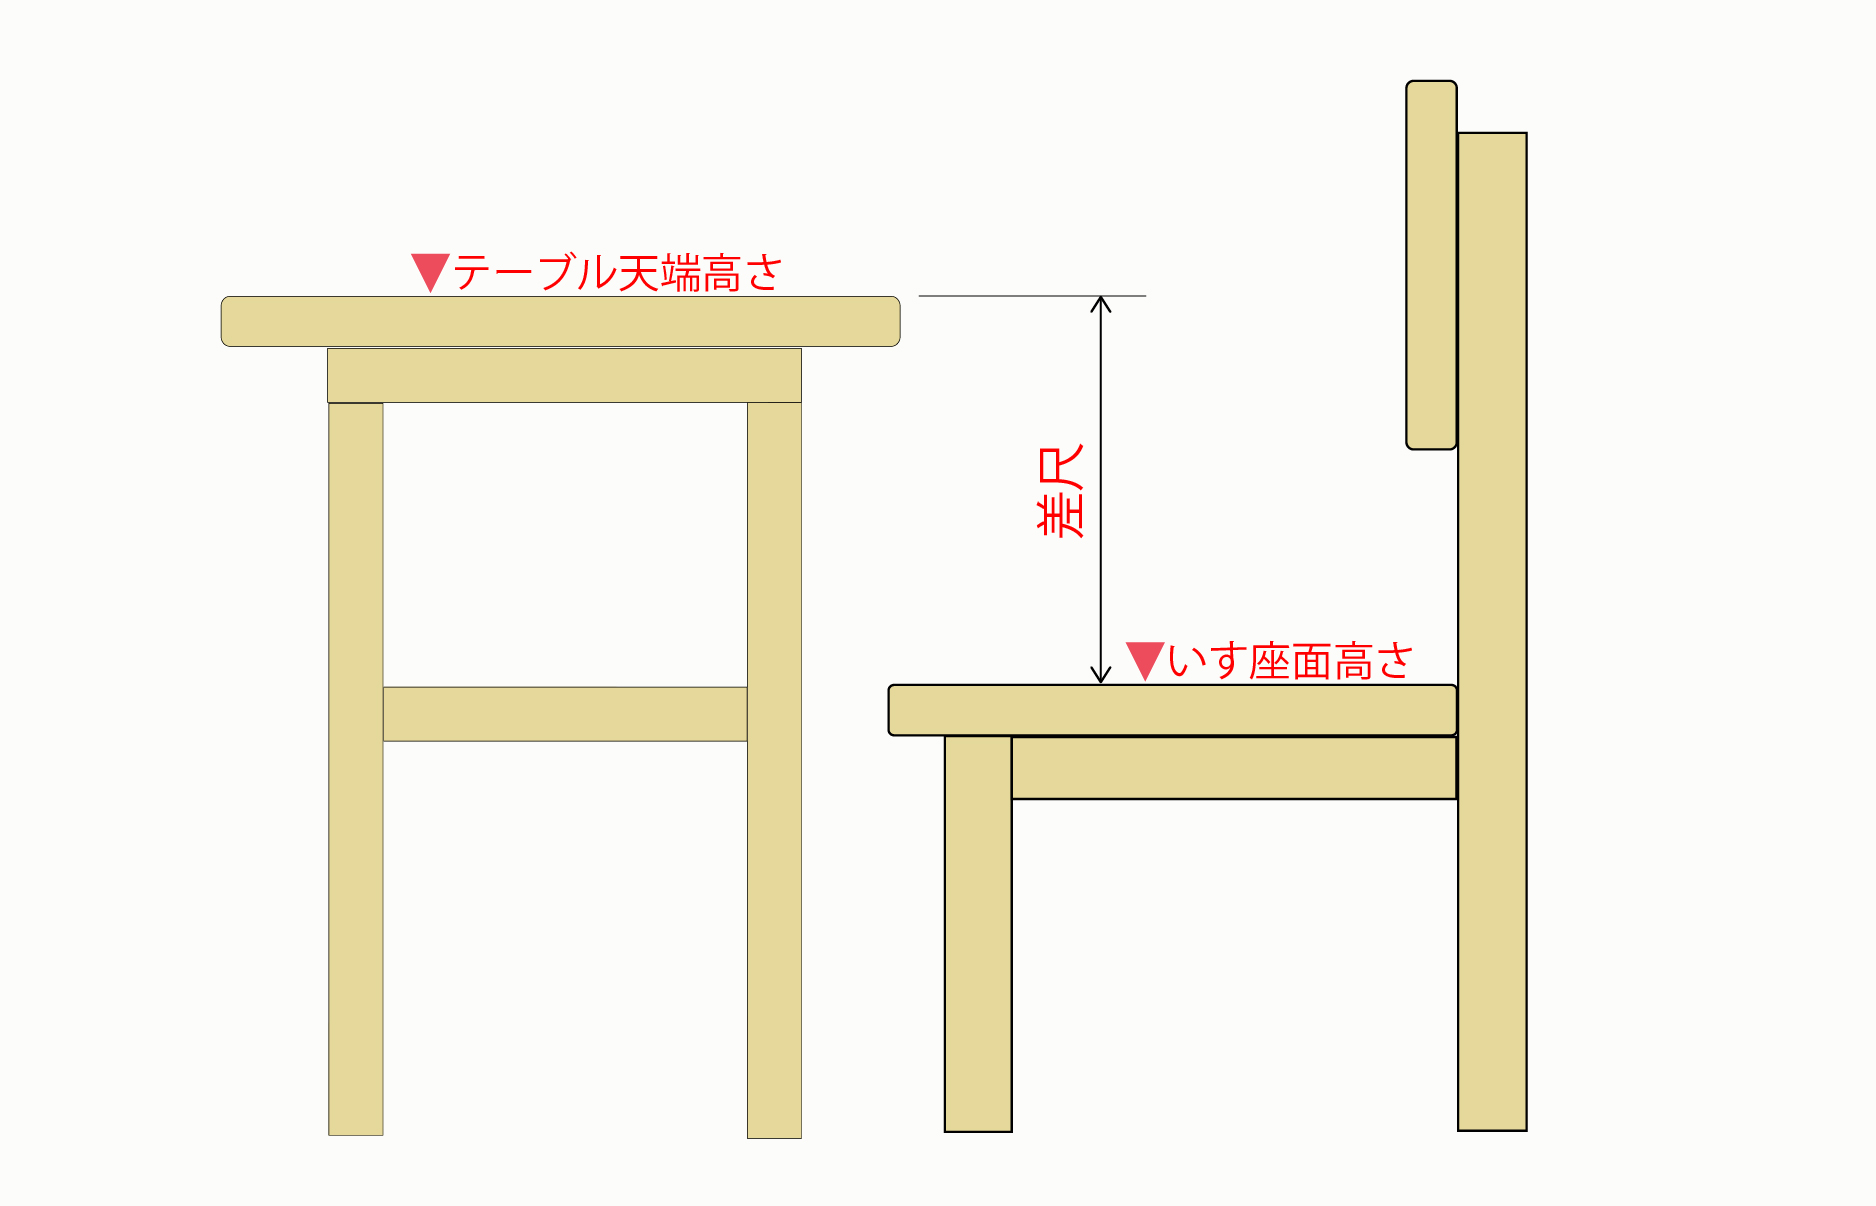
通常、差尺は25㎝~30㎝くらいが適正とされています。細かな計算は体格を考慮しますが、子供用のテーブルであることから、6割程度の体格を想定します。よって、差尺の適正値は15㎝~18㎝になりますので、今回は17㎝とします。以上から、ベンチの座面高さ27㎝に17㎝を足して、テーブル高さは44㎝に決定します。
製作過程
使用工具
今回の製作に使った工具です。
板を切るために使った丸のこです。最近はバッテリー駆動のものも多く出てきましたが、まだまだ高価ですので、配線でいいと思います。
![](https://kantan-diy.com/wp-content/plugins/pochipp/assets/img/pochipp-logo-t1.png)
組み付けに使ったインパクトドライバーです。初めて購入する場合には、バッテリー電圧と価格のバランスが良いものを選択しましょう。DIYで使用する分には、14.4Vタイプでトルクは十分ですし、工具自体も軽いので扱いやすいです。
![](https://kantan-diy.com/wp-content/plugins/pochipp/assets/img/pochipp-logo-t1.png)
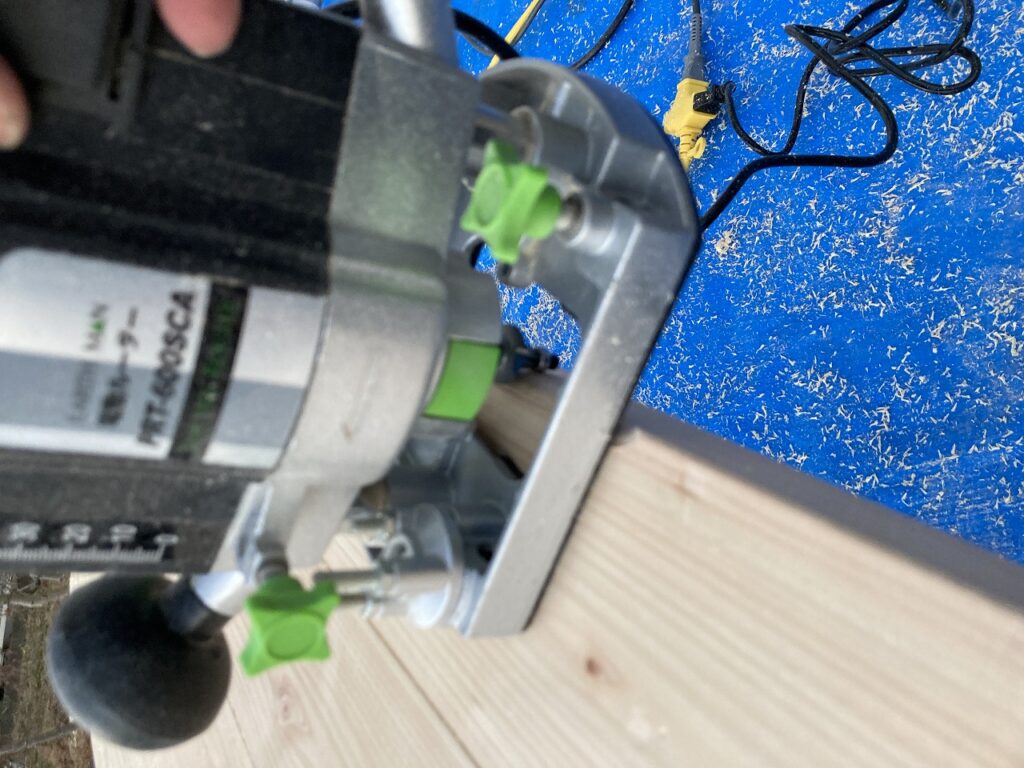
今回は、テーブルの角はルーターで削りました。しかし、ルーターは高価ですし、工具自体が大きく取り回しが不便です。少しトルクは劣りますが、DIYでは不便を感じないトリマーで十分です。
私は現在、18Vの工具へ切り替えつつあるので、こちらの製品を使っています。煩わしいコードがなく、とても扱いやすいです。価格だけが問題ですが、バッテリーは他の工具にも使えますので、一度揃えてしまえば気になりません。
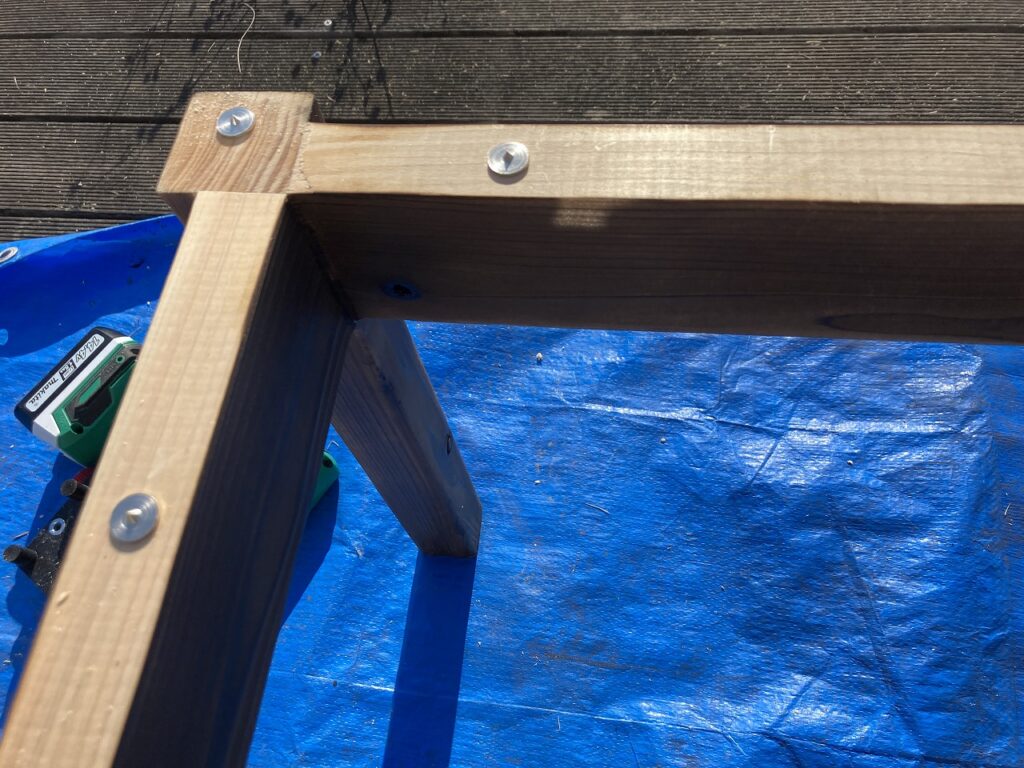
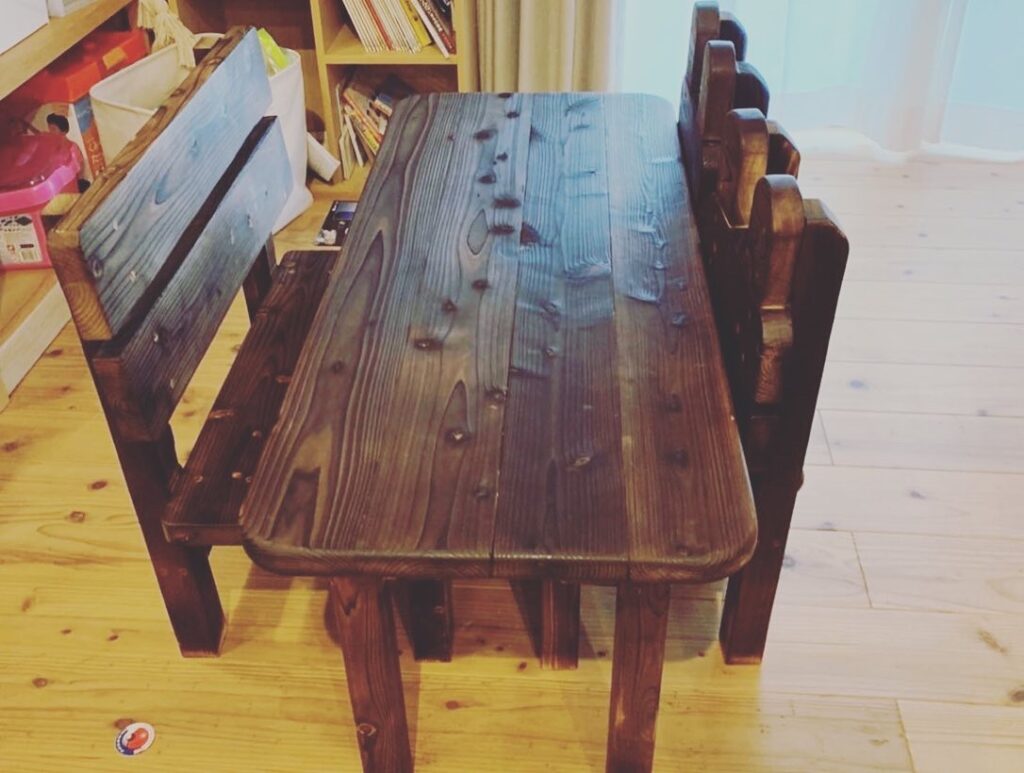
![](https://kantan-diy.com/wp-content/plugins/pochipp/assets/img/pochipp-logo-t1.png)
脚と枠組み
![](https://kantan-diy.com/wp-content/uploads/2021/01/IMG_4531-1024x768.jpg)
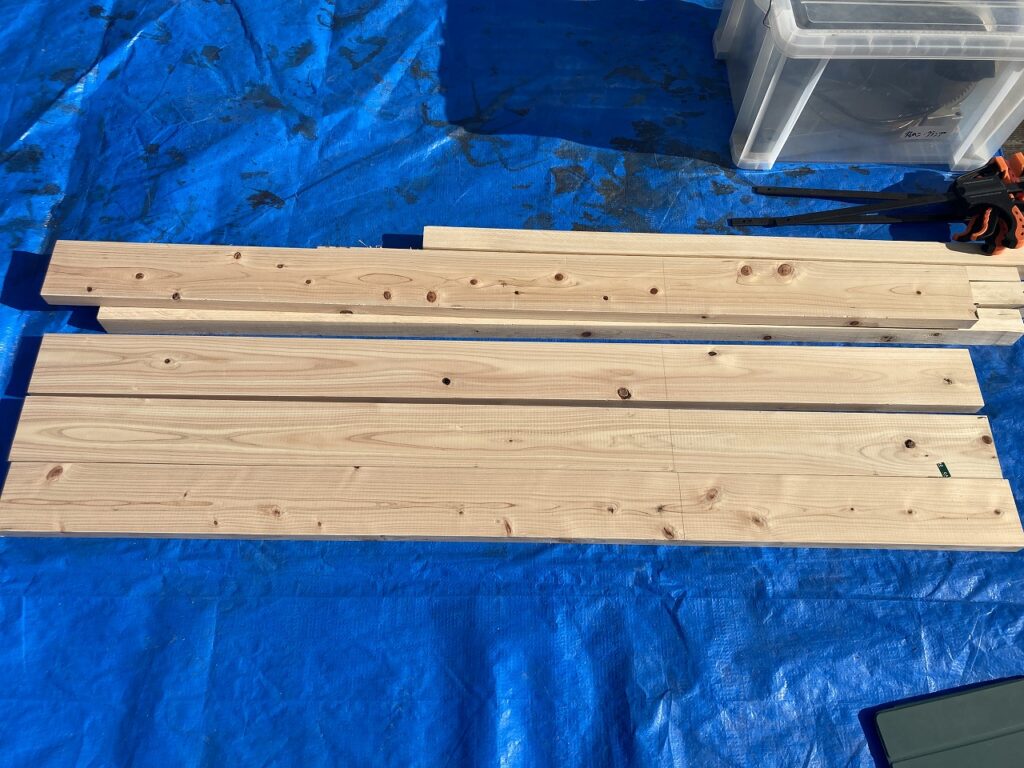
材料はベンチや椅子と同様に「ひのき」を使っています。天板は105㎜×30㎜の間柱、脚は45㎜の角材の2種類の木材を使用しました。
![](https://kantan-diy.com/wp-content/uploads/2021/01/IMG_4538-1024x768.jpg)
![](https://kantan-diy.com/wp-content/uploads/2021/01/IMG_4537-1024x768.jpg)
![](https://kantan-diy.com/wp-content/uploads/2021/01/IMG_4536-e1612090631488-768x1024.jpg)
間柱の105㎜を80㎜の幅に縦挽きして幕板にします。脚を固定する根元に幕板をつけて強度を確保します。
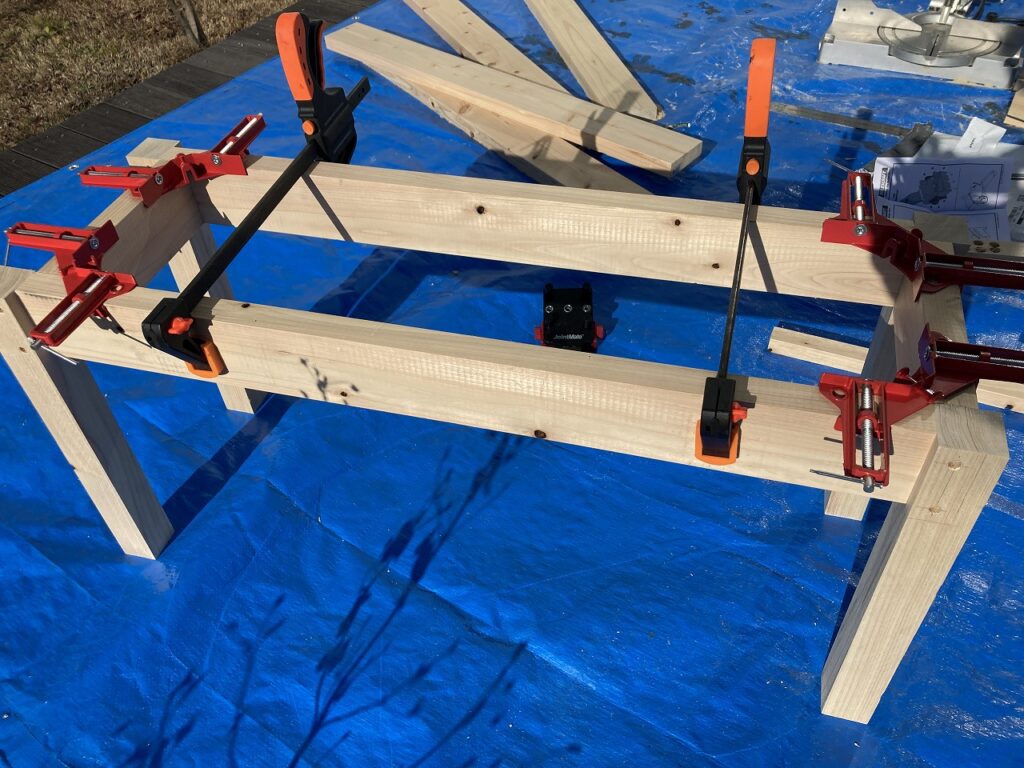
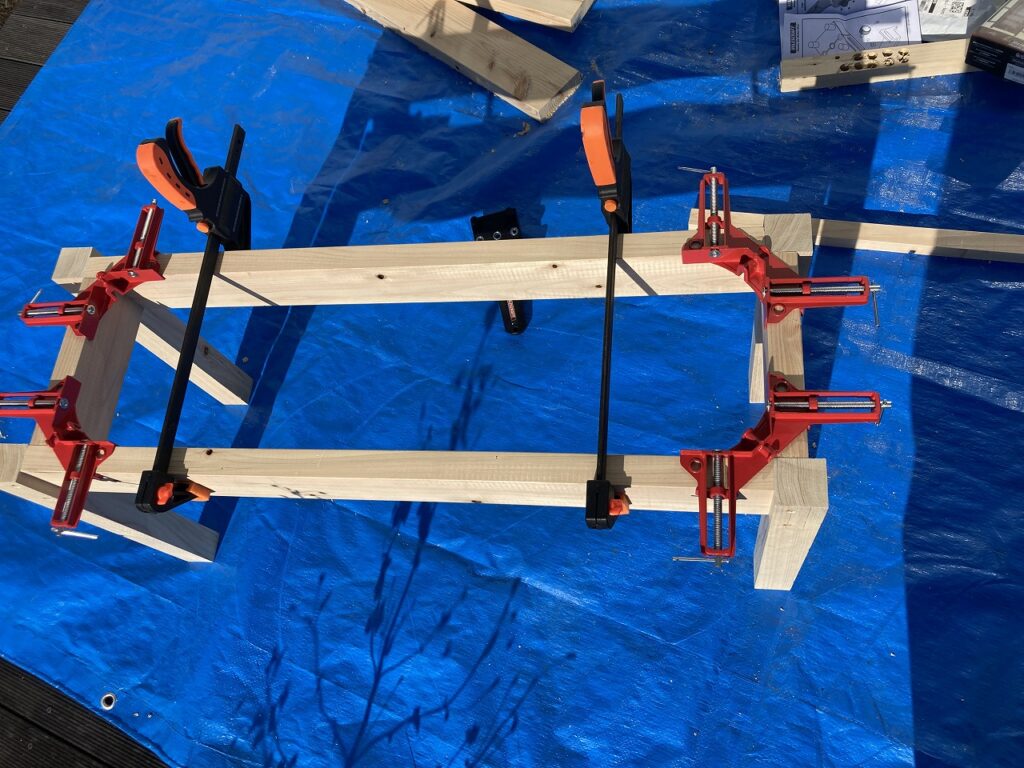
2方向から交差するようにビスをうちますので、高さを少しずつ変えて干渉しないようにします。テーブルの枠組みはコーナークランプを使って直角を確認しながら組んでいきます。
![](https://kantan-diy.com/wp-content/uploads/2021/01/IMG_4534-1024x768.jpg)
![](https://kantan-diy.com/wp-content/uploads/2021/01/IMG_4532-e1612090755903-1024x858.jpg)
![](https://kantan-diy.com/wp-content/uploads/2021/01/IMG_4535-1024x768.jpg)
天板
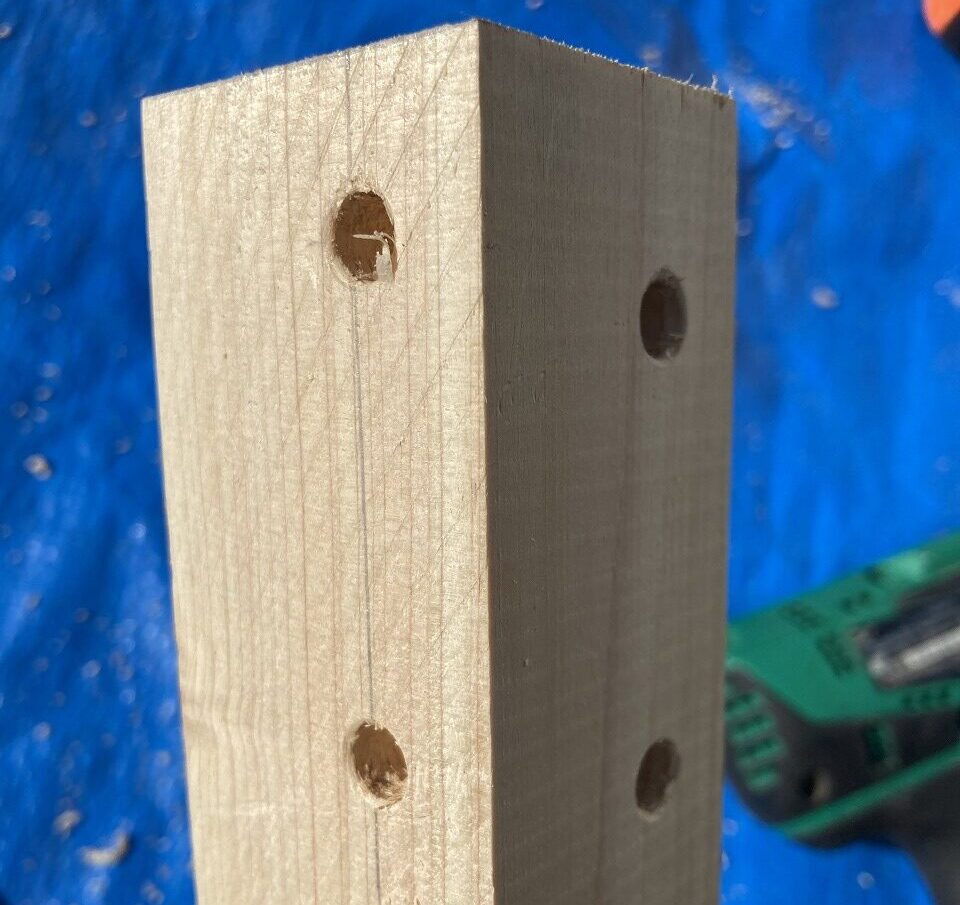
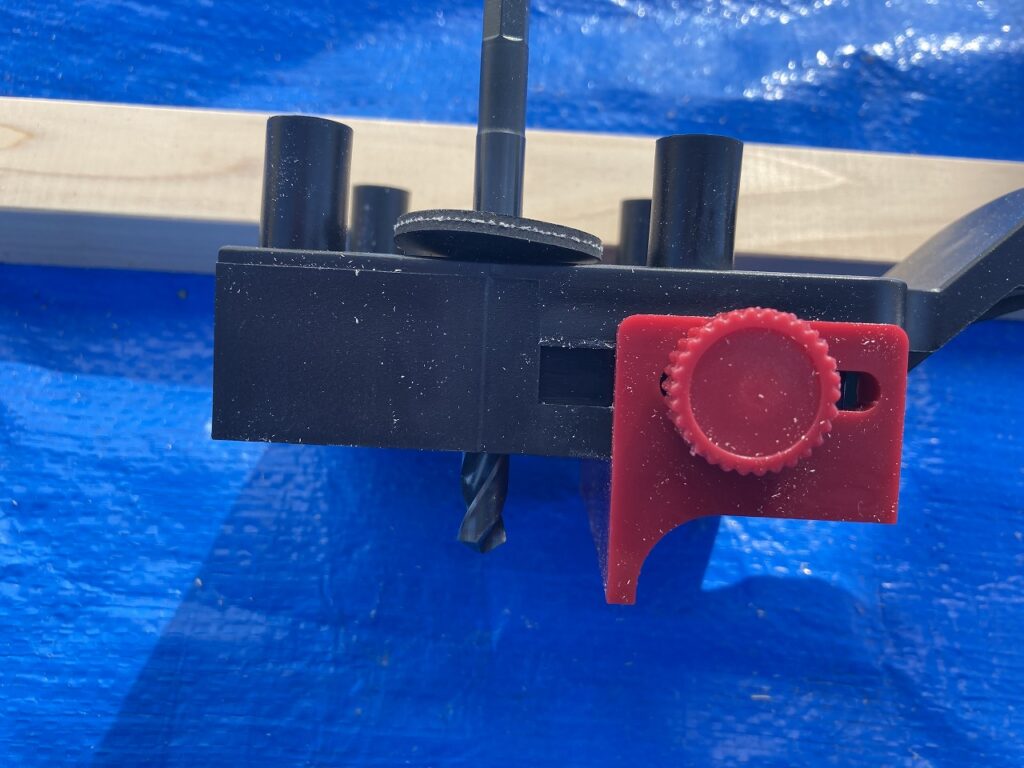
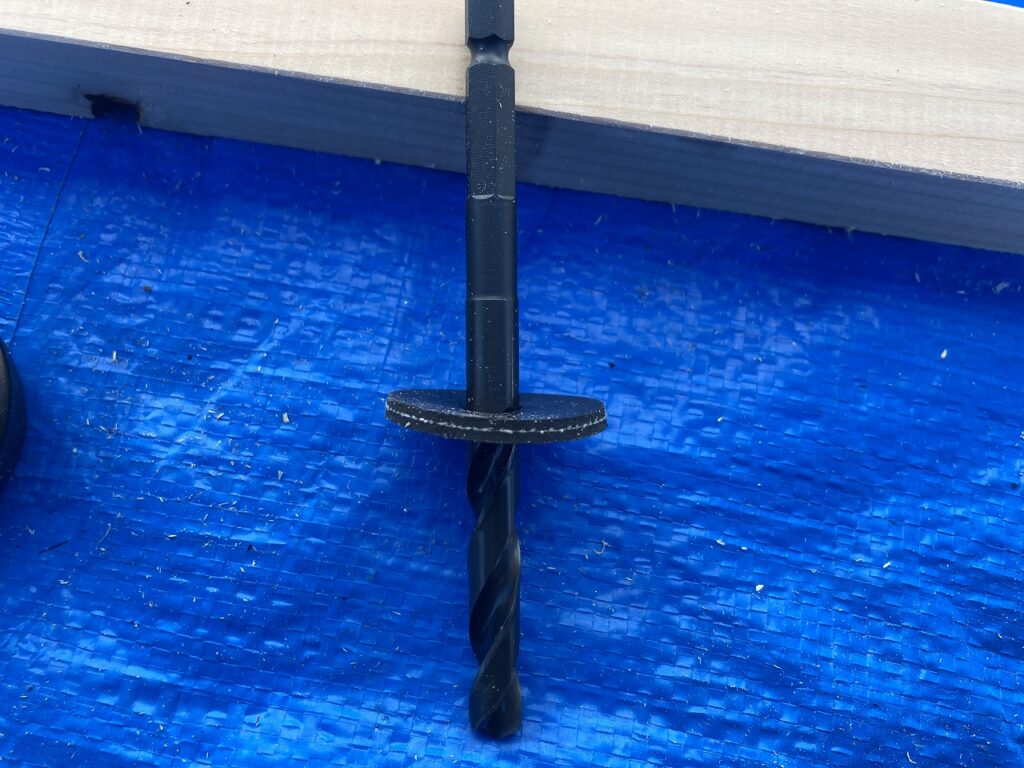
次に天板を作ります。4枚の板をダボで継いでいきます。ダボ継ぎする時の重要なことは、ドリルの穴を垂直に保つことです。ドリルを真っすぐ保つ工具と、穴の深さを一定に保つため、ドリルよりも少し小さい穴のゴムスペーサーを利用します。
![](https://kantan-diy.com/wp-content/plugins/pochipp/assets/img/pochipp-logo-t1.png)
![](https://kantan-diy.com/wp-content/uploads/2021/01/IMG_4540-1024x768.jpg)
![](https://kantan-diy.com/wp-content/uploads/2021/01/IMG_4546-1024x768.jpg)
ダボマーカーを使って、接続する先の板にダボ穴の位置を写し取ります。写し取ったマークに沿ってドリルで穴あけします。
![](https://kantan-diy.com/wp-content/uploads/2021/01/IMG_4543-1024x768.jpg)
![](https://kantan-diy.com/wp-content/uploads/2021/01/IMG_4544-1024x768.jpg)
![](https://kantan-diy.com/wp-content/uploads/2021/01/IMG_4545-1024x768.jpg)
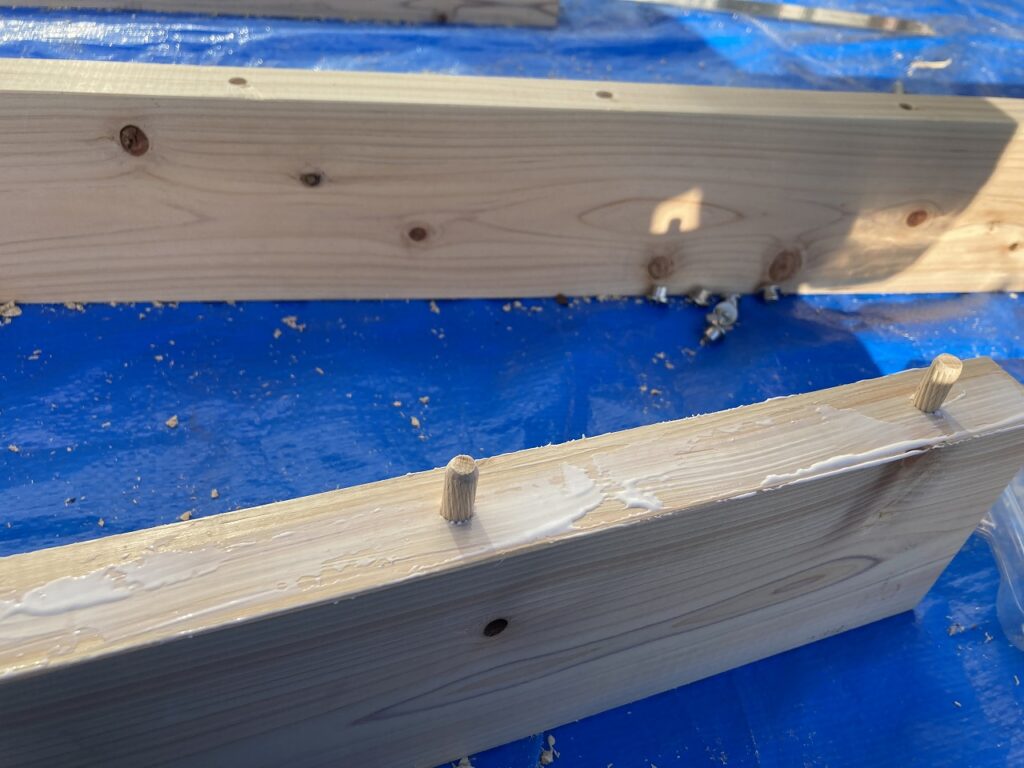
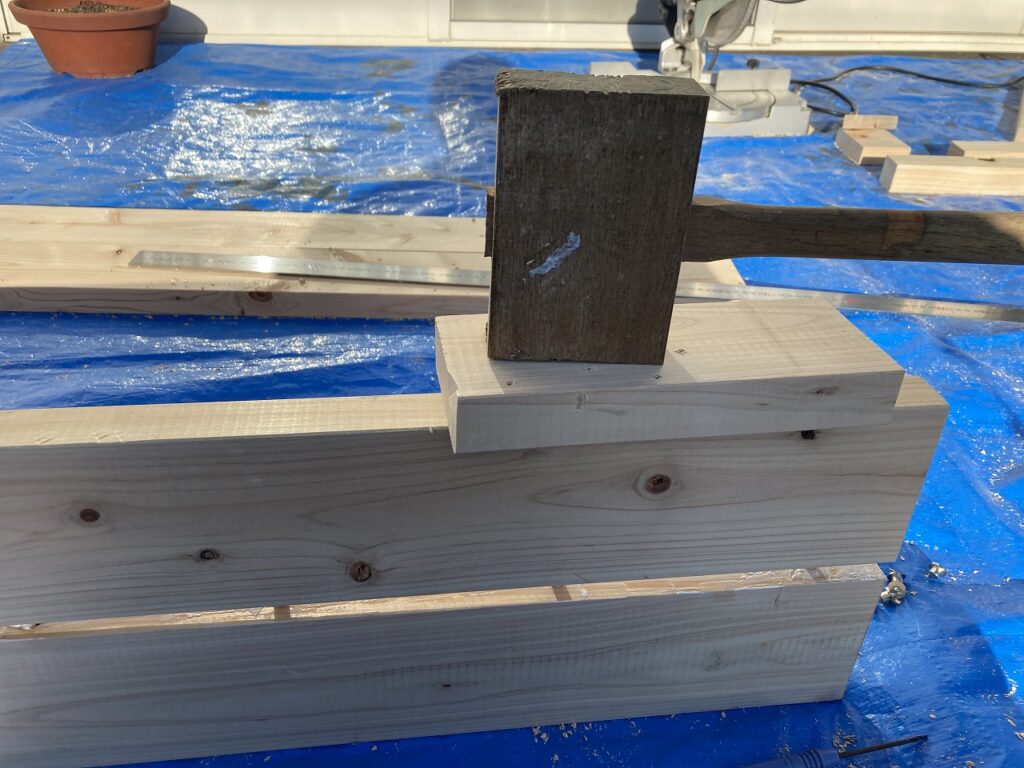
一方にダボを差し込み、もう一方の穴に合わせてはめ込んでいきます。当て木をして、木槌でたたきながら少しずつはめ込んでいきます。一枚の天板になるように、4枚の板を3回ダボ継ぎします。
![](https://kantan-diy.com/wp-content/uploads/2021/01/IMG_4548-1024x768.jpg)
![](https://kantan-diy.com/wp-content/uploads/2021/01/IMG_4550-1024x768.jpg)
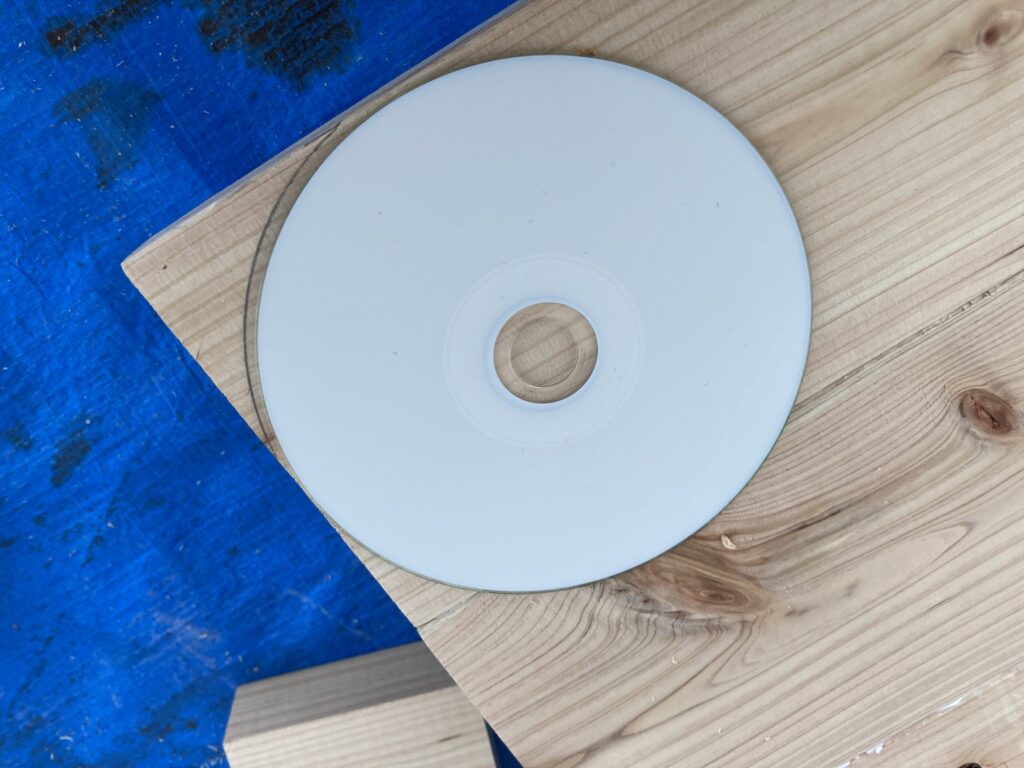
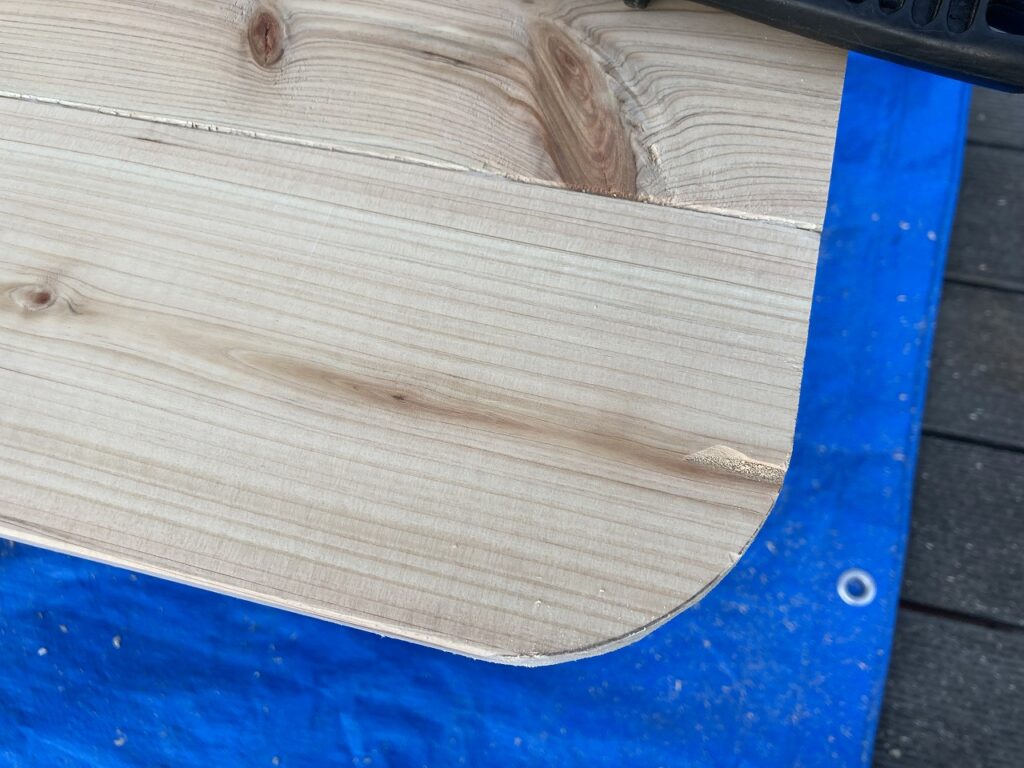
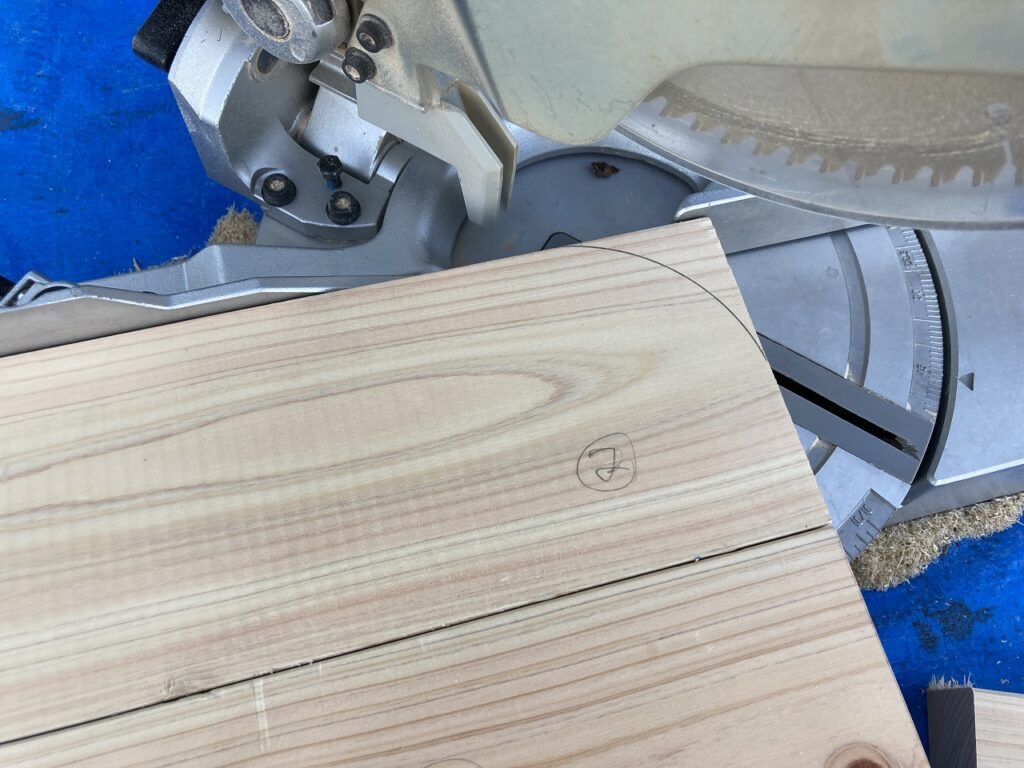
子供用のテーブルであるので、天板の角は落として丸くします。CDがちょうどいい大きさだったので定規代わりに使います。墨線に沿って丸ノコで角度切りしていきます。残りの角をヤスリで削り丸くします。
![](https://kantan-diy.com/wp-content/uploads/2023/10/2ad48983665f3e6db39ac8a6e8c383b3-1024x641.jpg)
![](https://kantan-diy.com/wp-content/uploads/2021/01/IMG_4547-1024x768.jpg)
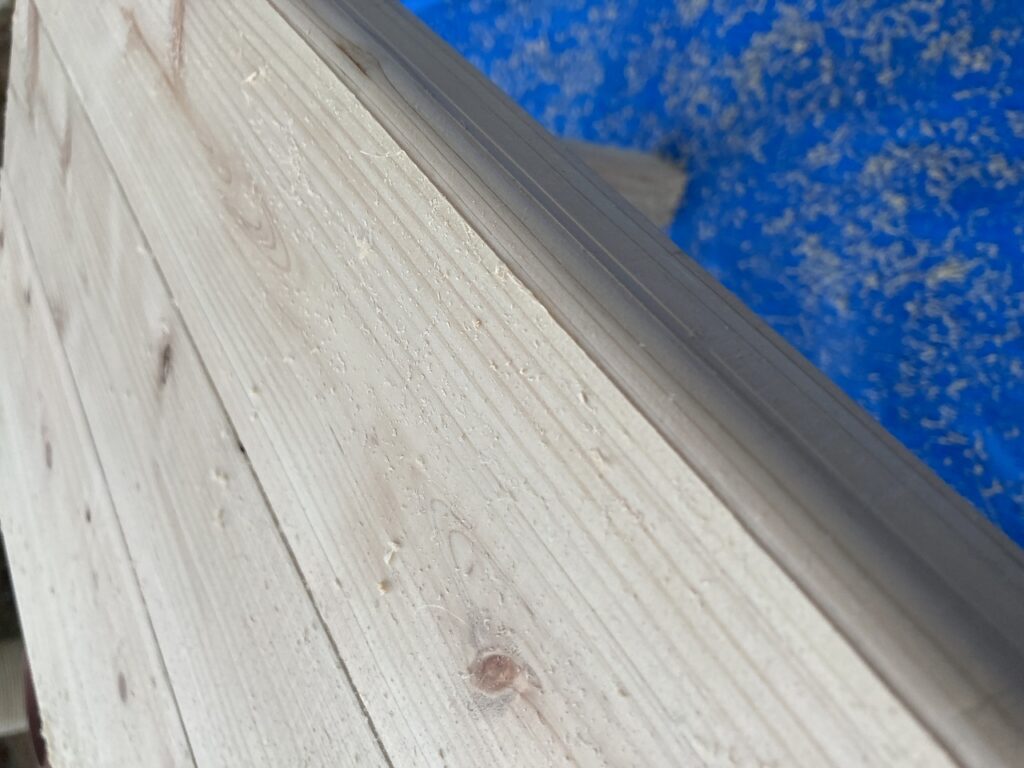
ルーターにボーズビットを付けて天板の角を全て丸く削ります。
![](https://kantan-diy.com/wp-content/uploads/2021/01/IMG_4551-1024x768.jpg)
![](https://kantan-diy.com/wp-content/uploads/2021/01/IMG_4555-1024x768.jpg)
![](https://kantan-diy.com/wp-content/uploads/2021/01/IMG_4552-1024x768.jpg)
仮組み付け
脚に天板を載せてみて、全体像を確認します。また、ベンチや椅子の出し入れがスムーズにできるかを確認します。座ってみて、テーブル高さが適切かもチェックします。
![](https://kantan-diy.com/wp-content/uploads/2021/01/IMG_4554-1024x768.jpg)
![](https://kantan-diy.com/wp-content/uploads/2021/01/IMG_4553-1024x768.jpg)
仕上げ方法検討
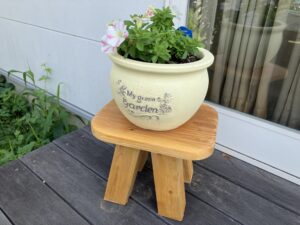
仕上げとして、どのようにするかを考えましたが、やはり、いすやベンチと同様に焼きを入れて浮造り加工に決めました。全体の統一感は重要ですからね。
最終の仕上げとして、蜜蝋ワックスを塗って完成させます。蜜蝋を塗る前に注意することは、浮造り加工時の磨き不十分だと、体や服に炭が移って汚れています。十分な磨きを入れてから、ワックス仕上げをしましょう。
焼き入れや浮造り加工は天板と脚が分かれていた方が作業しやすいので、分離させて作業します。
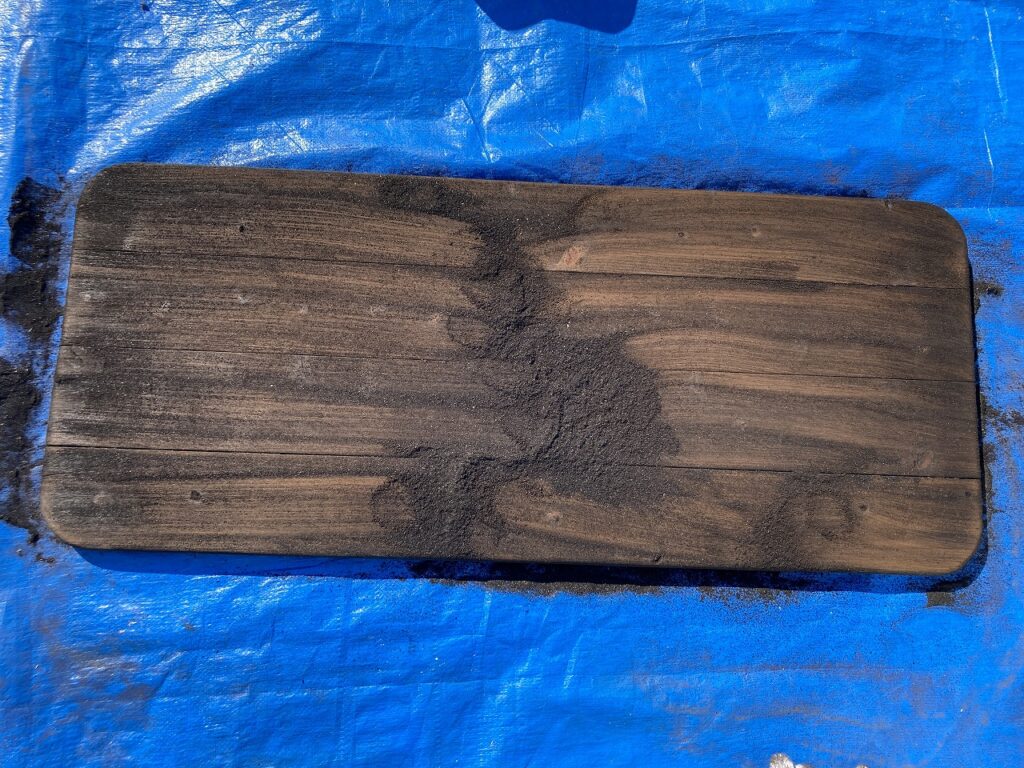
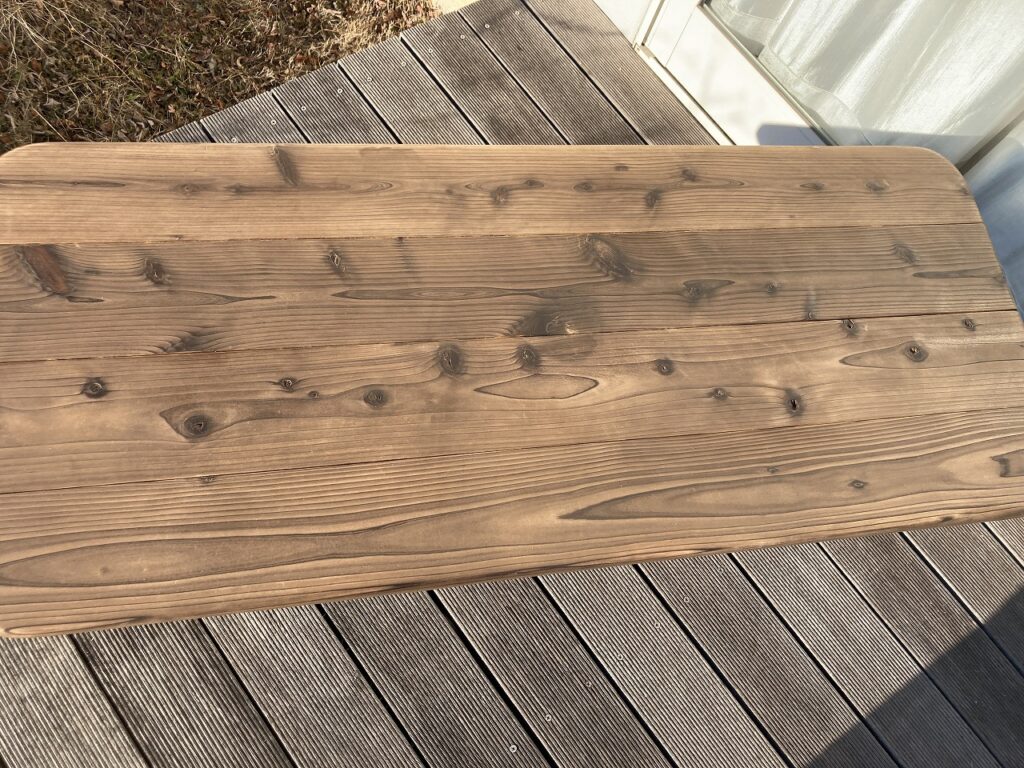
浮造り加工
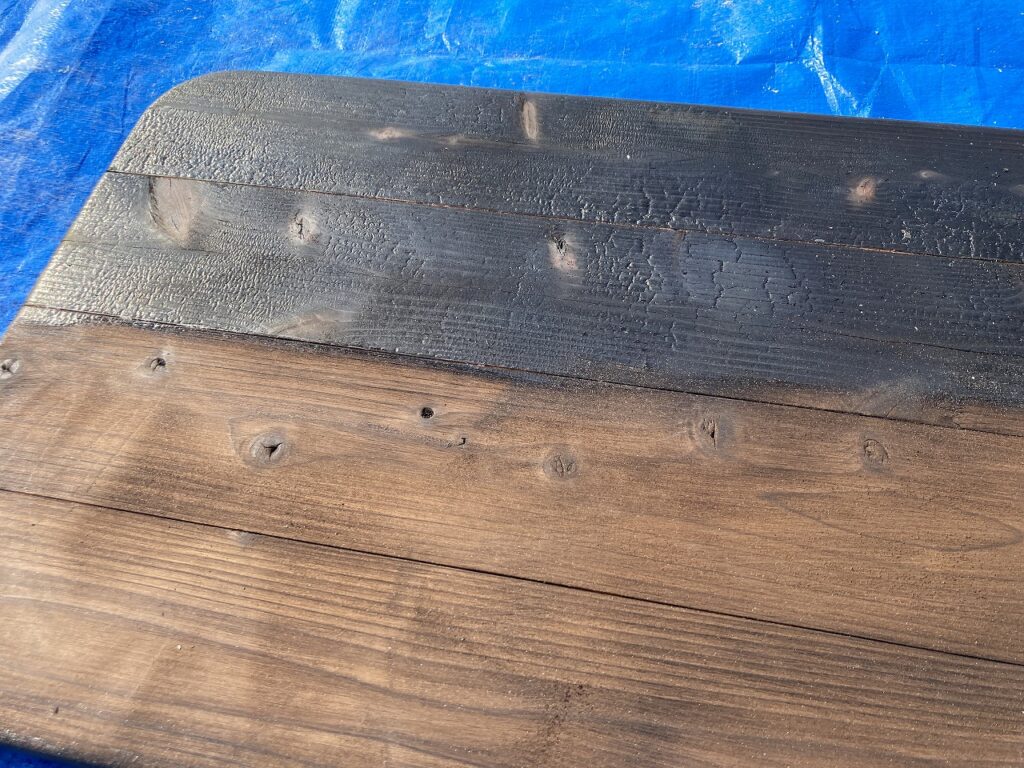
バーナーで天板を炙ります。うろこ状に表面にひび割れができるまで焼きます。焼きを入れる時の注意ですが、一点を集中して炙ると割れが発生しやすいので、全体をまんべんなくあぶります。
ゆっくりと全体の温度を上げることで、少しずつ焦がしていきます。炙りが完了したら、ワイヤーブラシでそぎ落としていきます。ワイヤーブラシは硬いものから柔らかいものへと変えていきます。
![](https://kantan-diy.com/wp-content/uploads/2021/02/IMG_4587-1024x768.jpg)
![](https://kantan-diy.com/wp-content/uploads/2021/02/IMG_4588-1024x768.jpg)
![](https://kantan-diy.com/wp-content/uploads/2021/02/IMG_4589-1024x768.jpg)
ブラシを変えながら削っていくと、木の硬い部分だけが残ります。節や木目が徐々にはっきりしていくようになります。
![](https://kantan-diy.com/wp-content/uploads/2021/02/IMG_4590-1024x768.jpg)
![](https://kantan-diy.com/wp-content/uploads/2021/02/IMG_4592-1024x768.jpg)
![](https://kantan-diy.com/wp-content/uploads/2021/02/IMG_4594-1024x768.jpg)
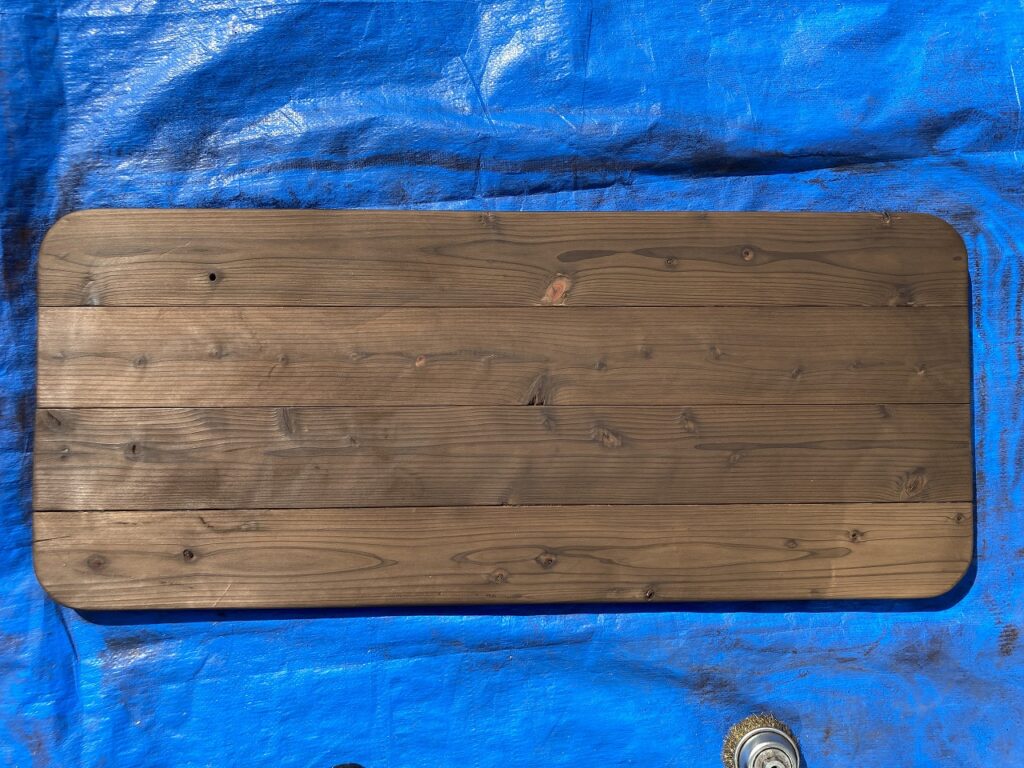
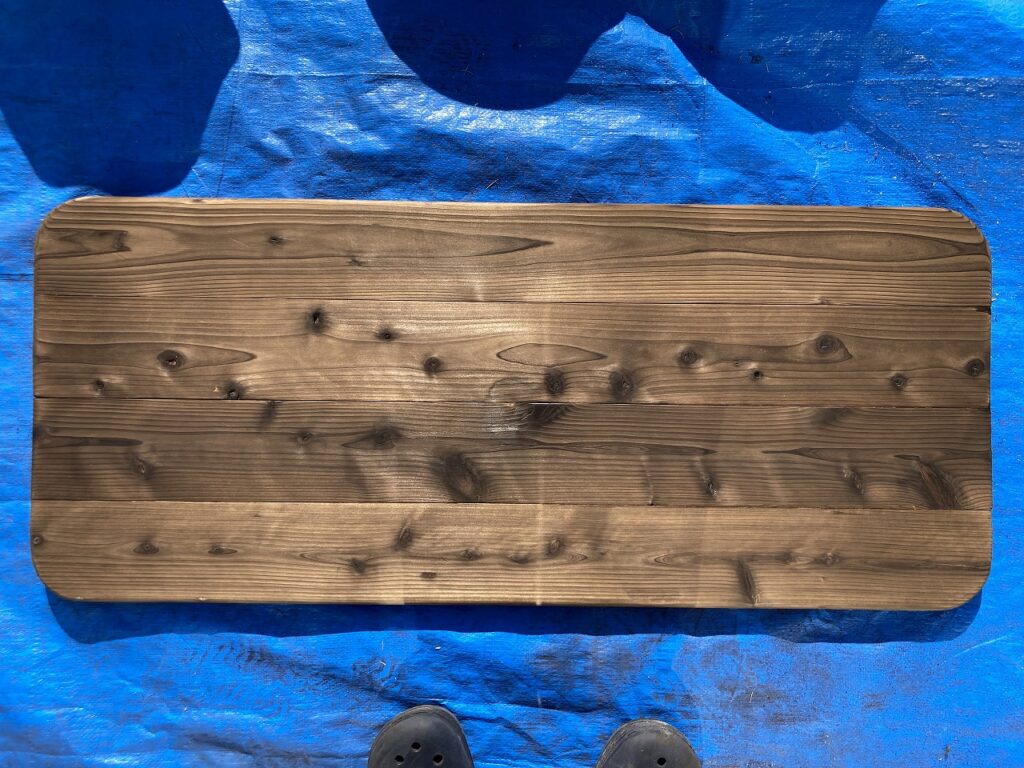
節の部分は非常に硬いので、焼きをいれても削れることはありません。浮造りは、触るとデコボコしていて、アンティーク調な雰囲気を出せます。何度も削っていきますが、すすが手につかなくなるまでは根気のいる作業となります。
![](https://kantan-diy.com/wp-content/uploads/2021/02/IMG_4582-1024x768.jpg)
![](https://kantan-diy.com/wp-content/uploads/2021/02/IMG_4584-1024x768.jpg)
![](https://kantan-diy.com/wp-content/uploads/2021/02/IMG_4585-1024x768.jpg)
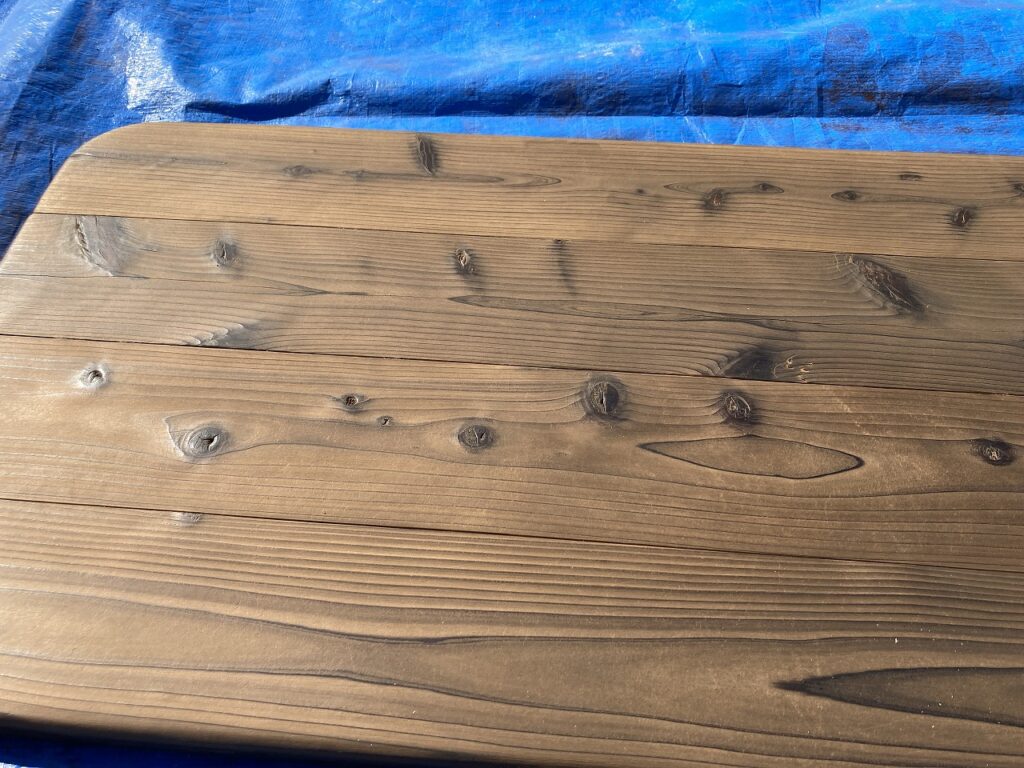
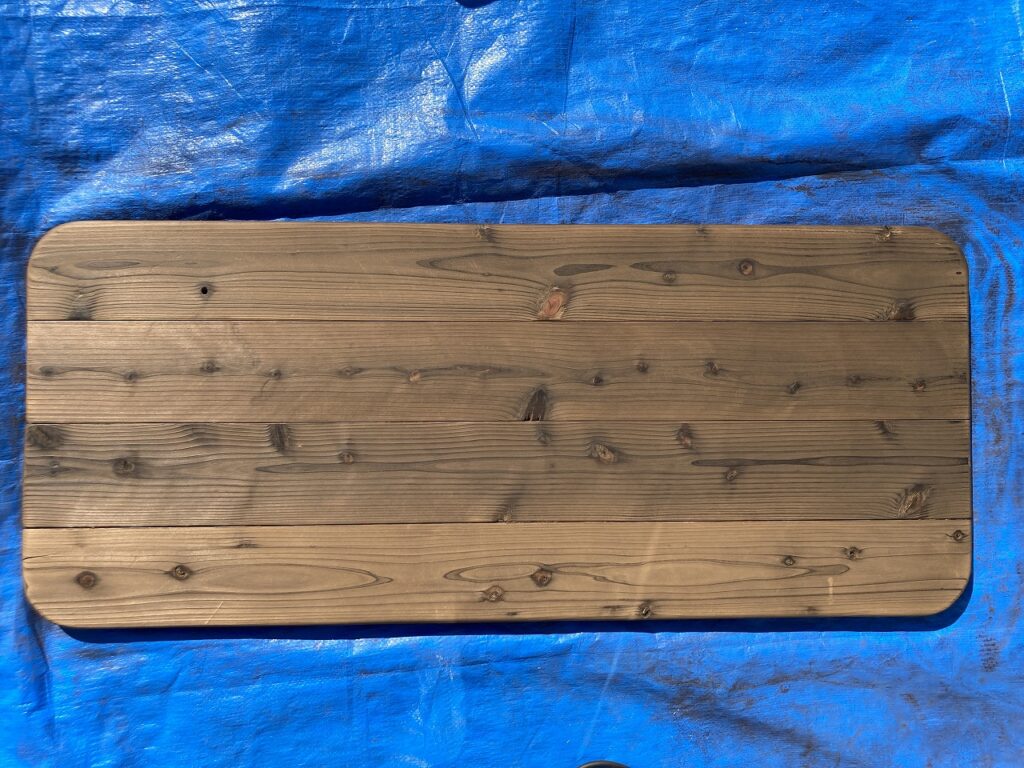
一通り、ブラシで磨きが完了したら、天板を水洗いします。水を使いながら、耐水ペーパーで番手を上げながら磨いていきます。写真の耐水ペーパーは100円ショップで入手でき、60番から1500番までの8種類がセットになっています。折角の浮造り加工で凹凸ができているので、あまり荒い番手で磨かないようにしましょう。400番から始めれば十分です。
![](https://kantan-diy.com/wp-content/uploads/2021/02/IMG_4567-1024x768.jpg)
![](https://kantan-diy.com/wp-content/uploads/2021/02/IMG_4610-1024x768.jpg)
組み付け
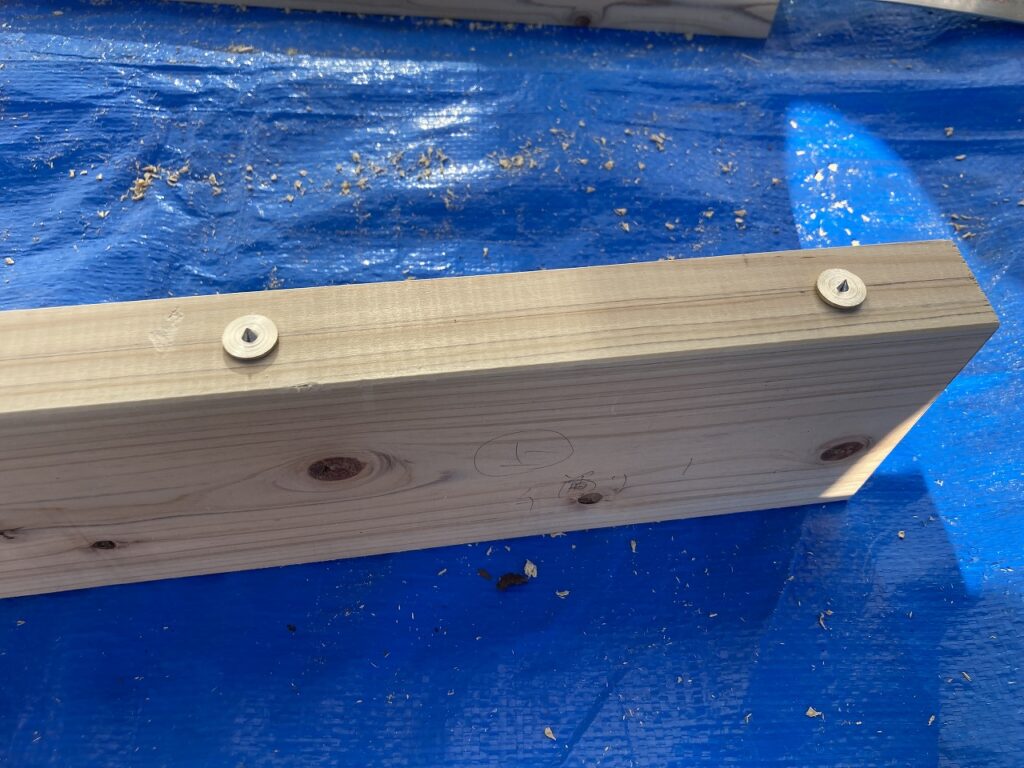
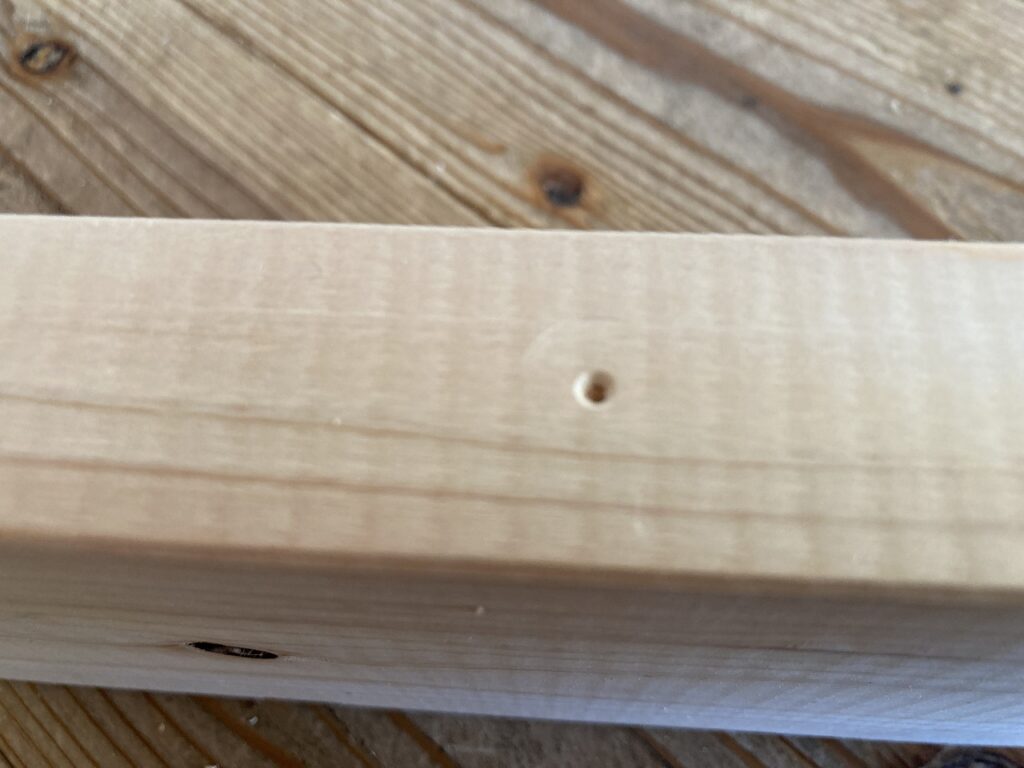
天板と脚はダボで接続します。ダボマーカーで天板にダボの位置を写します。木工用ボンドを使って、ダボで天板と脚を接続します。
![](https://kantan-diy.com/wp-content/uploads/2021/02/IMG_4595-1024x768.jpg)
![](https://kantan-diy.com/wp-content/uploads/2021/02/IMG_4596-1024x768.jpg)
![](https://kantan-diy.com/wp-content/uploads/2021/02/IMG_4597-1024x768.jpg)
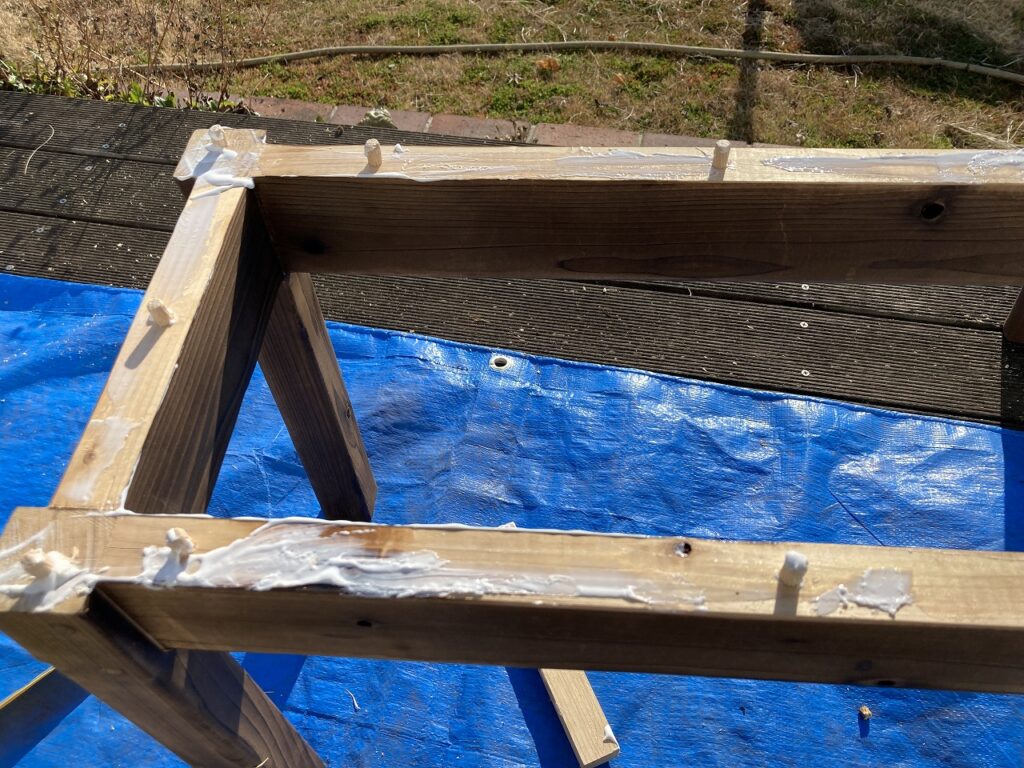
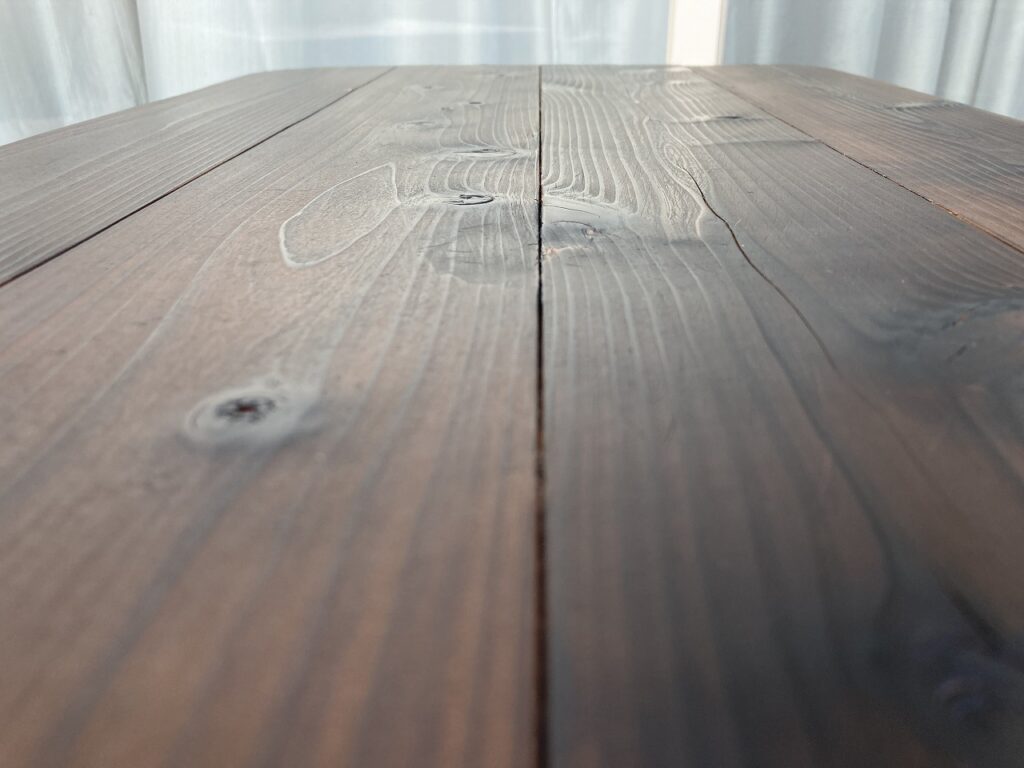
天板と接続したら、蜜蝋ワックスを塗って完成です。
![](https://kantan-diy.com/wp-content/uploads/2021/02/IMG_4604-1024x768.jpg)
![](https://kantan-diy.com/wp-content/uploads/2021/02/IMG_4603-1024x768.jpg)
![](https://kantan-diy.com/wp-content/uploads/2021/02/IMG_4602-1024x768.jpg)
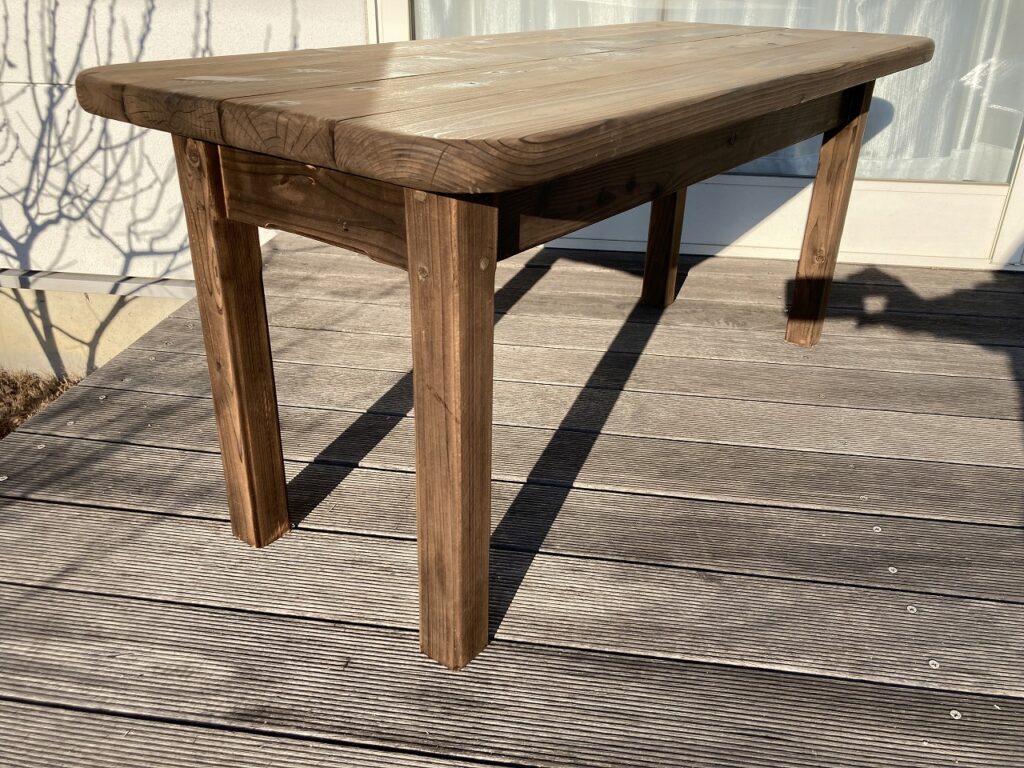
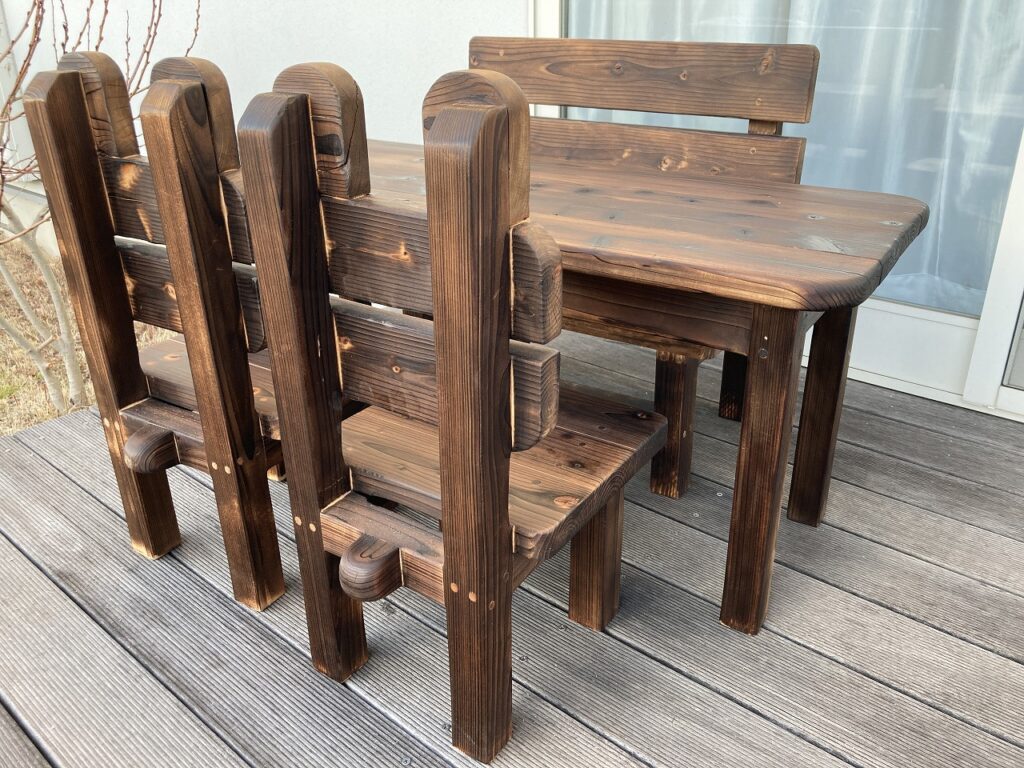
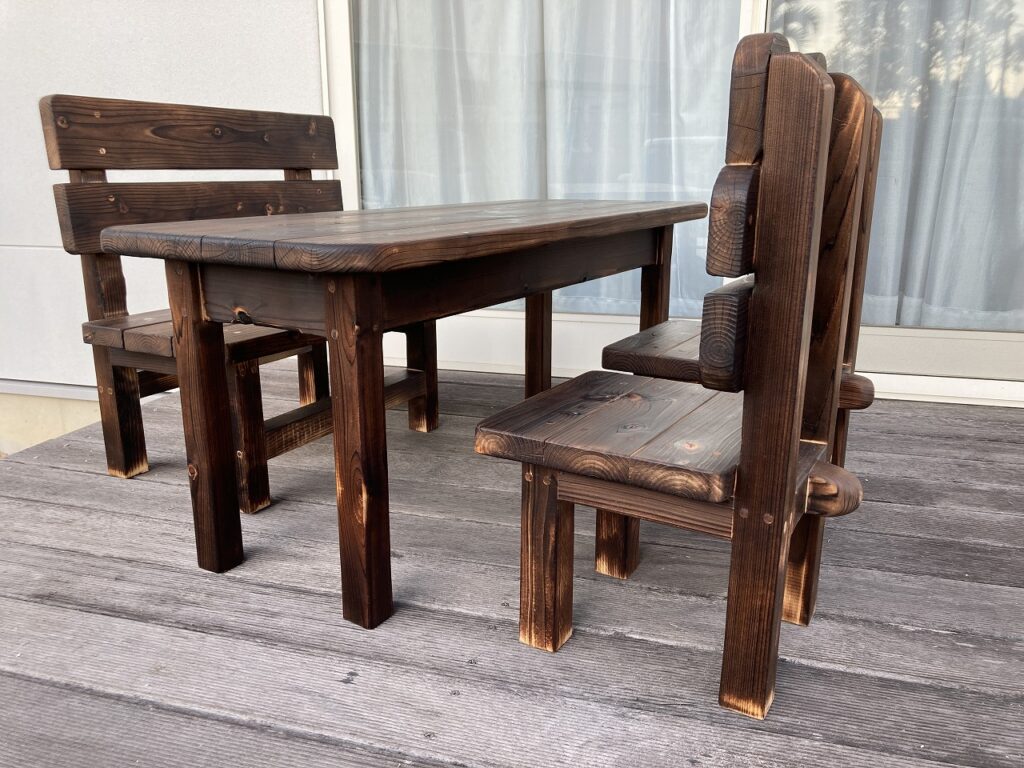
今まで作ってきたベンチ、椅子と組み合わせて、子供用のダイニングセットが完成しました。
![](https://kantan-diy.com/wp-content/uploads/2021/02/IMG_4607-1024x768.jpg)
![](https://kantan-diy.com/wp-content/uploads/2021/02/IMG_4606-1024x768.jpg)
![](https://kantan-diy.com/wp-content/uploads/2021/02/IMG_4608-1024x768.jpg)
嫁ぎ先
完成したものは、ちびっ子たちに使ってもらっています。
![](https://kantan-diy.com/wp-content/uploads/2023/07/IMG_7007-1024x768.jpg)
![](https://kantan-diy.com/wp-content/uploads/2023/07/BBEAEAA4-F1DC-4DA4-8C7C-31A982EDC215-1024x773.jpg)
反省点
デザイン
今回、出来上がったものを見てみると、テーブルの幅が広かったと思いました。子供用のテーブルは、「かわいさ」も重要となりますが、細長いことによってかわいさが減っているように思います。
椅子を2脚、テーブルの脚の間に余裕を持って納まるようにしましたが、もう少し詰めるべきでした。15㎝幅を詰めてもいいので、天板は85㎝にすると全体のおさまりが良くなったと反省しています。
制作工程
制作当時は持っていなかかった各種工具を利用すれば、もっと効率よく作れたと思います。
ダボを使う際、ダボ用のドリルを使った方が穴の深さを調整しやすいですね。
![](https://kantan-diy.com/wp-content/plugins/pochipp/assets/img/pochipp-logo-t1.png)
天板を複数枚継ぐなら、ジョイントカッターーが便利で確実です。
![](https://kantan-diy.com/wp-content/plugins/pochipp/assets/img/pochipp-logo-t1.png)
最後、磨きを入れるなら、手動よりもサンダーが便利ですね。アタッチメントとして、柔らかく磨くものもあります。
![](https://kantan-diy.com/wp-content/plugins/pochipp/assets/img/pochipp-logo-t1.png)
最後まで読んでいただきありがとうございました。
コメント