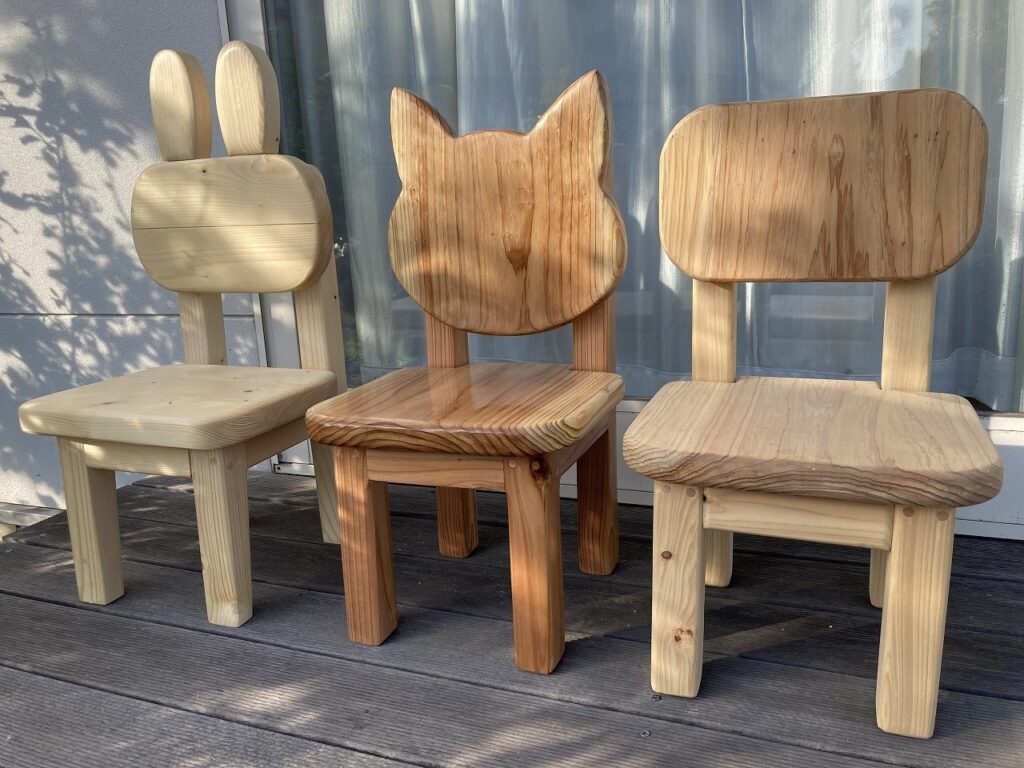
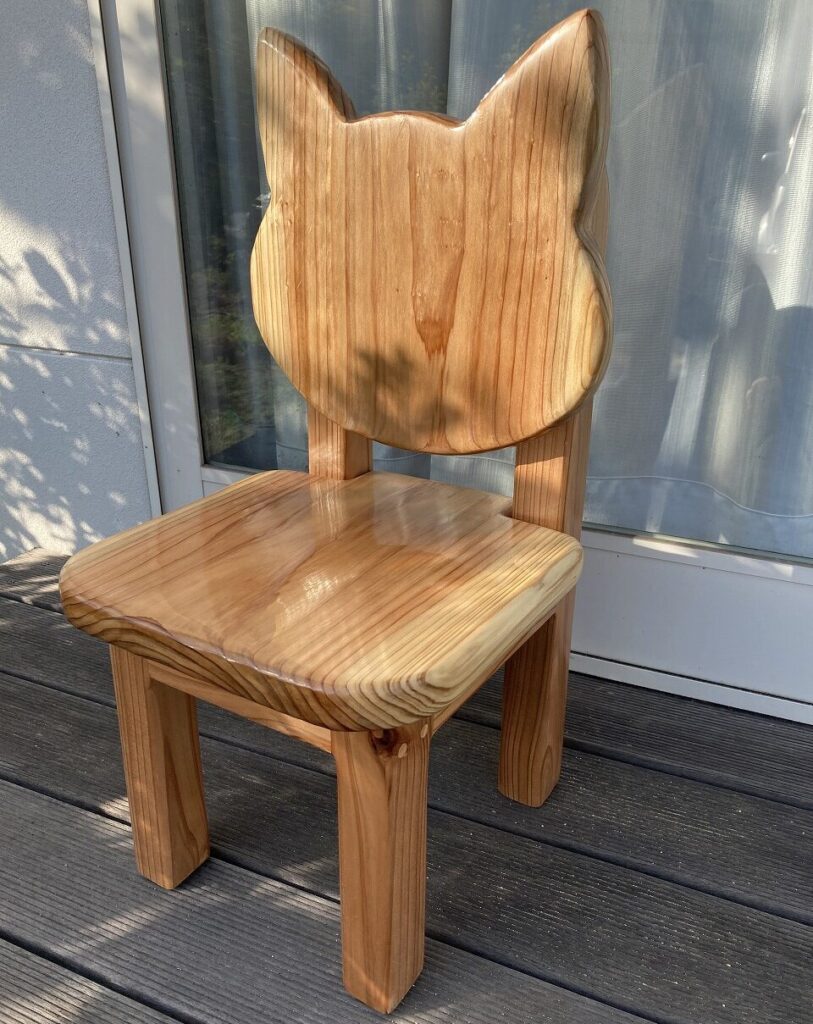
こんにちは、源です。子供用のネコのいすを作りました。
 げん
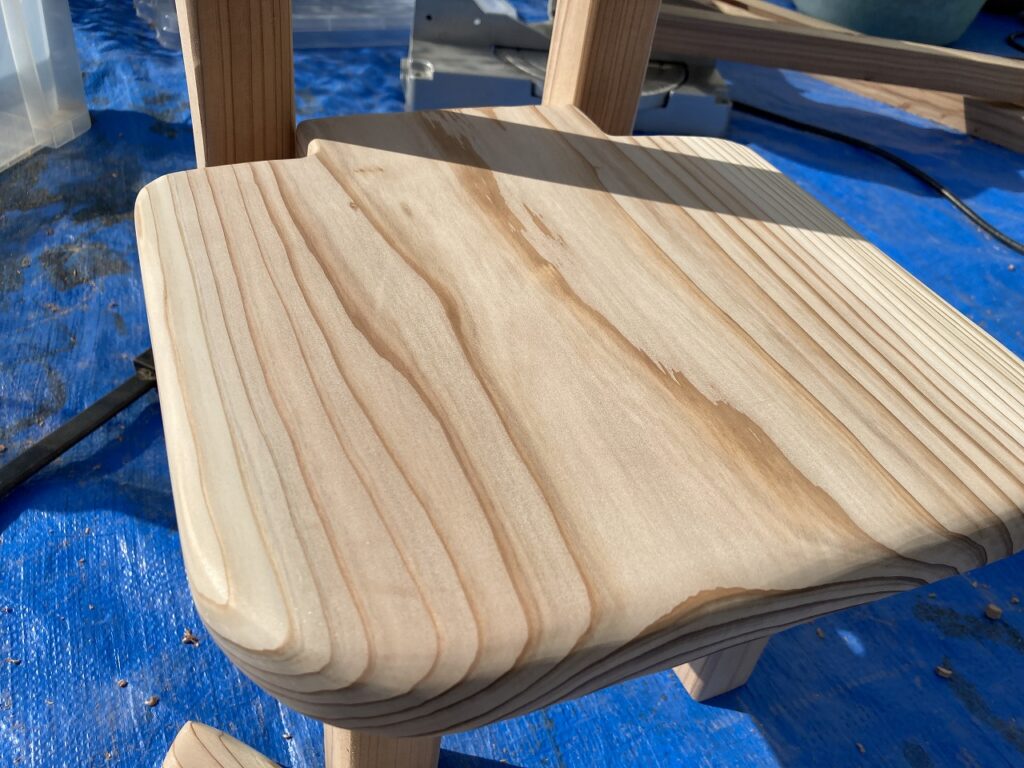
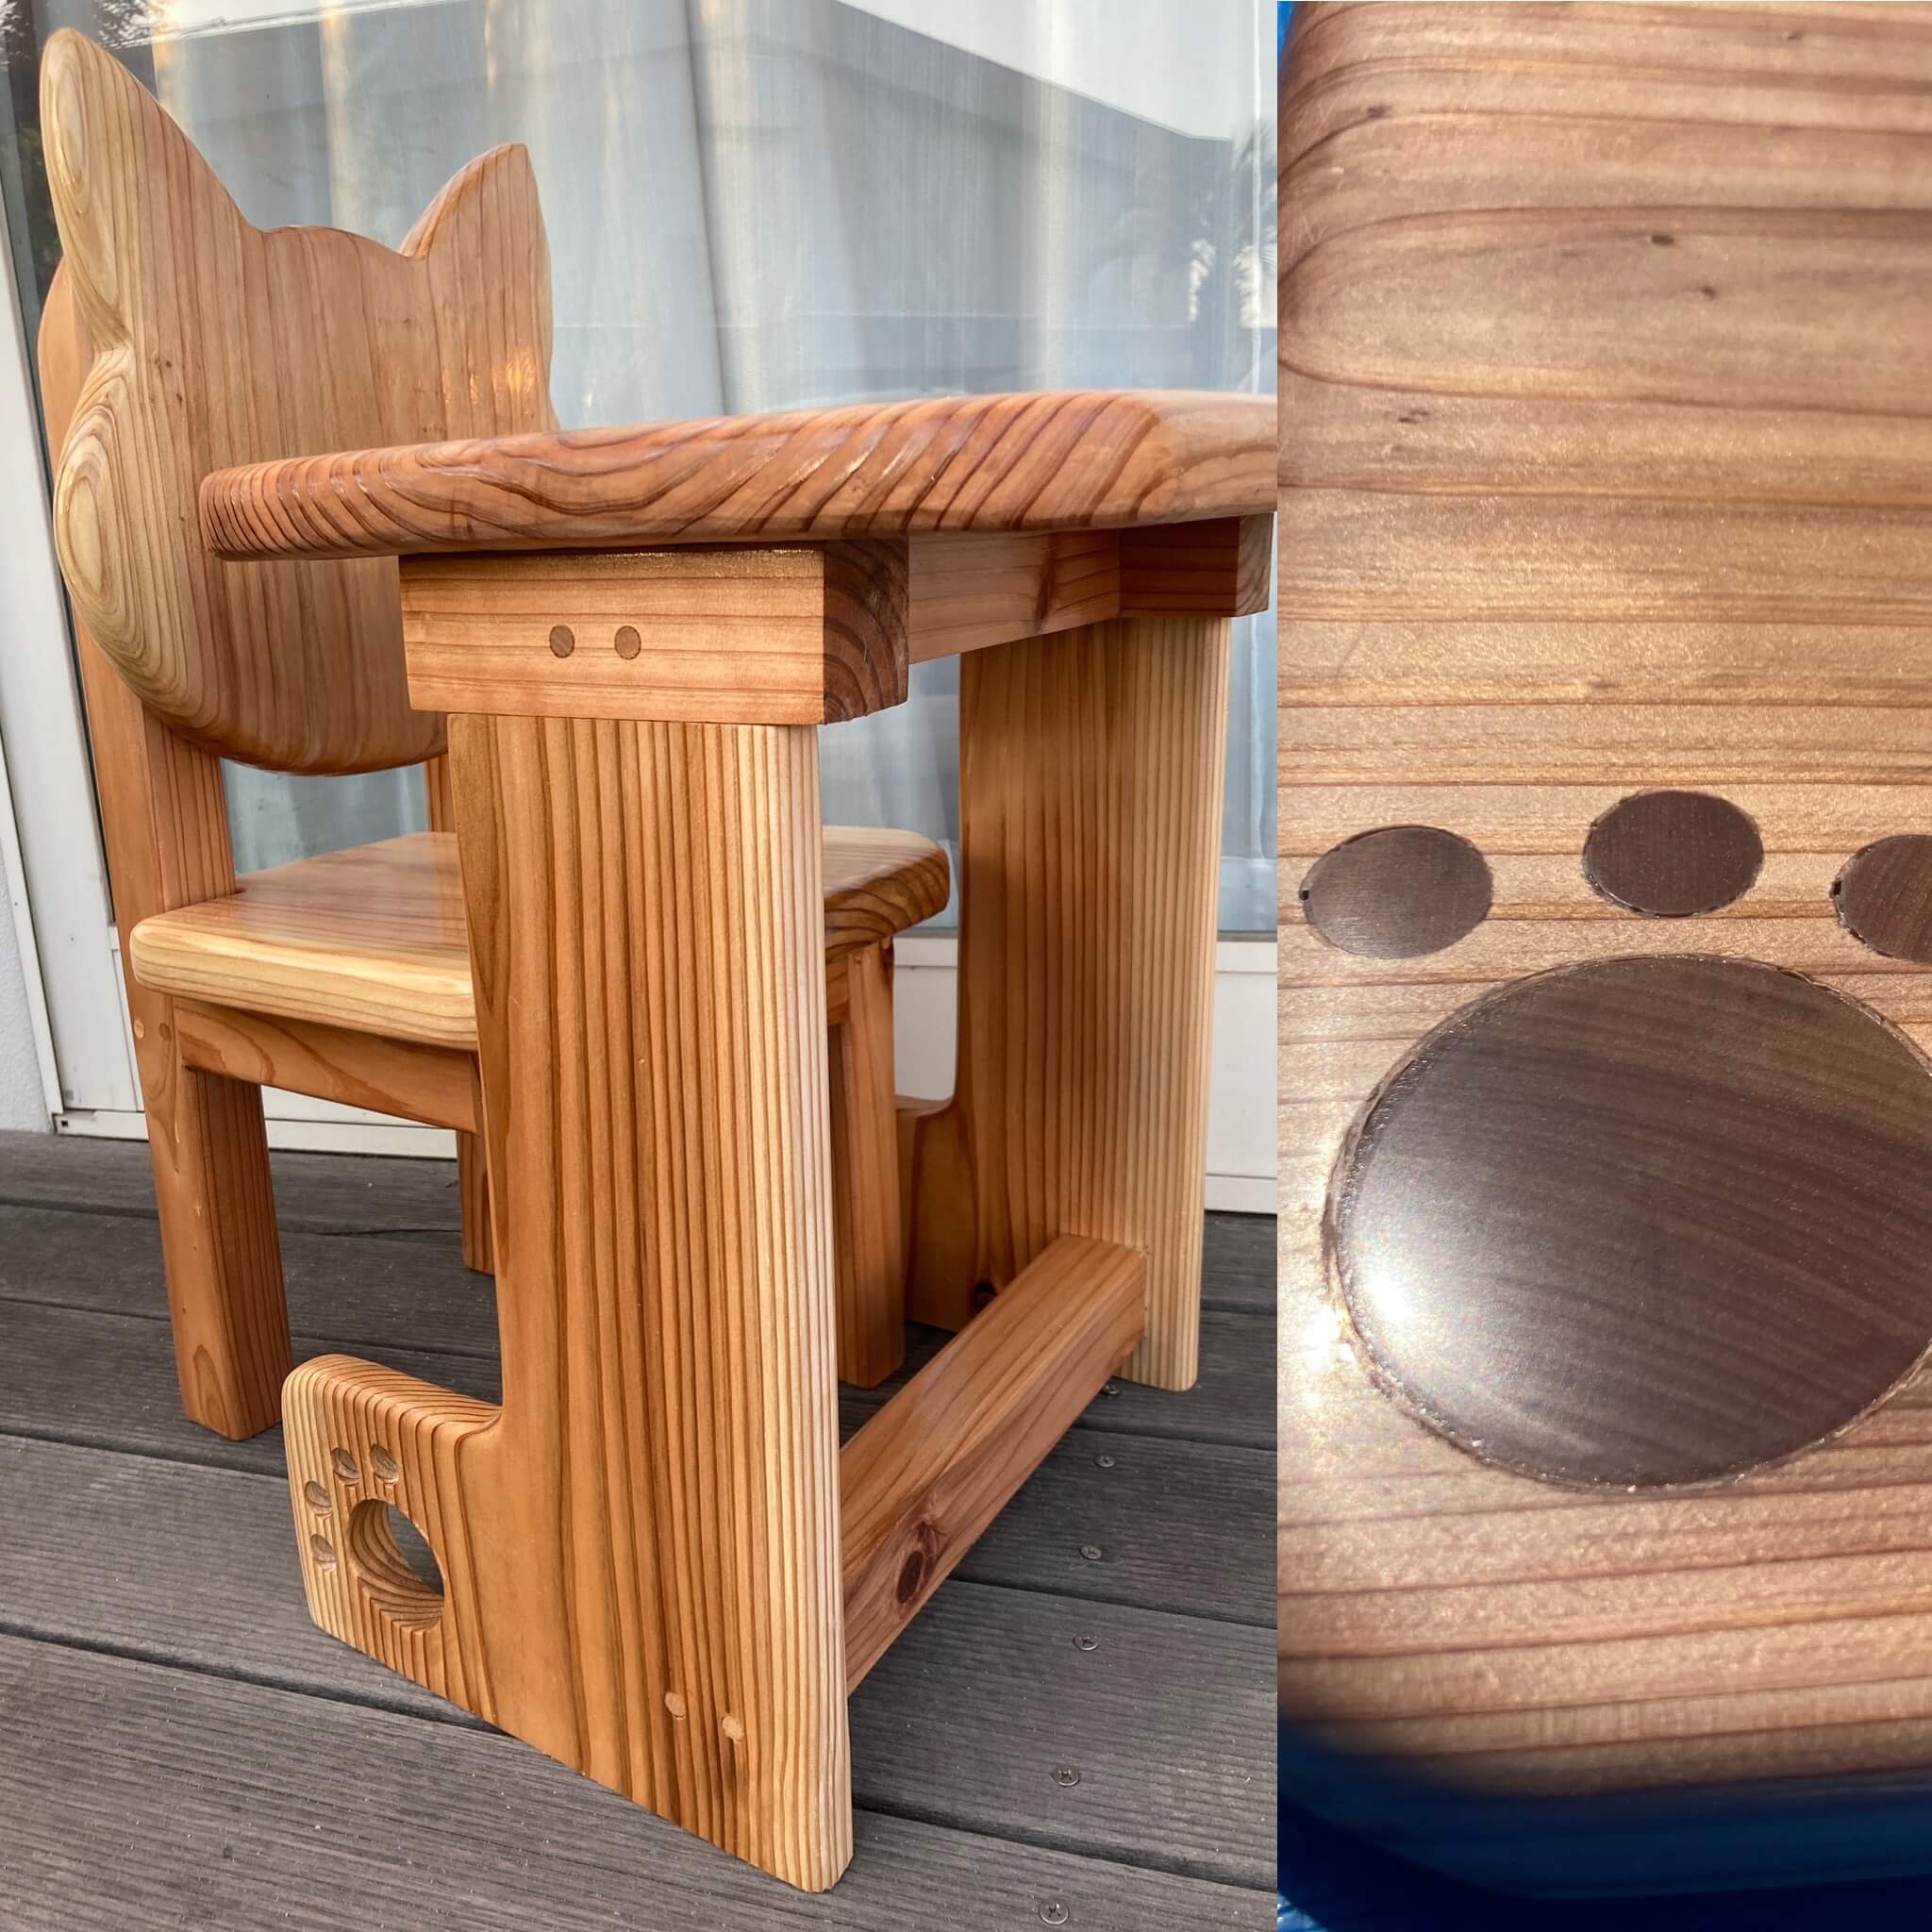
げん子供用のイスです。難易度(★★★☆☆)普通です。
以前、うさぎのいすを作り、知人の娘さんにプレゼントしました。次は猫を頼まれましたので、作ります。

今度は猫ちゃん作って
材料の紹介
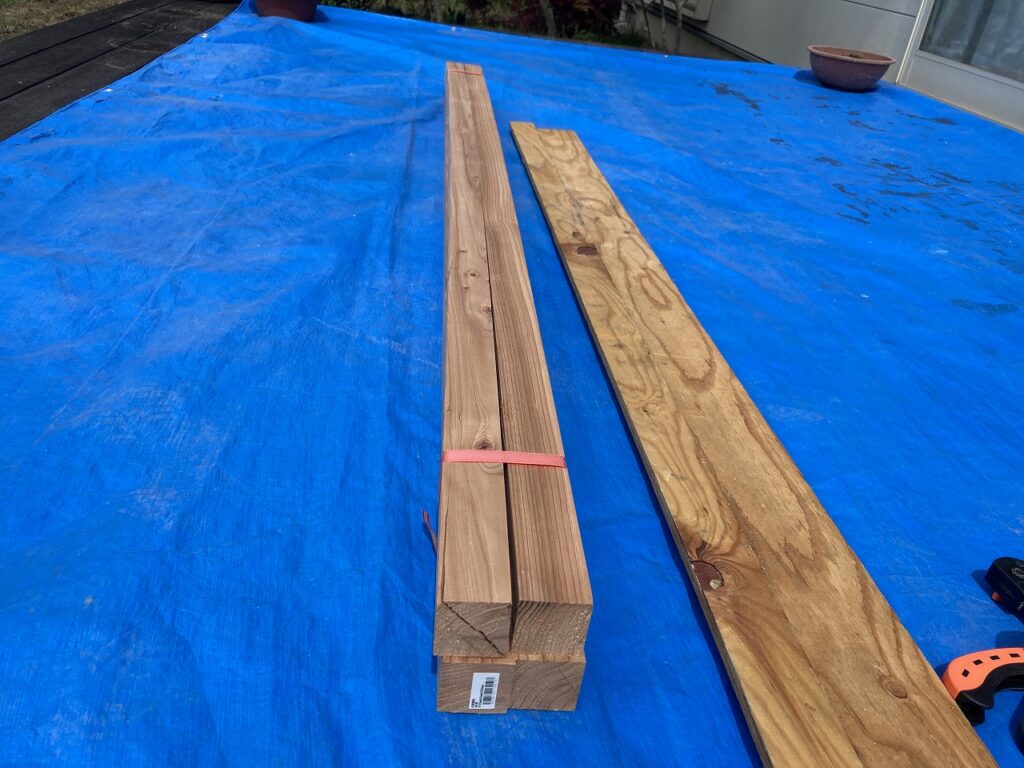
それでは作り方を説明していきます。まずは、材料です。今回は、杉で統一することにしました。
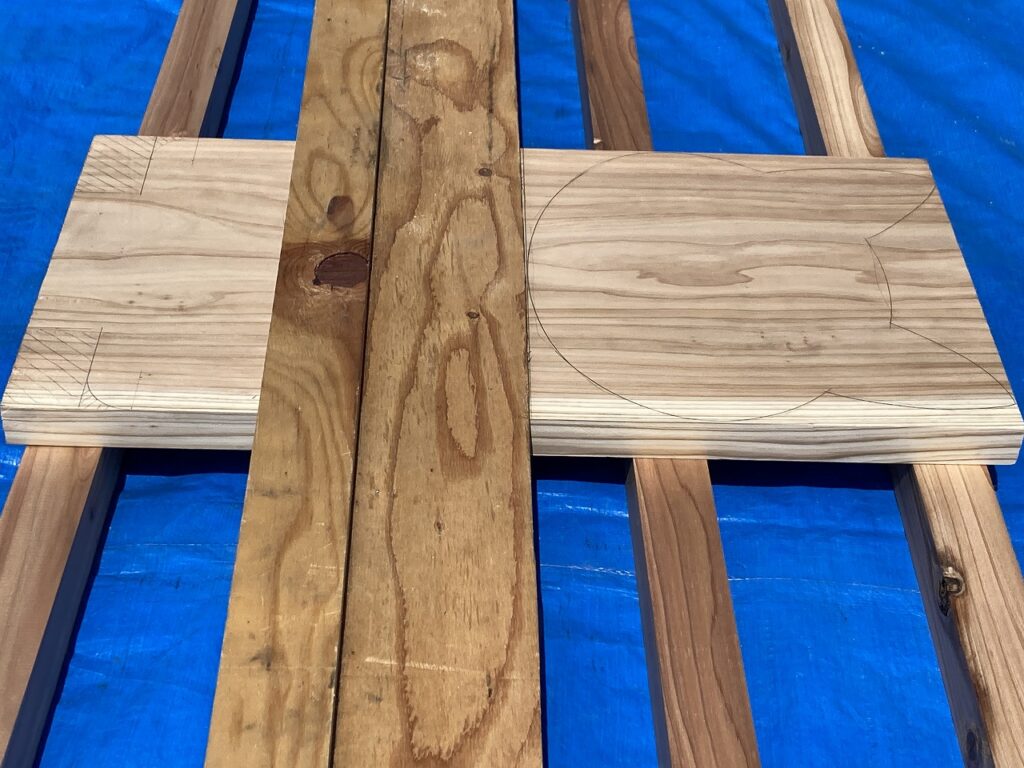
杉の垂木用「45㎜×45㎜×2,000㎜」4本組を枠組みに使います。座面と背板は300㎜×600㎜×30㎜の一枚板を使います。この一枚板はなかなか売っておらず、いつも行くホームセンターでも、違う支店でないと売っていません。なので、この板を買いに行くときは、ホームでないホームセンターに行きます。

デザイン
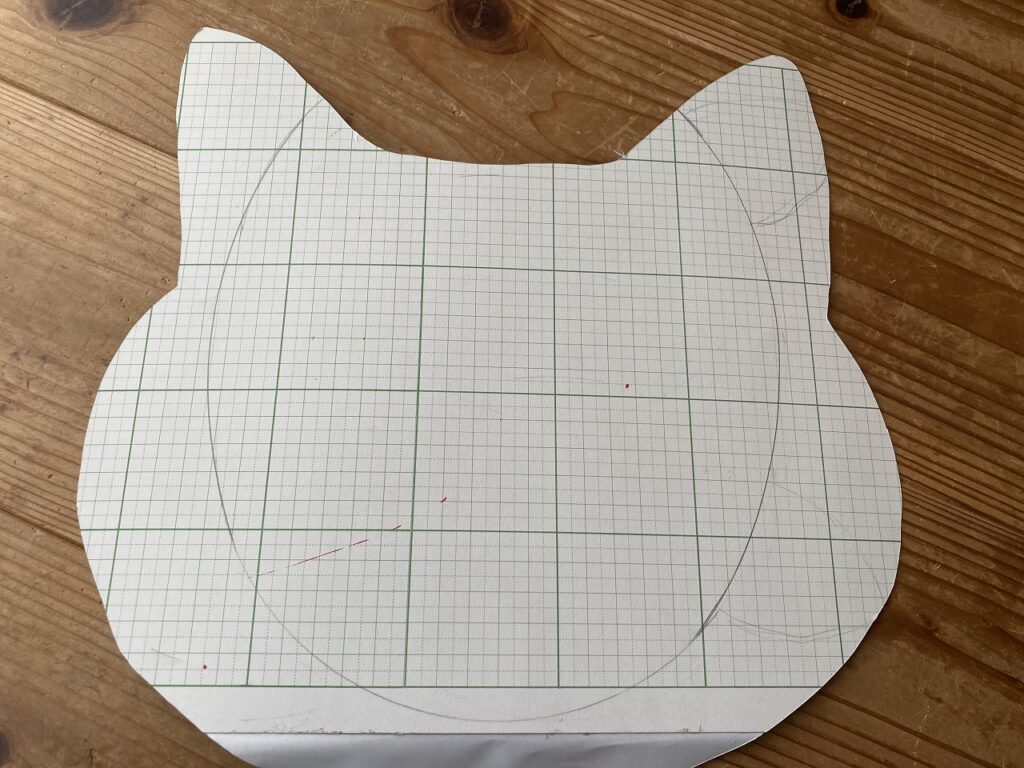
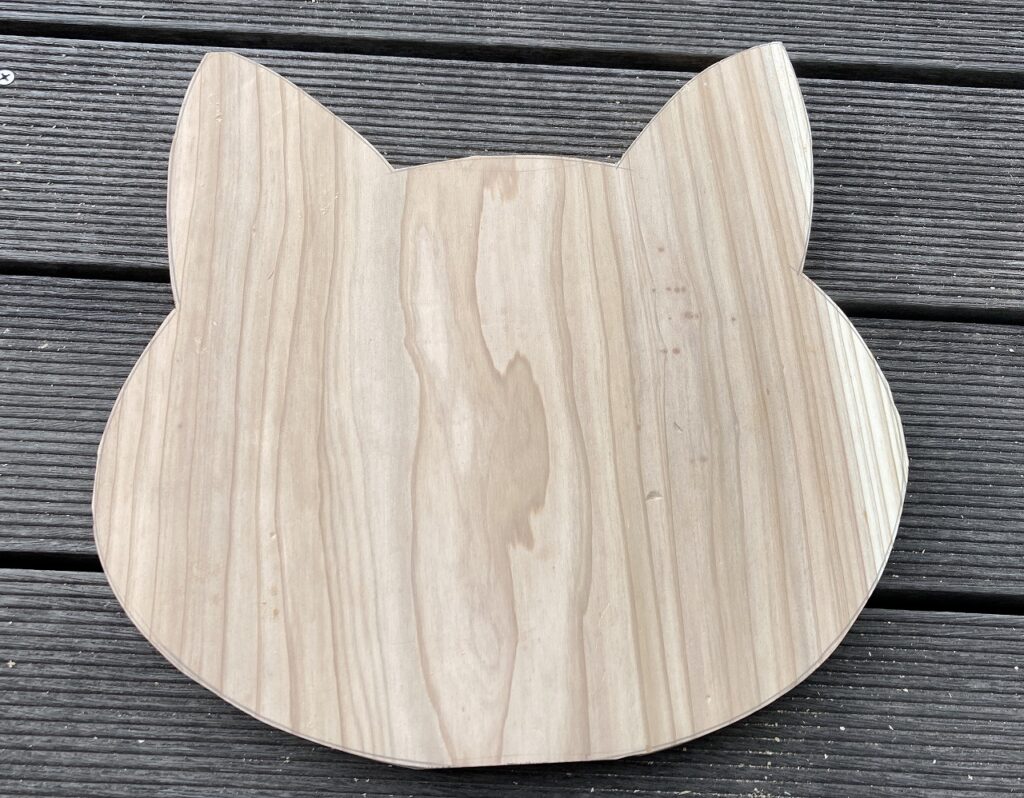
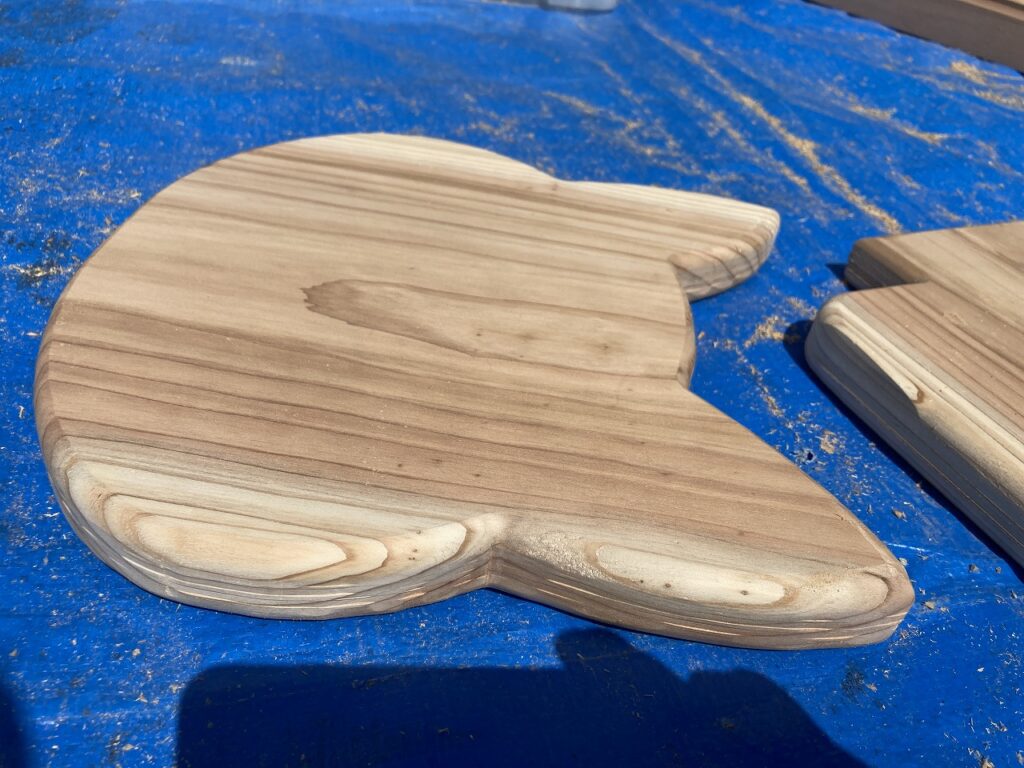
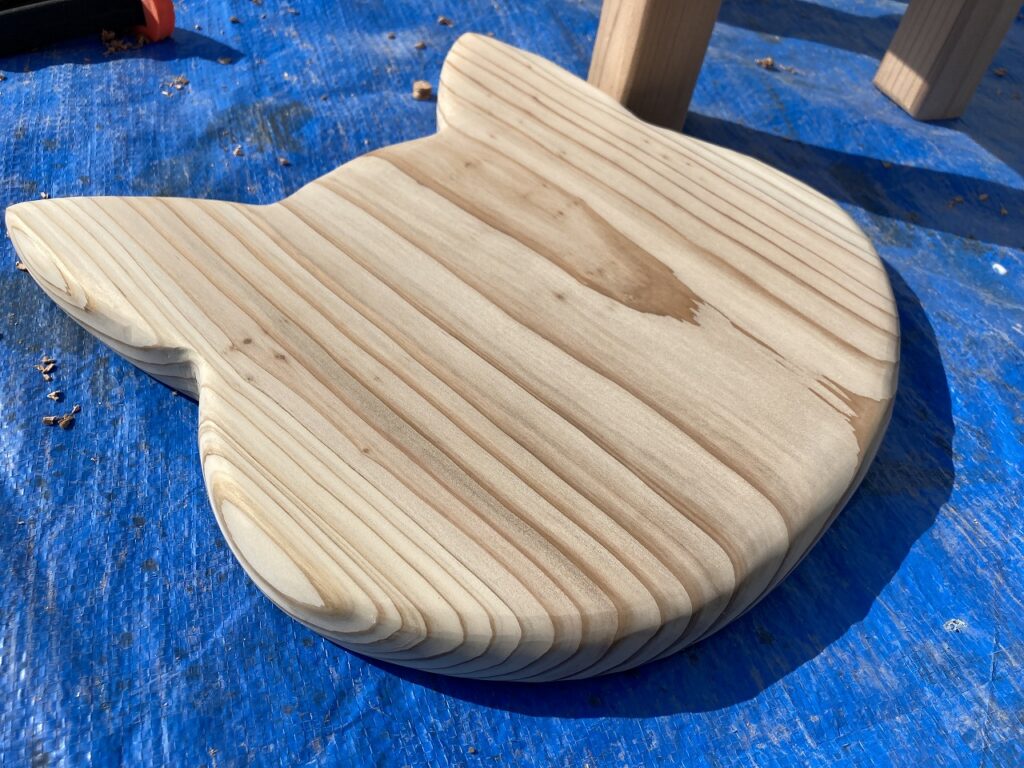
ネコのいすの最大のポイントは、やはり背板のデザインです。このデザインは、いきなり板に書いていくのではなく、厚紙で切り抜いて今まで作った椅子にあてがってみながら調整していきました。

つくり方
下書き
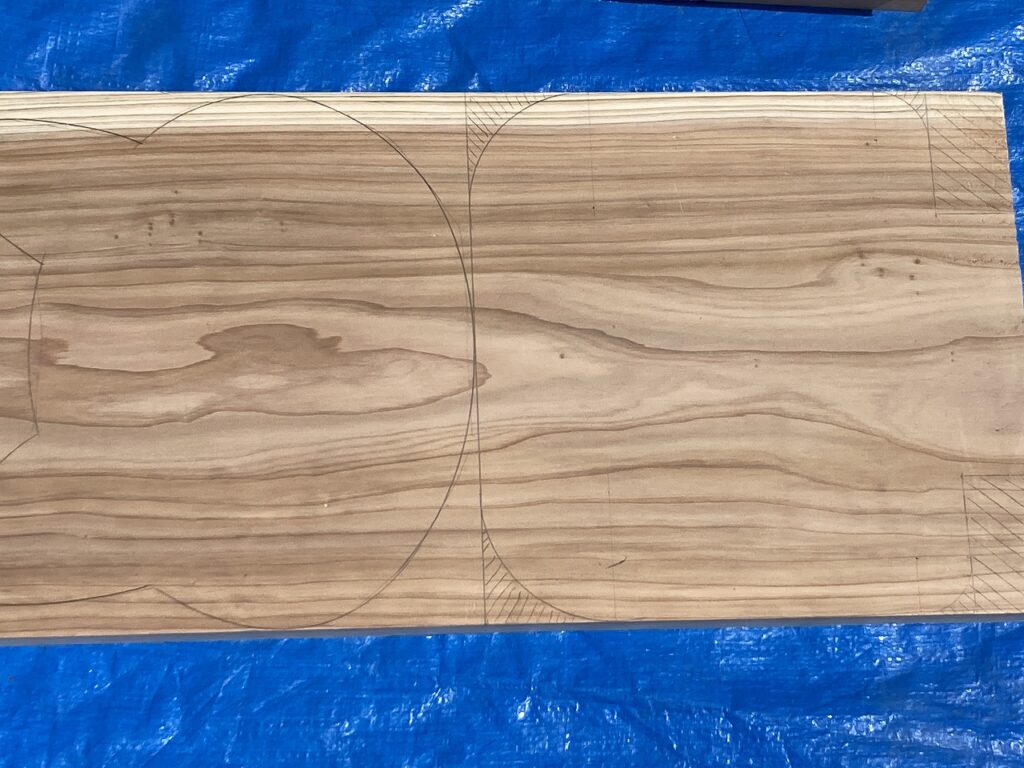
デザインがまとまったら、厚紙で作ったものを木に写します。その後、切り抜きやすいように曲線定規や雲形定規を使ってフォルムを調整します。


切り出し
ネコのフォルムを書き終わった時は、天気が悪かったので、すぐに切る作業には入りませんでした。次の休みの日に切ることとし、どのように切り進めようかと考えていました。
まずは、背板と座面の部分を切り分けます。30㎝を直線で切るため、丸ノコ用に作った治具を使います。
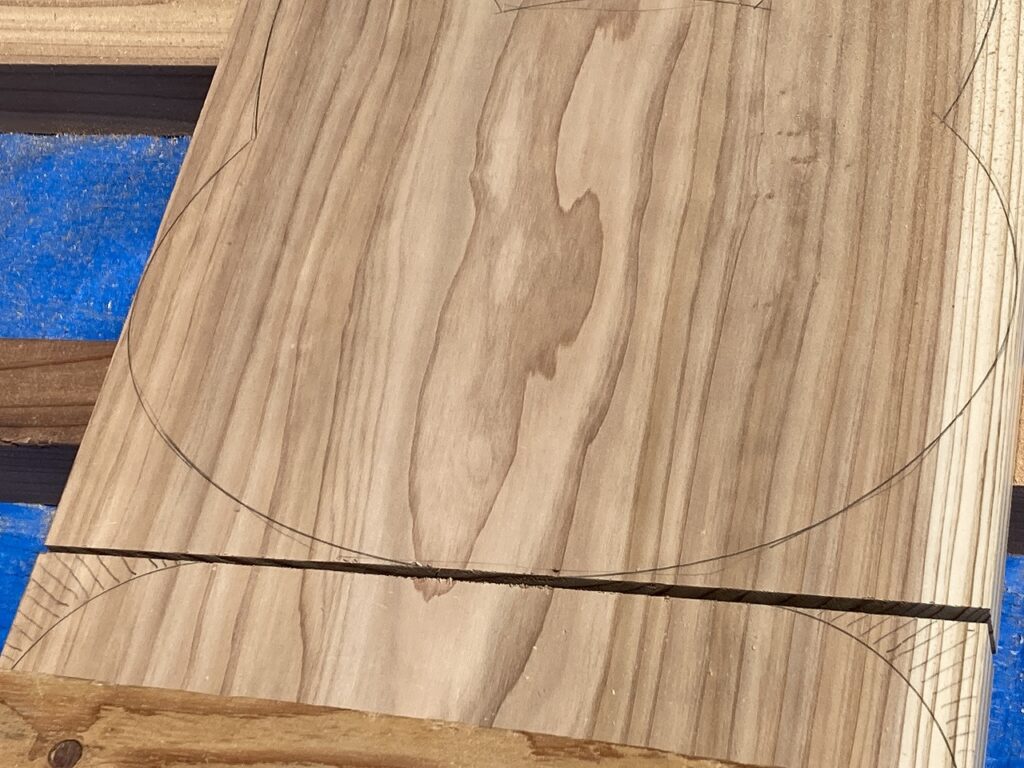
次にネコの顔を切り抜いていきます。結構複雑な曲線を切り抜くためには、手持ちの工具では難しいものばかりでした。とにかく、耳の部分を上手に切ろうと思うと、どうすればいいのかと悩みました。このような曲線を切ろうとする場合に、一番初めに思いつくのは「ジグソー」です。昔から存在は知っていましたが、なぜか手を出すことが無かった工具です。
結局、ジグソーを購入して切り抜いたわけなのですが、感想としては「もっと早くに買えばよかったー」です。とても便利で、精度よく切ることができました。ジグソーのすばらしさについては、いずれ別の記事で書こうと思っています。
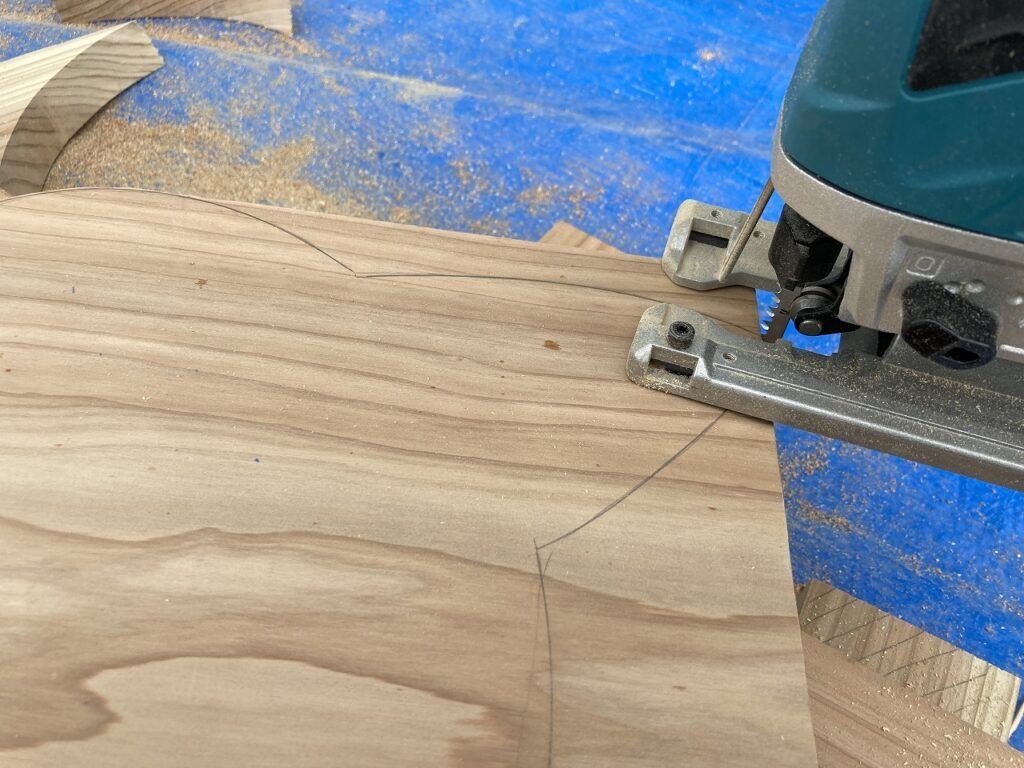
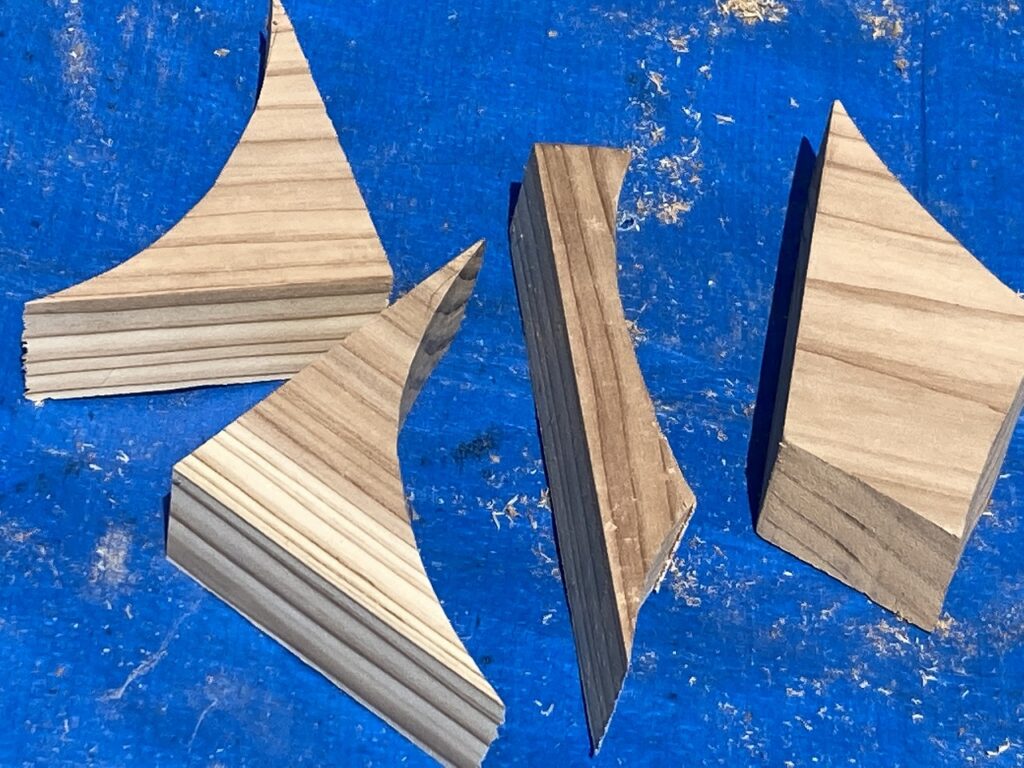
座面の部分の切り欠きについても、ジグソーを使えば簡単に切ることができました。今まで、細かな部分については手ノコで切っていましたが、はるかに速いスピードで精度高く切ることができます。
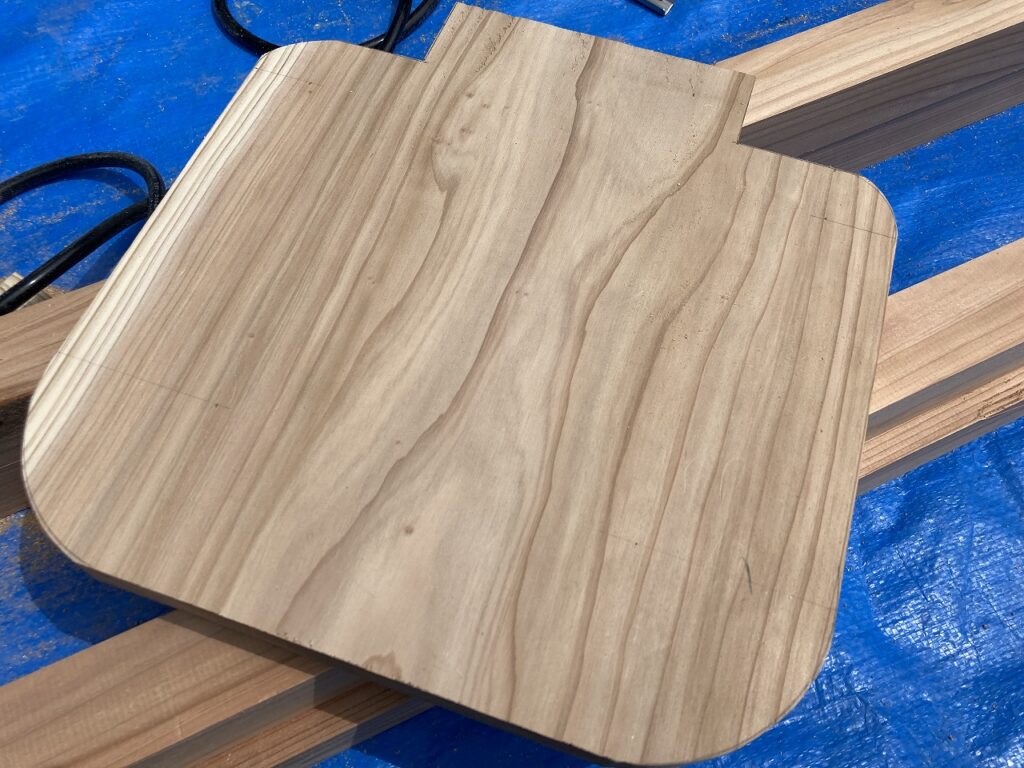
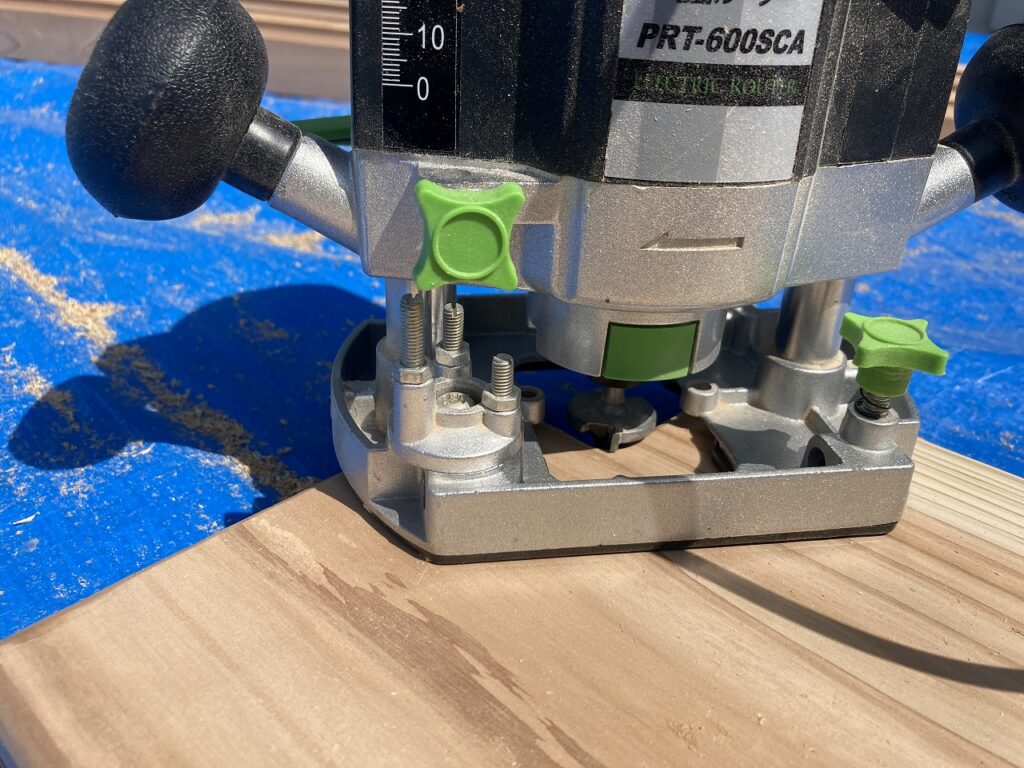
丸みつけ
次に、いす全体の丸みを出すために、ルーターで丸みを付けます。ビットはボーズビットを使います。


脚組み立て
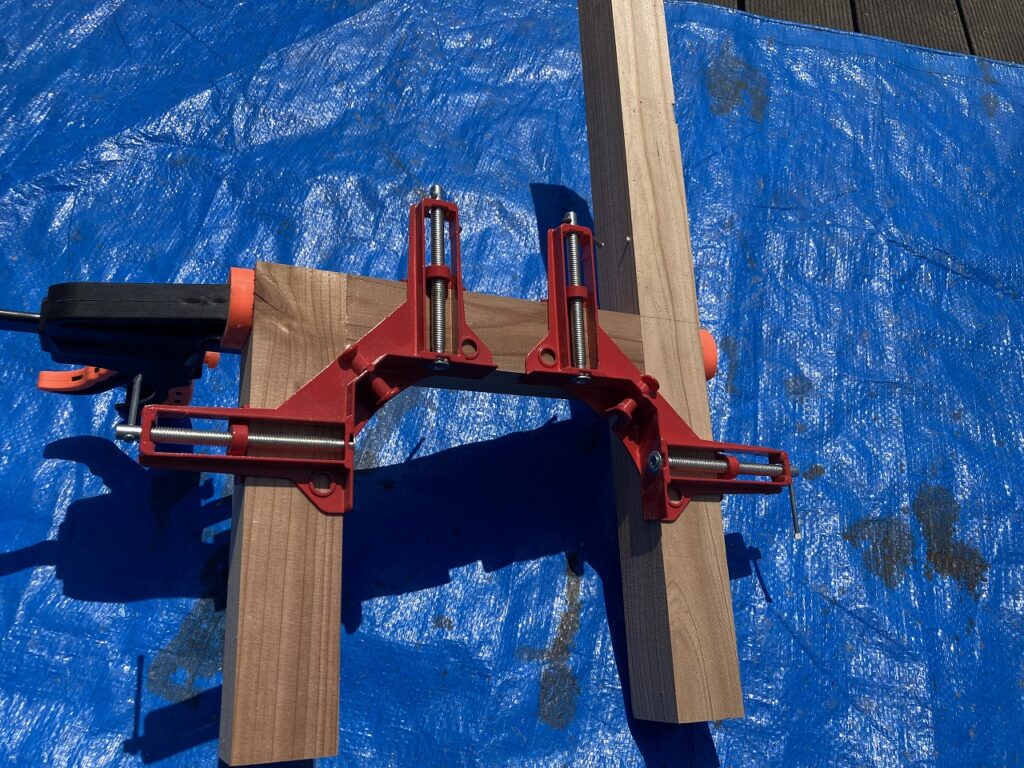
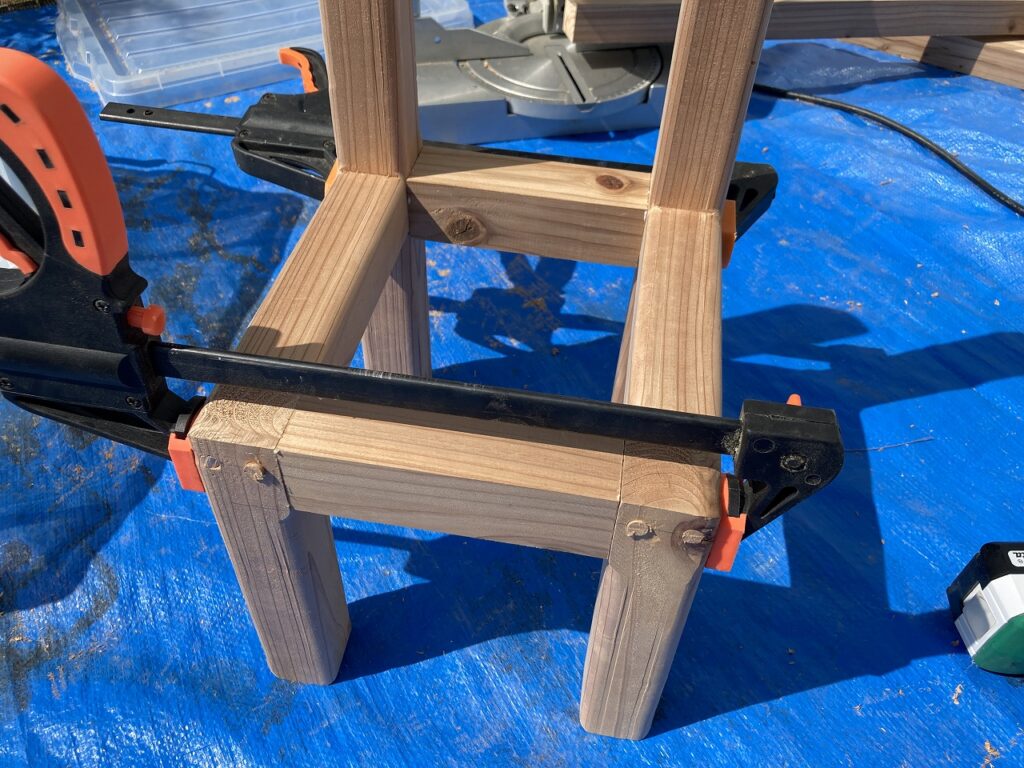
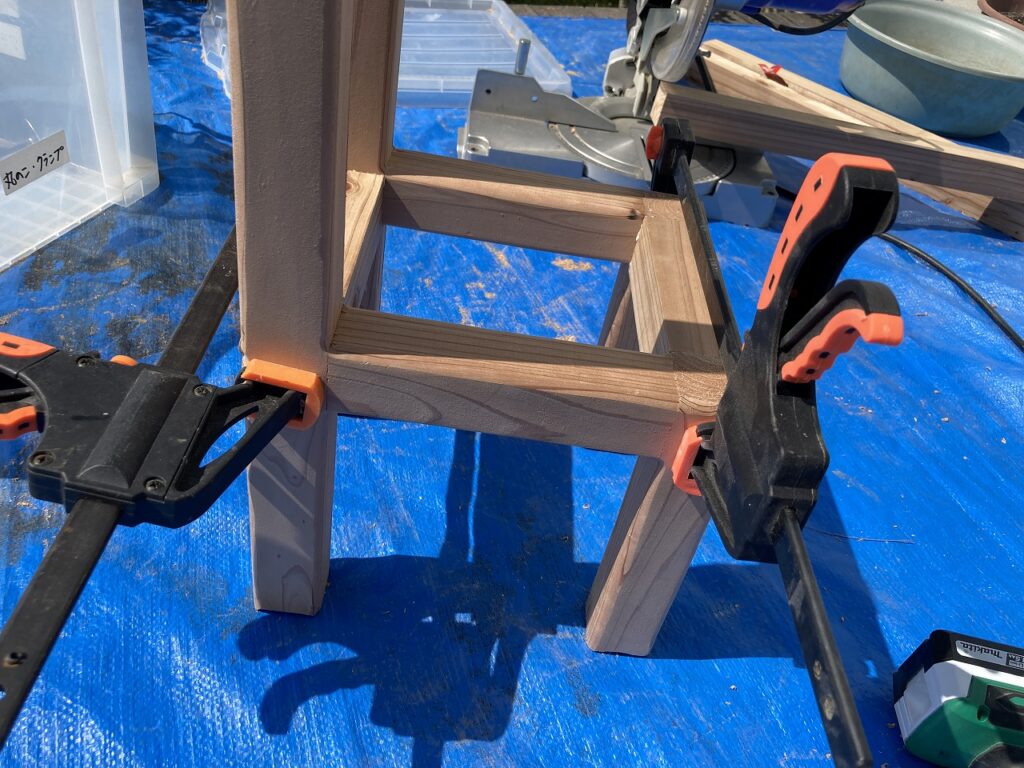
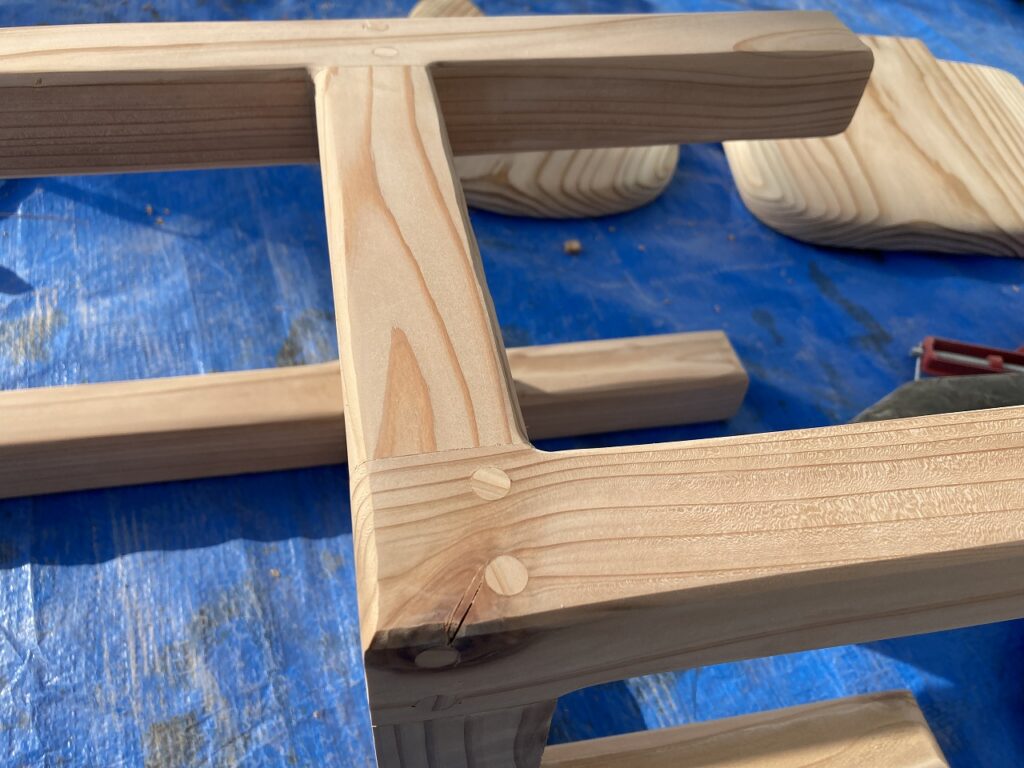
ここまでできたら、枠組みを作ります。いつも通りのかんじで作っていきます。L=52㎝、22㎝、18㎝、15㎝を2本ずつ切り出します。ここの切り出し精度がいすの出来を左右しますので、真っ直ぐ、直角に切ります。
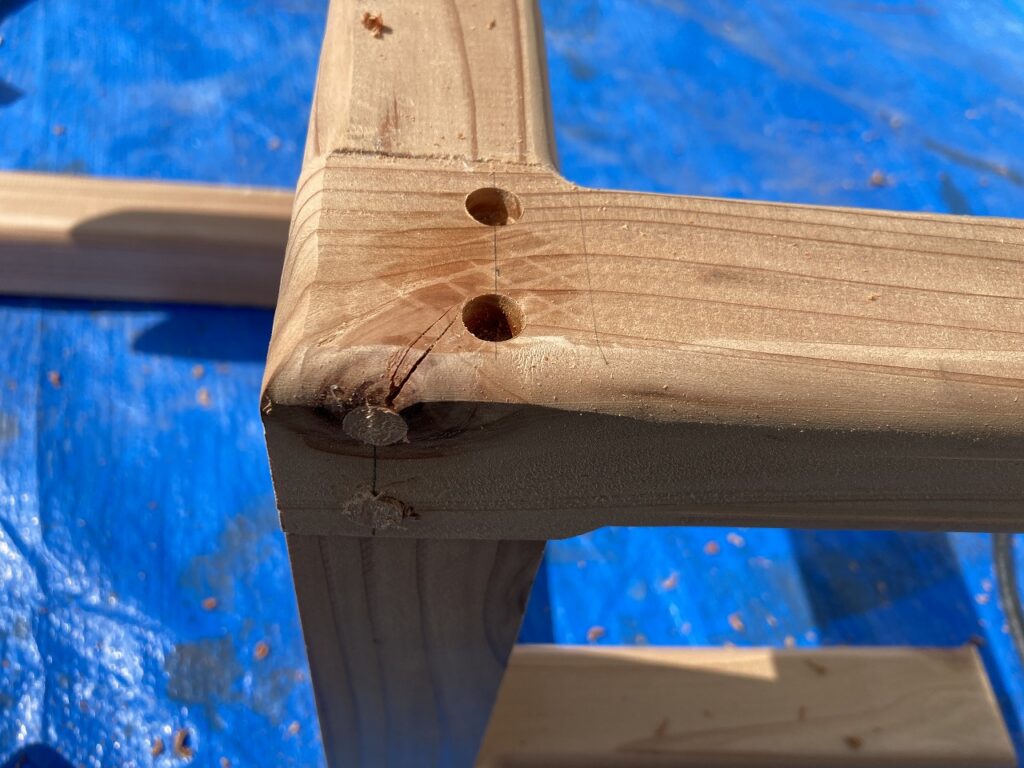
切り出したものは、片側ずつ組み立てます。コーナークランプを使って組み立てます。まずは、木工用ボンドで仮付けしながら、ビス留めしていきます。ビス穴はダボで埋めて隠すようにします。
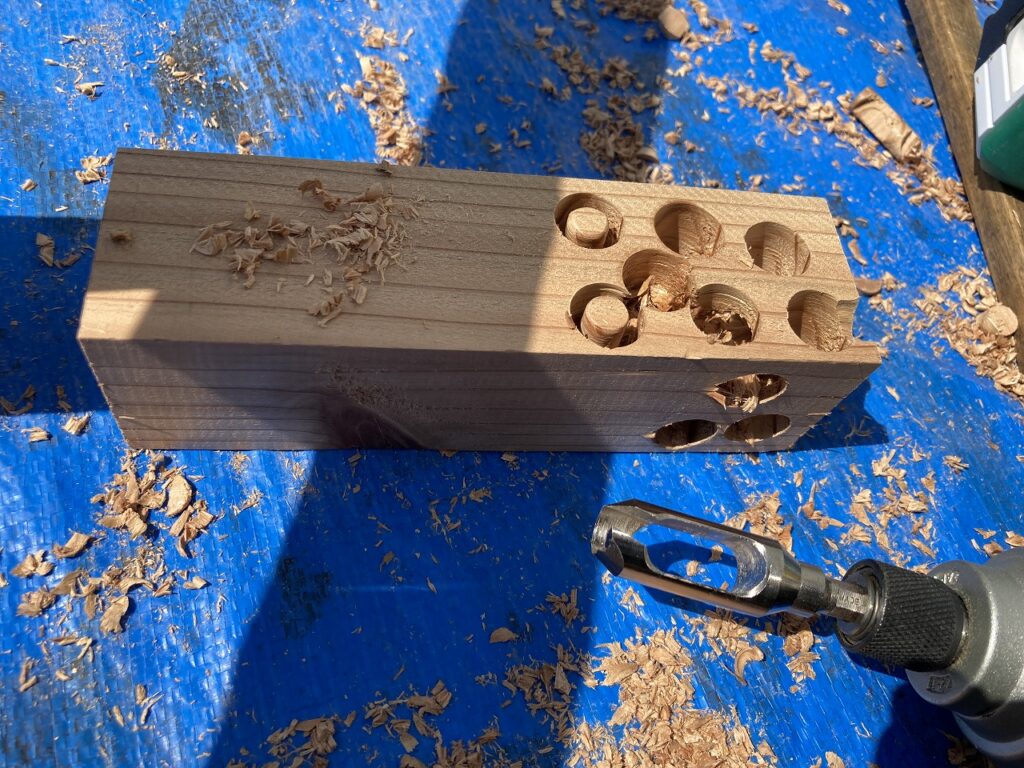
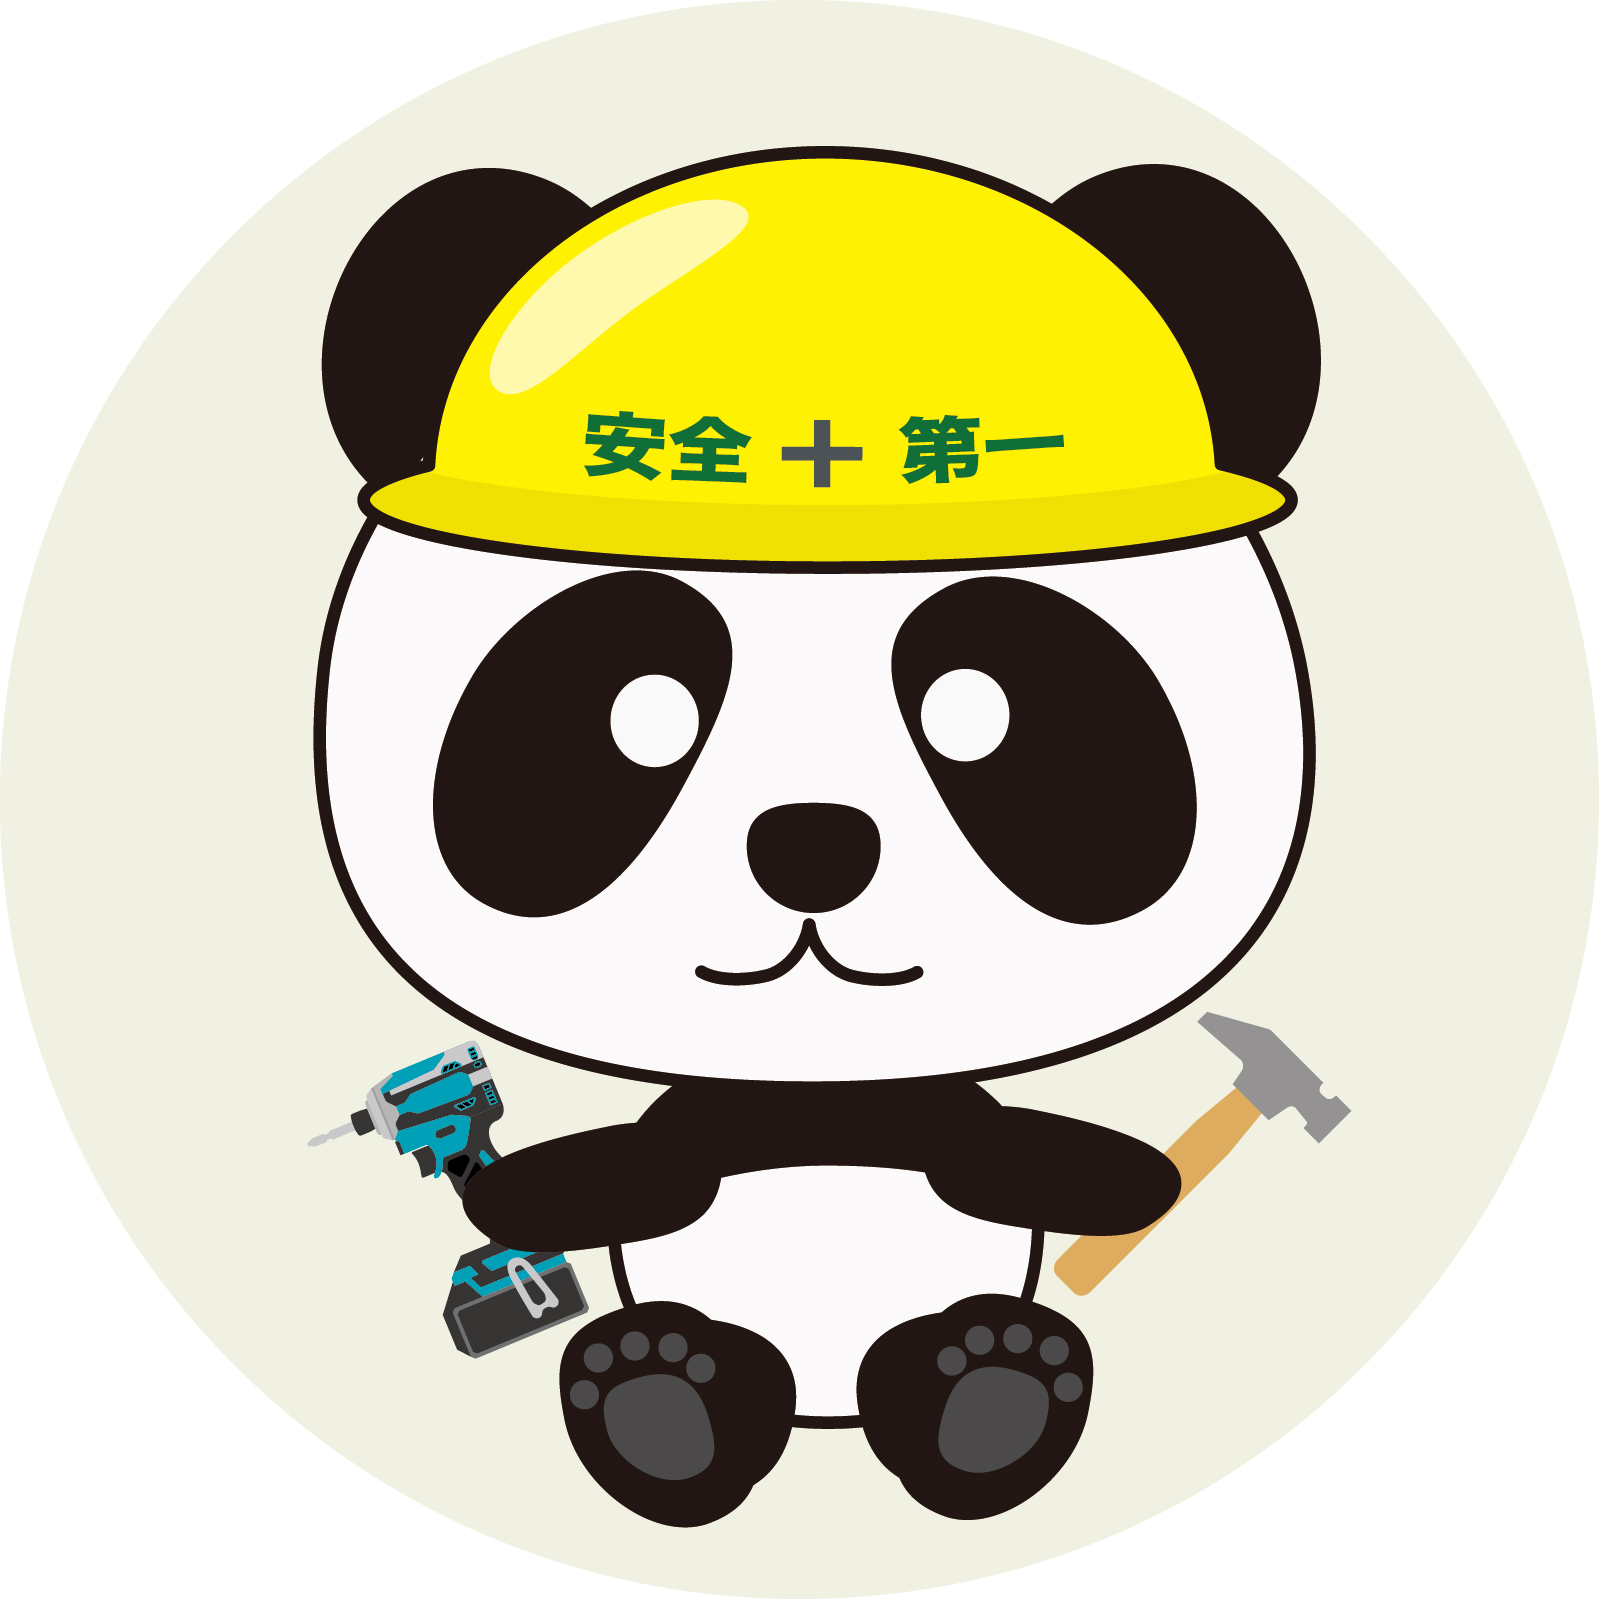
9㎜のダボを同じ杉材から切り抜くようにします。
ここで使った道具は以下のものです。


磨きあげ
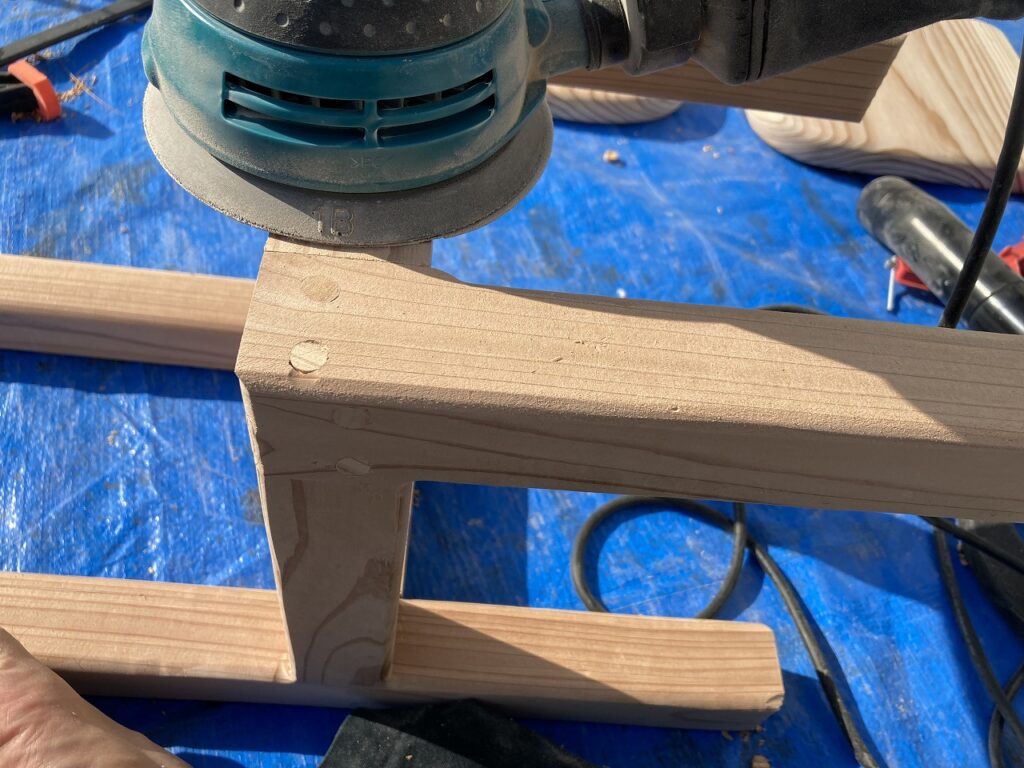
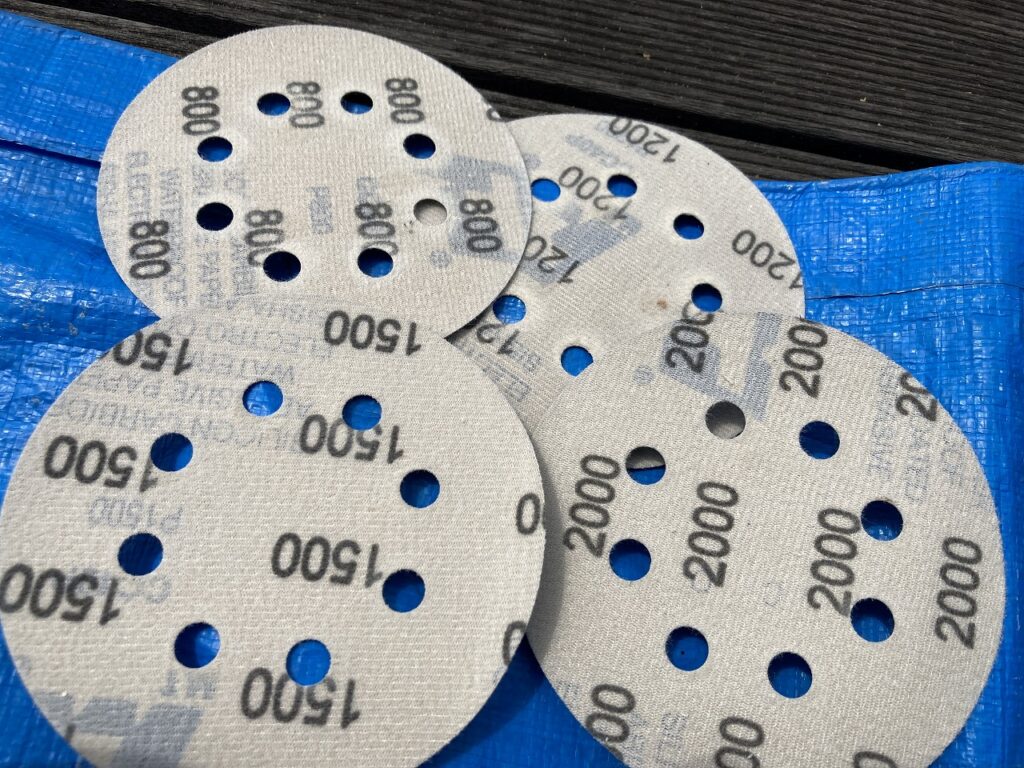
枠組みは大体出来上がったので、背板の製作に戻ります。まずはサンダーで整えます。60番から2000番まで番手を上げて磨きます。

塗装
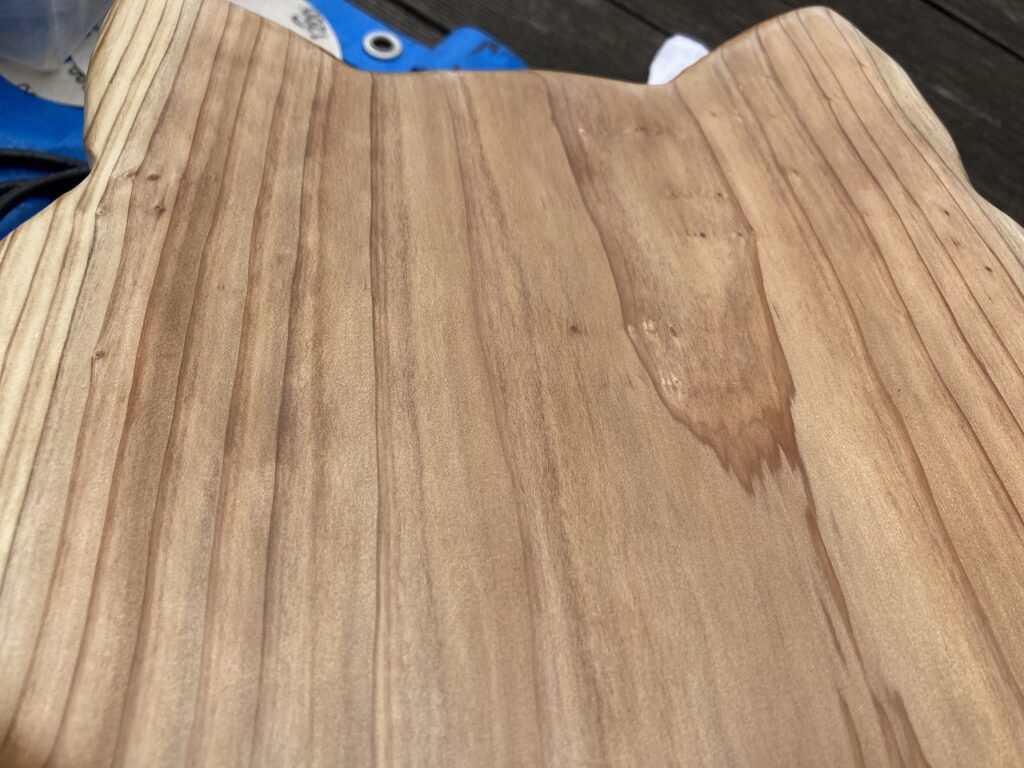
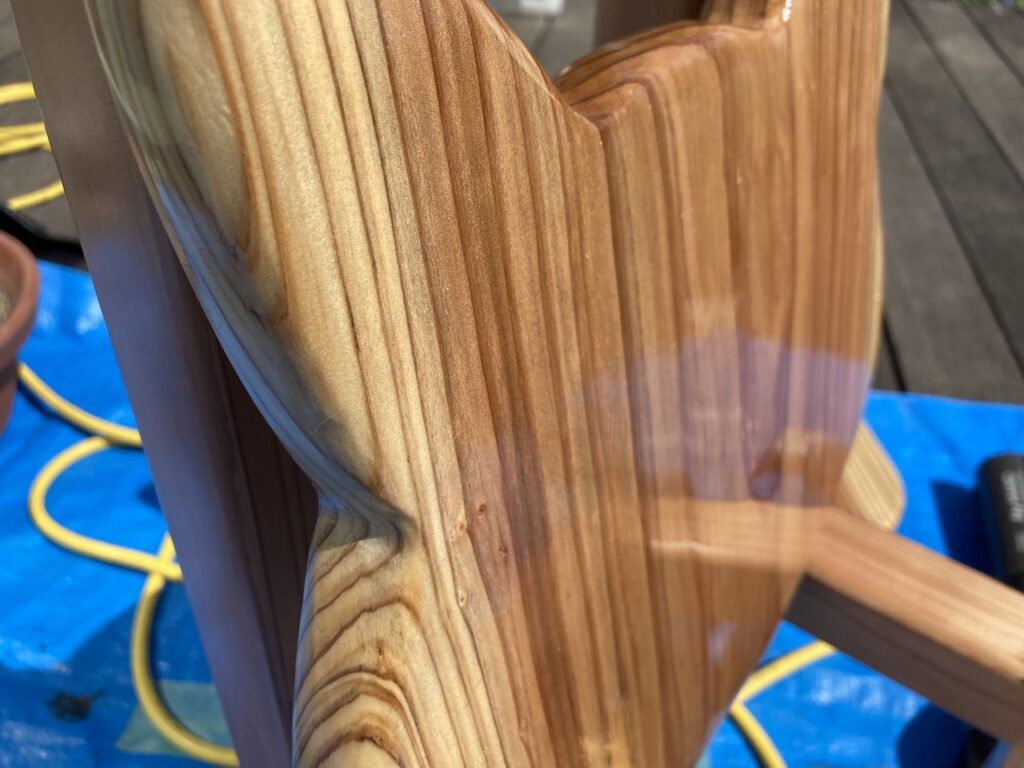
磨き終わったら、今回は塗装をします。杉材は非常に柔らかく、爪でも傷ついてしまします。塗装することで硬い膜の保護層ができる「木固めエース」を使いました。
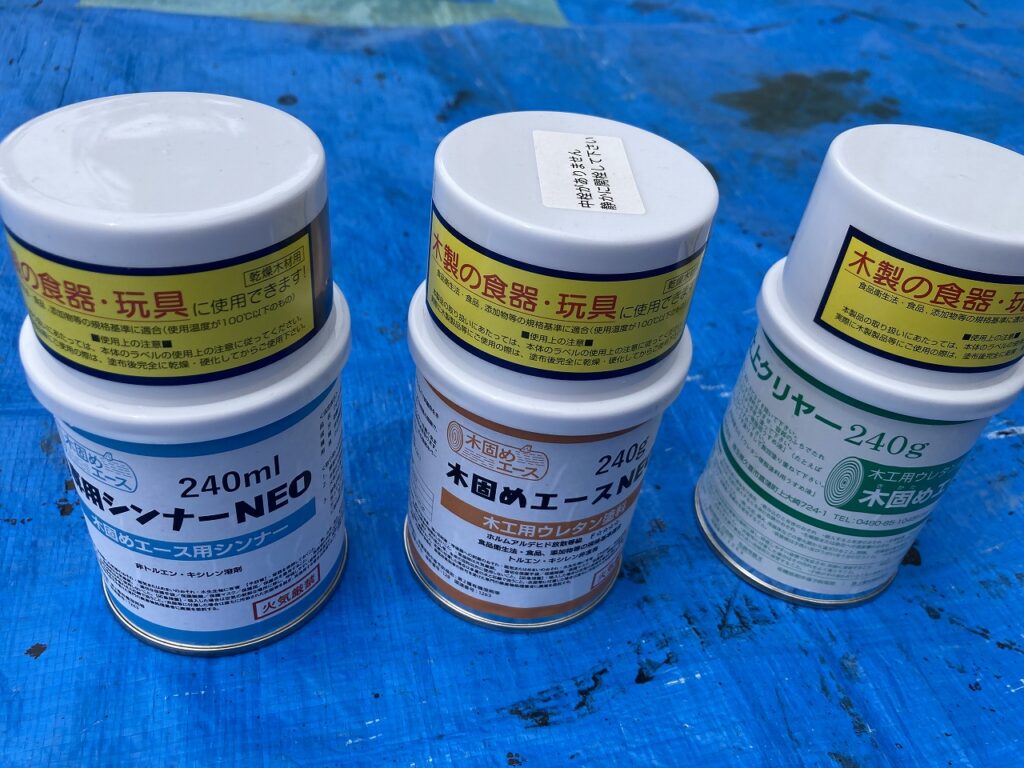
木固めエースは浸透性のポリウレタン系樹脂塗料です。今回購入したのは、木固めエース、仕上げクリヤー、専用シンナーです。東急ハンズで購入しましたが、通販の場合はオンラインショップで購入できます。
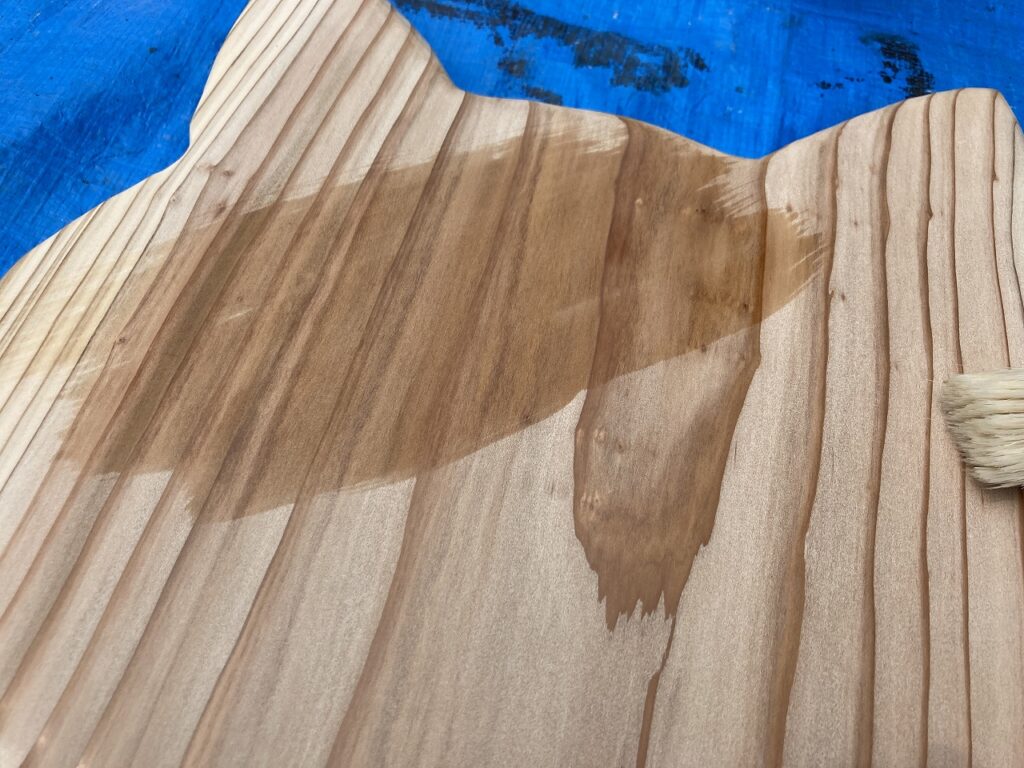
浸透しながら、木目の中に樹脂が入っていく感じです。数回、塗り重ねながら浸透しなくなるまで続けます。その後、16時間以上の乾燥時間を取ってから、磨きます。


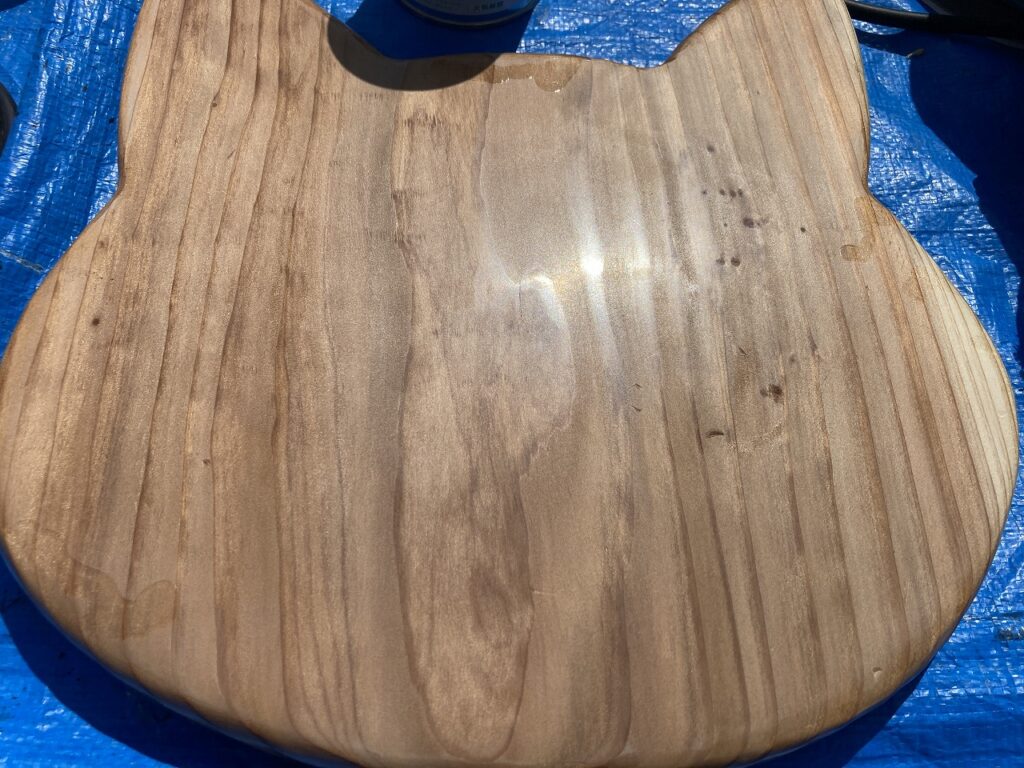
塗っただけではハケの痕が残りますが、サンダーで磨くことできれいになります。塗り方の説明書には、塗った後、シンナーで余分な塗料をふき落とすとありましたので、その作業をしっかりしていれば塗りムラは出なかったかもしれません。


仕上げにクリアーを塗ります。

最後に、ダボを使って背板と座面を組み上げて完成です。
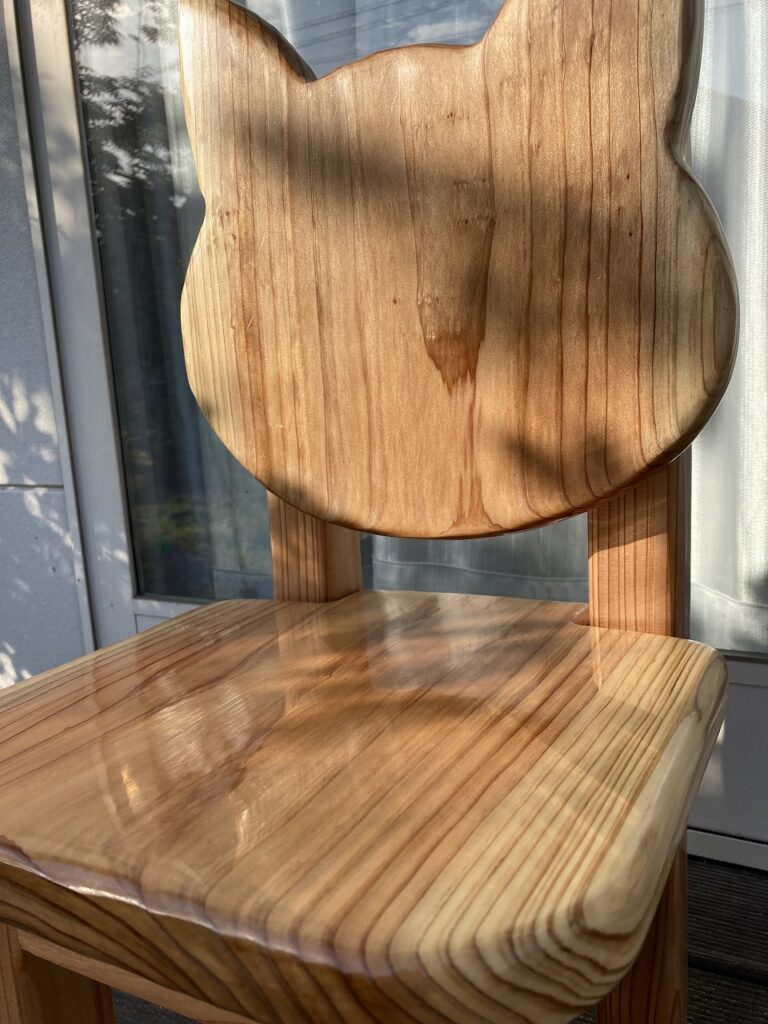
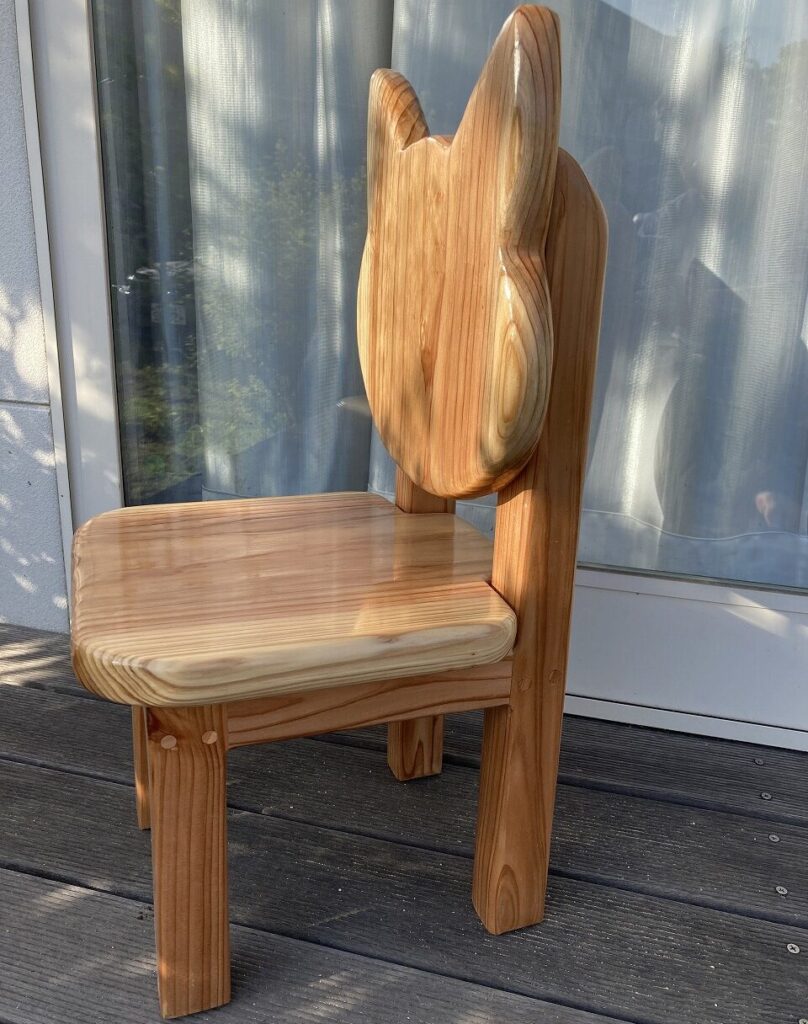
テカリがすごいですね。今回も地道な作業ばっかりで疲れました。でも、完成してみると楽しかったです。
ねこちゃん、かわいいね!
最後まで読んでいただきありがとうございました。
「ネコのいす」のセット「ネコのつくえ」の作り方はこちらです。


コメント